Adding Tracks
Adding audio tracks to your project couldn't be easier: if you have Automatic Track Creation selected in the Audio section of the Settings ![]() , you can create a new audio track every time you press the Record
, you can create a new audio track every time you press the Record ![]() button (as long as no other audio track has been armed beforehand). This allows you to very quickly launch the app and immediately start recording audio. Automatic Track Creation is on by default. Audio tracks can also be added manually as detailed below.
button (as long as no other audio track has been armed beforehand). This allows you to very quickly launch the app and immediately start recording audio. Automatic Track Creation is on by default. Audio tracks can also be added manually as detailed below.
MIDI tracks must be added manually, but the process is very straightforward. Simply press the Add Track ![]() button towards the bottom right of the Arranger Screen to open the following dialog.
button towards the bottom right of the Arranger Screen to open the following dialog.

As can be seen, this allows you to add all forms of MIDI track and also manually add audio tracks to your project. Selecting Add audio track(s) or Add USB MIDI track(s) will then ask you how many of those type of tracks you want to add.
NOTE. Remember, if you create audio tracks in this way, you will need to arm the track first in order to record to it. Information on how to do that can be found here.
If you add an audio track with a USB audio interface connected, the app will display the Track Input dialog where you can determine which input you would like to record from and if you would like to record in mono or stereo. For example, if you have only one guitar connected to a stereo USB audio interface, you need to select Mono 1 (if the guitar is connected to input 1) or Mono 2 (if the guitar is connected to input 2). If you would keep 'Stereo 1-2' as input, the audio would be recorded as stereo, where one side would be silent since nothing was connected and no panning would be possible. If you accidentally run into this situation after recording, you can use the Split into two mono tracks option from the Track pop-up menu. If you asked to add multiple tracks, the Track Input dialog will be displayed several times after another, such that you can quickly set up the inputs of subsequent tracks.
Selecting Add MIDI instrument track or Add drum pattern track will open a virtual Instruments selection dialog from where you can select the instrument you wish to control with that MIDI track (you can always change the instrument used later if you change your mind).
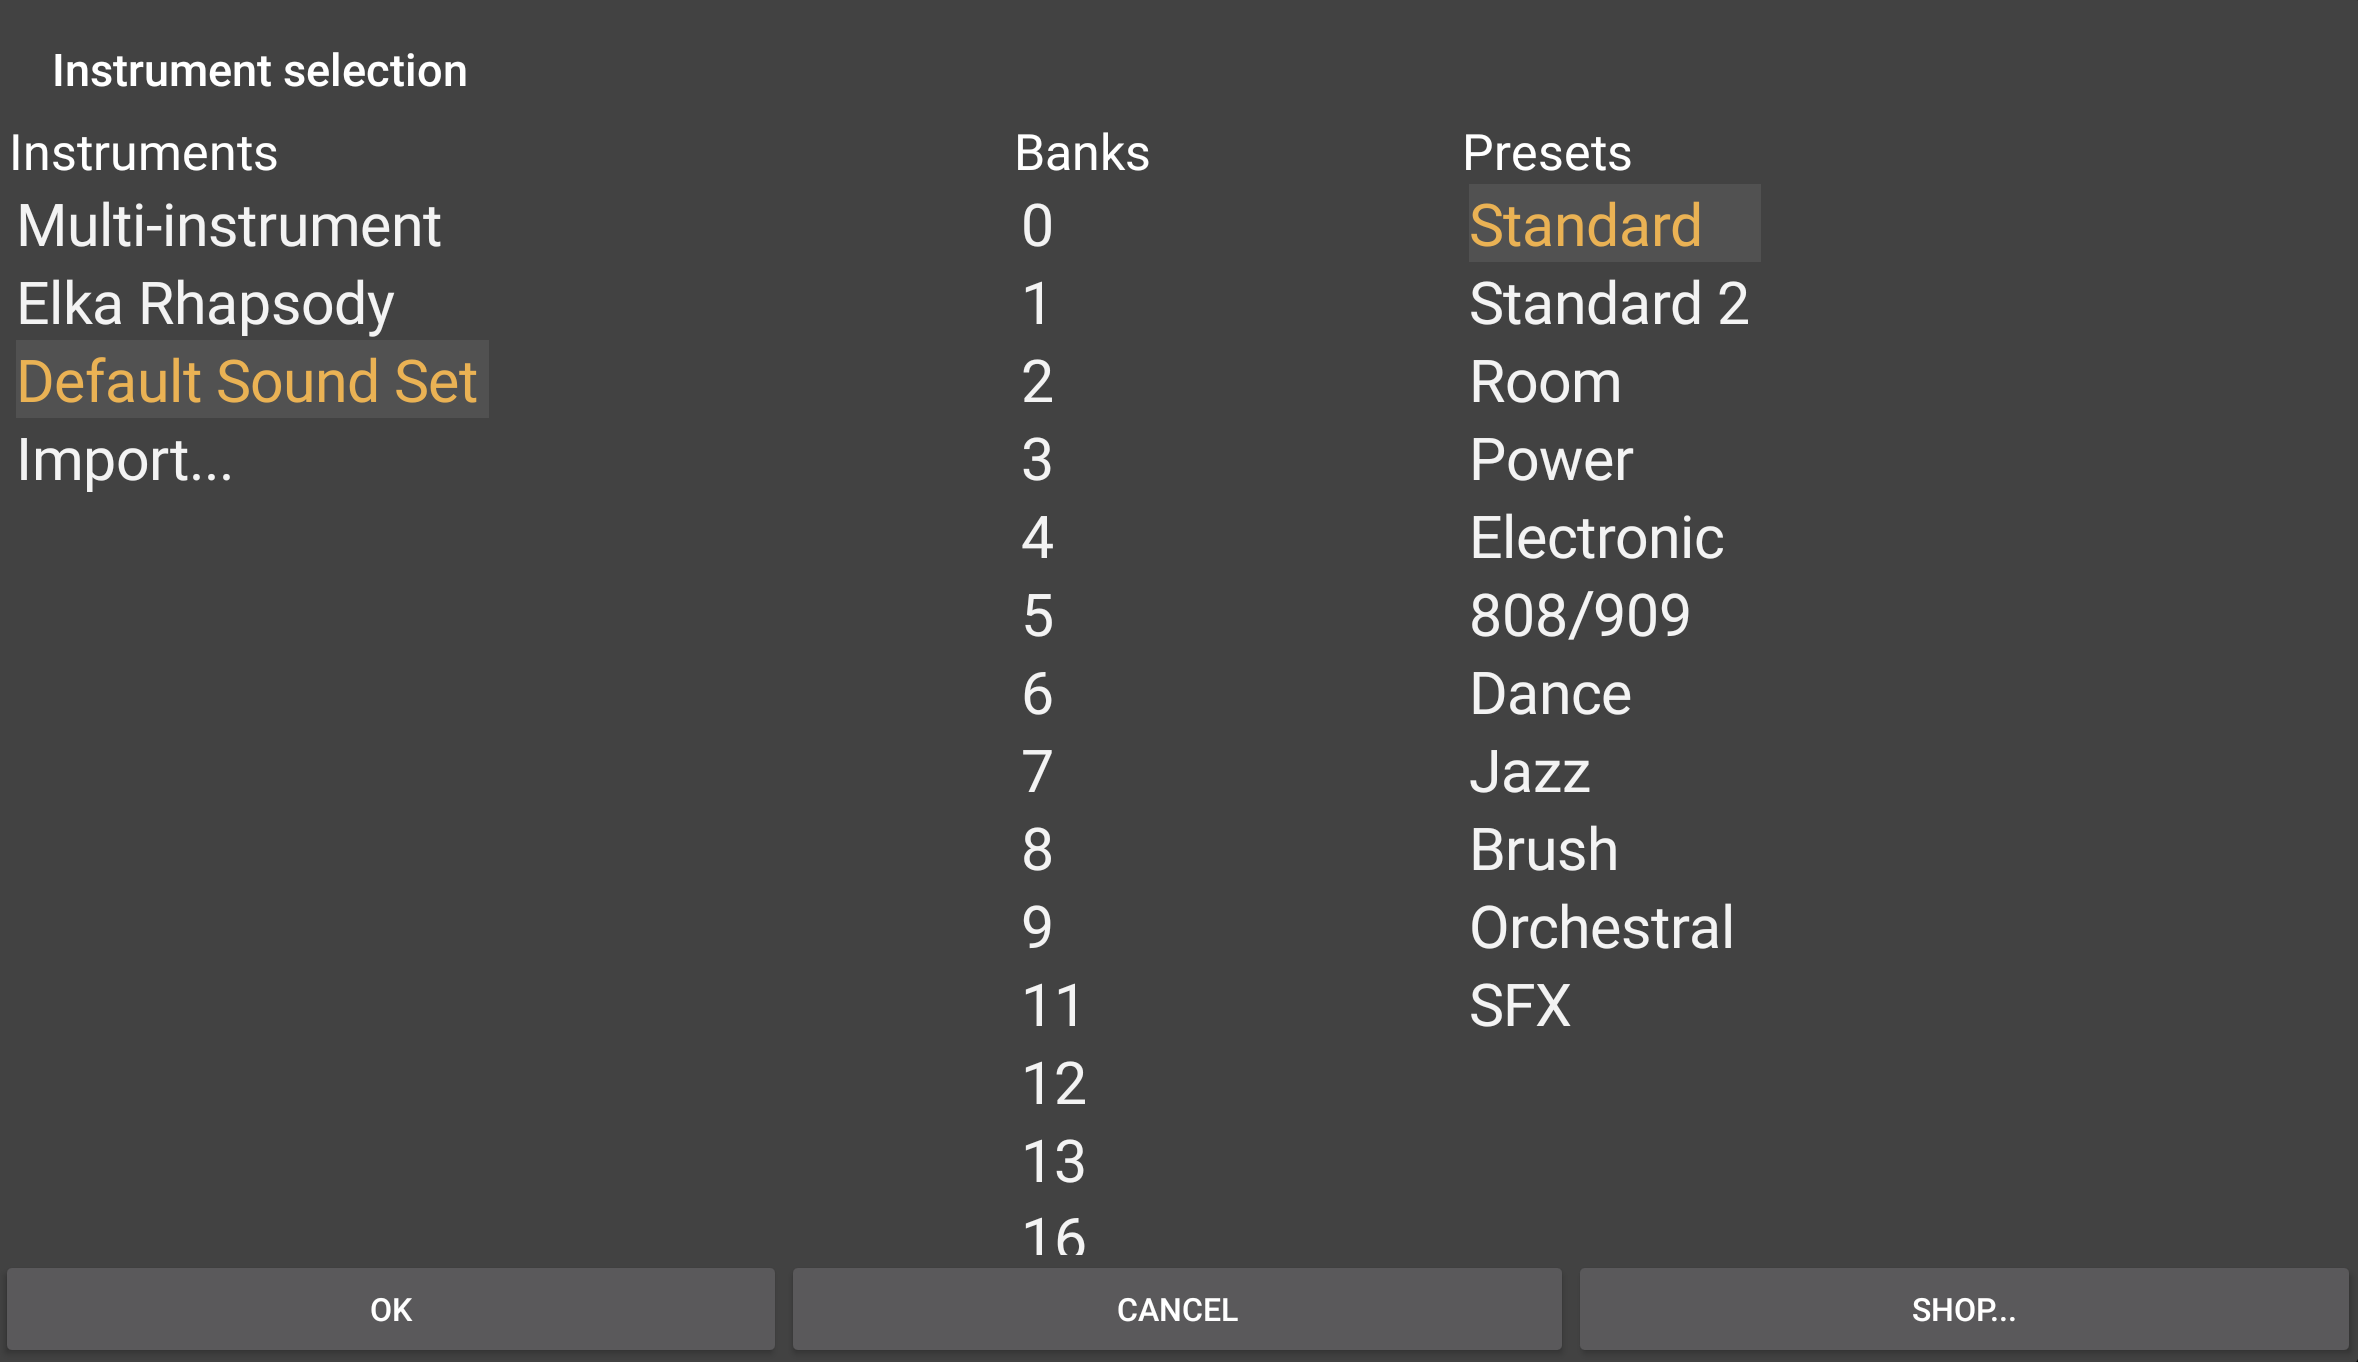
If you select Add MIDI instrument track, the following Instrument Selection dialog will open.

On the left side, the Instruments you have available are listed. The first time you select Add MIDI instrument track to open this dialog, you will be prompted to download the free Default Sound Set (*) soundfont. The Evolution One synthesizer and, if you're using Android 9 and above, Toneboosters Flowtones synthesizer, will also be listed, as will the option to Create your own SFZ instrument. This is also the place where any Digital Sound Factory soundfonts you purchase from the Shop will appear. The soundfont shop can be accessed by pressing the Shop button at the bottom right of the dialog. Shown in the screenshot above is the Digital Sound Factory Elka Rhapsody instrument which is available for free from the shop. Any instruments you create will also be shown in this instrument list as will any soundfonts or SFZ instruments you manually copy into your SoundFonts directory. You can also directly import Soundfonts from elsewhere on your device using the Import... option, though please be aware that this only works with sf2 instruments as they are self-contained files unlike sfz instruments.
As can be seen, soundfonts can sometimes contain different Banks of presets and these can be selected between in the middle.
Finally, on the right, are the individual Presets. These may be completely different instruments, as seen above, or different variations of the same instrument. Evolution One and Flowtones presets are selected from within the synthesizers interfaces and are not shown in this dialog.
Once you have selected your instrument, bank and preset, press OK to confirm, load your selection and take you back to the Arranger Screen from where you can record to, compose on and edit your MIDI track.
If you select Add drum pattern track from the Add Track options, you will see the same dialog but it will, by default, take you to Bank 128 of the Default Sound Set, where the drum presets can be found, as seen below.
The Drum Pattern Sequencer in Audio Evolution Mobile is set up to conform to General MIDI drum mapping (https://www.midi.org/specifications-old/item/gm-level-1-sound-set) - meaning which MIDI note, or keyboard key, each drum type (Kick, Snare, Hat etc.) is assigned to - and requires this mapping for the correct drum types to be assigned to the correct row of the Drum Pattern sequencer. The Default Sound Set is a General MIDI (GM) soundfont, meaning all of its mappings conform to the standard, including its drum presets. All of the Digital Sound Factory drum soundfonts available in the shop also conform to the correct GM MIDI mapping to be used seamlessly within the Drum Pattern sequencer. Any purchased soundfonts will be shown in the Instruments list on the left of the dialog, ready to be selected.
Once you've selected your drum kit preset, press OK to confirm and launch the Drum Pattern sequencer. Alternatively, you can select Multi-instrument which allows you to create your own custom drum kit from different elements. Full information on creating and using multi-instrument drum pattern instruments can be found here.
NOTES. You can, and may wish to, use a drum preset on a MIDI Instrument track rather than a Drum Pattern track. This will allow you to access greater editing tools than are available within the Drum Pattern sequencer but it will also allow you to use the on-screen drum pads (by pressing the Open Virtual Keyboard button or the Arm button on the channel strip) to play the drums and record a live finger-drumming performance. Just remember that each drum type is mapped to a single note on the Piano Roll Editor if you want to edit them.
Drum Pattern tracks can also be converted to MIDI Instrument tracks, and vice versa, after they have been created from within the Track Options. Long press in an empty area of the track, not containing a clip, to open the track options or access them from within the Clip/Track Options by pressing the three dot button on a selected clip on the track.
* The Default Sound Set soundfont used by Audio Evolution Mobile is the GeneralUser GS soundfont and is the work of S. Christian Collins. S. Christian Collins' website can be found here http://schristiancollins.com/index.php , where there is information about virtual instruments, the soundfont and SFZ formats, and additional free soundfont instruments to download, as well as examples of his own music.