The Piano Roll Editor
If you want to manually edit the MIDI information you've recorded using the on-screen keyboard or external MIDI keyboard, or, if you don't play the keyboard and want to compose your music completely manually right from the beginning, the Piano Roll Editor is the place to do it. Piano roll editors can seem quite daunting when you first encounter them, but they're really very easy to use once you understand the concept behind them and get used to composing on them. What's more, if you don't play an instrument, learning to use a piano roll editor will allow you to use, to 'play', every virtual instrument you have available: lack of skill as a performer need not stand in the way of your musical imagination.
It is worth noting that the concept used dates back to at least 1896. Physical piano rolls are long continuous rolls of paper with holes punched in them. The holes represent note and control data. Once loaded into a Player Piano, or Reproducing Piano, the roll moves over the 'tracker bar' which reads/interprets the holes and triggers the notes accordingly. A piano roll editor for MIDI compositions uses the same basic concept.
The Piano Roll Editor represents a piano keyboard vertically, with the lowest notes at the bottom and the highest notes at the top. The horizontal axis represents time. Therefore, you choose your note vertically and define the duration of that note horizontally. During playback, the playback head moves through the score from left to right, triggering the notes accordingly as it does so. There is a great deal more functionality present in Audio Evolution Mobile's piano roll editor, ways of refining the performance of each note, but that is the basic principle.
To open the Piano Roll Editor, first create a MIDI instrument track or plain MIDI track using the Add Track ![]() button on the Arranger Screen. For a MIDI instrument track, choose the virtual instrument you'd like to use from the selection screen shown (by default the Stereo Grand from the Default Sound Set will be chosen on that selection screen).Then, double tap within the created track, which will automatically create a MIDI clip on the track and open the piano roll editor screen seen here.
button on the Arranger Screen. For a MIDI instrument track, choose the virtual instrument you'd like to use from the selection screen shown (by default the Stereo Grand from the Default Sound Set will be chosen on that selection screen).Then, double tap within the created track, which will automatically create a MIDI clip on the track and open the piano roll editor screen seen here.
NOTE. When you double tap on the empty MIDI (Instrument) track to create a clip/open the piano roll editor in Expert mode, the clip will be placed on the empty track at the beginning of the bar you double tapped on. So, if you look at the Timeline/Marker Display ![]() and double click on the MIDI track within the bar 1 area (i.e. before bar 2 starts), the clip will be placed at the beginning of bar 1 (the start of the project) and the piano roll view will also open at the beginning of bar 1. If, though, you double tapped in the area defining bar 4 on the track (between 4 and 5 on the Timeline/Marker Display), the clip would be placed at the beginning of bar 4 and the piano roll would open at the beginning of that clip. The same system is used when any additional new clip is created by double tapping in an empty area of the track.
and double click on the MIDI track within the bar 1 area (i.e. before bar 2 starts), the clip will be placed at the beginning of bar 1 (the start of the project) and the piano roll view will also open at the beginning of bar 1. If, though, you double tapped in the area defining bar 4 on the track (between 4 and 5 on the Timeline/Marker Display), the clip would be placed at the beginning of bar 4 and the piano roll would open at the beginning of that clip. The same system is used when any additional new clip is created by double tapping in an empty area of the track.
Once clips exist on your MIDI track, to open them in the piano roll editor for editing, you double tap on them again. This time though, the initial piano roll viewpoint will be exactly the point on the timeline at which you double tapped the clip - it won't jump to the beginning of that bar. As such, you will need to scroll through the piano roll display to see the MIDI events occurring before and after the point at which you double tapped.
NOTE. The above instructions refer to the Expert Mode Arranger Screen set up. To create a MIDI clip when using the Beginner Mode Arranger Screen, you need to be in Edit ![]() mode. When in this mode, tap once in any empty area of the MIDI track's timeline. The clip will be placed at the beginning of the bar you tapped closest to. Once created, double tap a clip, in either Edit or Scroll
mode. When in this mode, tap once in any empty area of the MIDI track's timeline. The clip will be placed at the beginning of the bar you tapped closest to. Once created, double tap a clip, in either Edit or Scroll ![]() modes to open the clip in the Piano Roll Editor.
modes to open the clip in the Piano Roll Editor.

NOTE. If your device screen is too small to display all of the buttons shown here at the same time, the More ![]() button will allow you to access the functions you're missing.
button will allow you to access the functions you're missing.
1 The Project ![]() button allows you to Save project and Save project as, as well as access the project sample rate setting (if it has not already been 'locked in place' by the presence of audio in the project), directly from the piano roll editor screen.
button allows you to Save project and Save project as, as well as access the project sample rate setting (if it has not already been 'locked in place' by the presence of audio in the project), directly from the piano roll editor screen.
2 The Scroll mode ![]() button disables both the draw and edit modes and so allows you to swipe through your MIDI composition on the piano roll without having to worry that you'll accidentally add unwanted notes or change and delete things you do want. Activating the Scroll mode also gives you access to some of the controls, seen below, from the track's Channel Strip.
button disables both the draw and edit modes and so allows you to swipe through your MIDI composition on the piano roll without having to worry that you'll accidentally add unwanted notes or change and delete things you do want. Activating the Scroll mode also gives you access to some of the controls, seen below, from the track's Channel Strip.

As can be seen, this allows you to alter the track volume and pan, arm and disarm the track, mute and solo the track, change the virtual instrument used by the track and open the onscreen piano keyboard screen (once on the onscreen keyboard screen, press the Arm button (shown active and lit up red above) to disarm the track to return to the piano editor).
3 The Draw mode ![]() button (shown here in its 'lit up' active state) allows you to add new MIDI events to the piano roll grid. The type of events you add (be they notes, pitch bends, velocity levels etc.) will be determined by using the Event Type Selector
button (shown here in its 'lit up' active state) allows you to add new MIDI events to the piano roll grid. The type of events you add (be they notes, pitch bends, velocity levels etc.) will be determined by using the Event Type Selector ![]() button. In this mode, you can also tap, hold and slide on events to move them (this works for most MIDI event types including Notes). When in the Note event type, tap, hold and slide on the end of note events to adjust the note's length. Such movements will be affected by the piano roll Grid snap-to setting; turn it off by selecting OFF to move and resize freely without any snapping-to. The Piano roll editor event selection time can be user defined in the User interface section of the Settings
button. In this mode, you can also tap, hold and slide on events to move them (this works for most MIDI event types including Notes). When in the Note event type, tap, hold and slide on the end of note events to adjust the note's length. Such movements will be affected by the piano roll Grid snap-to setting; turn it off by selecting OFF to move and resize freely without any snapping-to. The Piano roll editor event selection time can be user defined in the User interface section of the Settings ![]() if the notes/events aren't responding to your touch as quickly as you'd like. For more information on using the piano roll editor, please see the Event Type Selector definitions here.
if the notes/events aren't responding to your touch as quickly as you'd like. For more information on using the piano roll editor, please see the Event Type Selector definitions here.
4 The Edit mode ![]() button allows you to edit MIDI events already present without adding any new events. Again, use the Event Type Selector button to access the different types of MIDI events to be edited. Tap, hold and slide on events to move them (this can also be done in Draw mode depending on the event type is selected in the Event Type Selector). Tap, hold and slide on the end of note events to adjust the note's length (this can also be done in Draw mode when Note is selected in the Event Type Selector). Note event lengths can also be adjusted using the handles shown in the Timeline/Marker Display area when a note is first placed or is selected by long pressing on it (it is also possible to use this method to alter the length of multiple notes once they've been selected with the rectangular marquee tool). Tap, hold and slide on one of the handles to alter the length of the note from the end or, unlike the previous method, the beginning. Such movements will be affected by the piano roll Grid snap-to setting; turn it off by selecting OFF to move freely without any snapping-to.
button allows you to edit MIDI events already present without adding any new events. Again, use the Event Type Selector button to access the different types of MIDI events to be edited. Tap, hold and slide on events to move them (this can also be done in Draw mode depending on the event type is selected in the Event Type Selector). Tap, hold and slide on the end of note events to adjust the note's length (this can also be done in Draw mode when Note is selected in the Event Type Selector). Note event lengths can also be adjusted using the handles shown in the Timeline/Marker Display area when a note is first placed or is selected by long pressing on it (it is also possible to use this method to alter the length of multiple notes once they've been selected with the rectangular marquee tool). Tap, hold and slide on one of the handles to alter the length of the note from the end or, unlike the previous method, the beginning. Such movements will be affected by the piano roll Grid snap-to setting; turn it off by selecting OFF to move freely without any snapping-to.
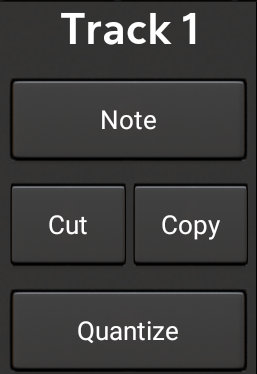
Long press on an event to select it. Alternatively, long press in an empty area of the piano roll grid to activate the rectangular marquee tool, allowing you to select one or more events. Once an event or events are selected, you will be able to Cut (remove and copy to clipboard), Copy (copy to clipboard) or Quantize (snap to exact musical increments of the tempo) the events selected using the buttons on the left of the interface when Edit mode is active (seen below). When Quantize is selected a further dialog will open allowing you to tailor the quantization to your requirements as described here.
5 The Remove mode ![]() button allows you to completely remove the currently displayed type of MIDI event (except for velocity levels) from the piano roll grid by tapping on or swiping over the events with your finger as if it were an eraser.
button allows you to completely remove the currently displayed type of MIDI event (except for velocity levels) from the piano roll grid by tapping on or swiping over the events with your finger as if it were an eraser.
6 The Undo ![]() button undoes the last edit made on the clips and tracks within the piano roll should you make a mistake. The undo stack is unlimited, so you can undo all the way back to when you started editing. The Undo list is emptied when the app is closed and will therefore be empty when the app is next launched. The piano roll editor will close when the event you are undoing is the event that created the MIDI clip.
button undoes the last edit made on the clips and tracks within the piano roll should you make a mistake. The undo stack is unlimited, so you can undo all the way back to when you started editing. The Undo list is emptied when the app is closed and will therefore be empty when the app is next launched. The piano roll editor will close when the event you are undoing is the event that created the MIDI clip.
7 The Redo ![]() button re-applies the last edit undone using the Undo button as long as no further edits have taken place since using the Undo function.
button re-applies the last edit undone using the Undo button as long as no further edits have taken place since using the Undo function.
8 The Paste ![]() button allows you to paste any MIDI notes (including their velocity levels) you have copied to the clipboard. The copied content is pasted from the position of the Time Marker
button allows you to paste any MIDI notes (including their velocity levels) you have copied to the clipboard. The copied content is pasted from the position of the Time Marker ![]() in the timeline. Position the time marker by tapping once on the Timeline/Marker Display; by touching, holding and sliding the time marker or by sliding your finger in the MIDI Clip Overview/Scrollpad. You can also use the Jump to button. Be aware of the the piano roll Grid size setting and that the Time Marker will snap-to the musical increment selected as it is moved; select OFF in the grid size settings to move the markers completely freely. When in Edit mode, you can also paste by long pressing at the point in the piano roll grid where you would like the paste operation to happen. This will bring up a dialog asking whether you want to Paste or Clear clipboard. If you choose 'Clear clipboard' you will then be able to use the long press to activate the rectangular marquee tool, allowing you to select a group of notes on the grid which you can then copy to the clipboard.
in the timeline. Position the time marker by tapping once on the Timeline/Marker Display; by touching, holding and sliding the time marker or by sliding your finger in the MIDI Clip Overview/Scrollpad. You can also use the Jump to button. Be aware of the the piano roll Grid size setting and that the Time Marker will snap-to the musical increment selected as it is moved; select OFF in the grid size settings to move the markers completely freely. When in Edit mode, you can also paste by long pressing at the point in the piano roll grid where you would like the paste operation to happen. This will bring up a dialog asking whether you want to Paste or Clear clipboard. If you choose 'Clear clipboard' you will then be able to use the long press to activate the rectangular marquee tool, allowing you to select a group of notes on the grid which you can then copy to the clipboard.
9 The Grid ![]() button opens the Grid size options, seen below, for snapping-to on the piano roll editor.
button opens the Grid size options, seen below, for snapping-to on the piano roll editor.

This allows you to choose the musical increment that the placement and movement of MIDI events on the piano roll will snap-to. It does not affect the display of the piano roll, whose visible grid is always displayed dynamically according to the level of zoom. As can be seen, it can be turned OFF which will allow placement and movement of events completely freely on the piano roll. Next is the DYN, dynamic option. This will have the events snap-to the smallest increment currently displayed visually according to the zoom level on the piano roll. The rest of the options are increments of the current tempo from one BAR to 1/32T (1/32 triplet beat).
10 The Loop ![]() button displays the loop markers
button displays the loop markers ![]() and engages looped playback mode. The loop markers can be moved by touching, holding and sliding them to the desired time point. Be aware of the the piano roll Grid size setting and that the markers will snap-to the musical increment selected as they are moved; select OFF in the grid size settings to move the markers completely freely. Press the Loop button again to turn loop mode off.
and engages looped playback mode. The loop markers can be moved by touching, holding and sliding them to the desired time point. Be aware of the the piano roll Grid size setting and that the markers will snap-to the musical increment selected as they are moved; select OFF in the grid size settings to move the markers completely freely. Press the Loop button again to turn loop mode off.
11 The Jump ![]() button displays the Jump-to options. These allow you to quickly and easily jump the Time Marker
button displays the Jump-to options. These allow you to quickly and easily jump the Time Marker ![]() and your viewpoint to one of the options available, just as when on the Arranger Screen. For full details, please see here.
and your viewpoint to one of the options available, just as when on the Arranger Screen. For full details, please see here.
12 The Marker ![]() button allows you to place a blue marker
button allows you to place a blue marker ![]() in the Timeline/Marker display at the current position of the Time Marker. Position the time marker by tapping once on the Timeline/Marker Display; by touching, holding and sliding the time marker or by sliding your finger in the MIDI Clip Overview/Scrollpad. You can also use the Jump to button. Be aware of the the piano roll Grid size setting and that the Time Marker will snap-to the musical increment selected as it is moved; select OFF in the grid size settings to move the Time Marker completely freely. You will offered the chance the name your marker as you create it. Once created, you can reposition the marker by touching, holding and sliding the marker's blue handle/name display. For full details, please see here and here.
in the Timeline/Marker display at the current position of the Time Marker. Position the time marker by tapping once on the Timeline/Marker Display; by touching, holding and sliding the time marker or by sliding your finger in the MIDI Clip Overview/Scrollpad. You can also use the Jump to button. Be aware of the the piano roll Grid size setting and that the Time Marker will snap-to the musical increment selected as it is moved; select OFF in the grid size settings to move the Time Marker completely freely. You will offered the chance the name your marker as you create it. Once created, you can reposition the marker by touching, holding and sliding the marker's blue handle/name display. For full details, please see here and here.
13 The Next ![]() button takes you back to the Arranger Screen. From there, repeated presses will cycle through the Mixer screen, the Master Screen and back to the Arranger Screen again. In order to open the Piano Roll Editor again, double tap on a MIDI clip on a MIDI (Instrument) track.
button takes you back to the Arranger Screen. From there, repeated presses will cycle through the Mixer screen, the Master Screen and back to the Arranger Screen again. In order to open the Piano Roll Editor again, double tap on a MIDI clip on a MIDI (Instrument) track.
14 The track name ![]() is displayed here.
is displayed here.
15 The Event Type Selector ![]() button allows you to select the specific type of MIDI event you are Drawing or Editing. This is where you access the options that allow you to refine the performance of the MIDI notes. Pressing the Event Type Selector button opens this dialog.
button allows you to select the specific type of MIDI event you are Drawing or Editing. This is where you access the options that allow you to refine the performance of the MIDI notes. Pressing the Event Type Selector button opens this dialog.
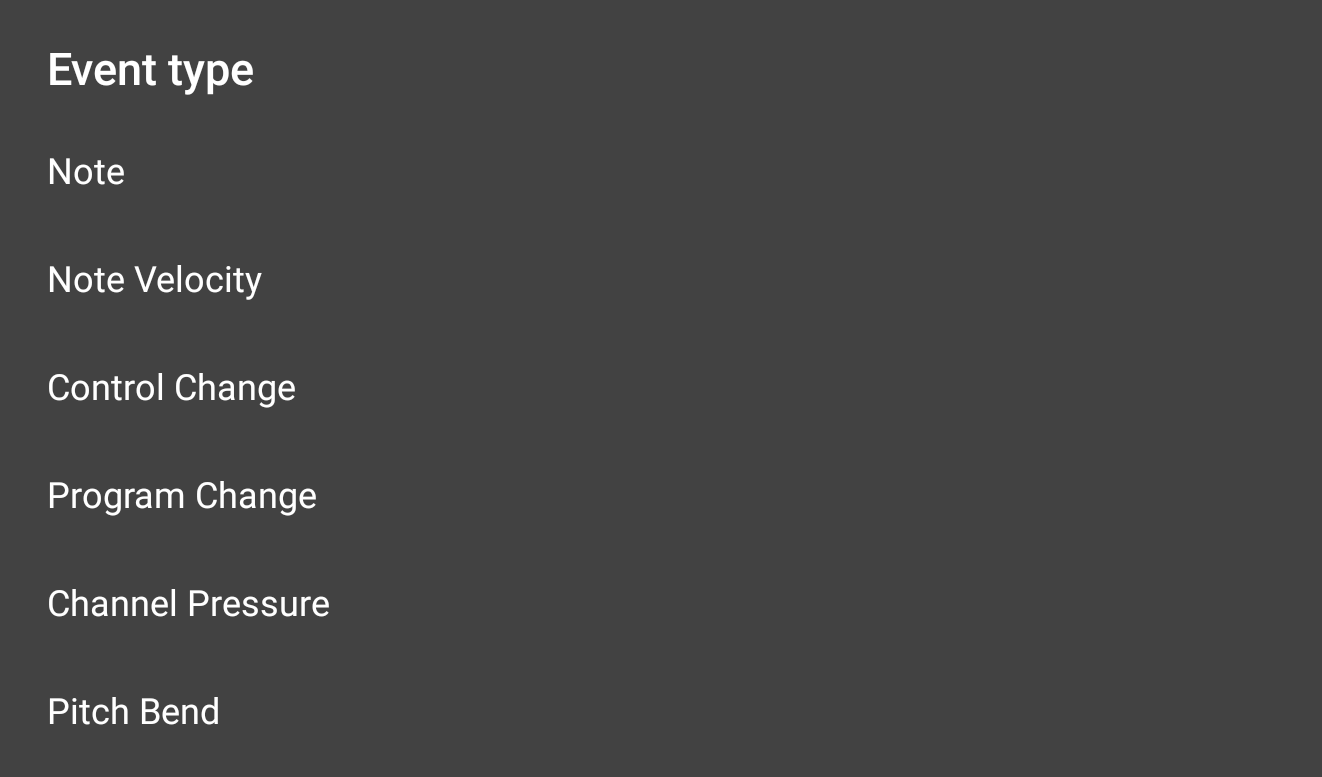
As you can see there are six options available, one of which, Control Change, opens further options.
- Note. This is the default event which allows you place and edit MIDI note events on the piano roll. This is what you'll use to compose your music. Notes are represented by rectangular blocks on the piano roll as can be seen below. Their placement vertically defines the pitch of the note. On the left of the piano roll is a virtual keyboard indicating the pitch. Each new octave is indicated on the keyboard: C5 is labeled in the image below. This virtual keyboard can be played by touching it if you want to hear the notes.
Tap on the piano roll to place a note.Tapping and holding will allow you to create a note and slide it to the desired pitch and location. Long pressing and holding on a note after it's been created will also allow you to move it (and will select it, see below). Be aware that the notes will be placed in accordance with the piano roll Grid snap-to settings - turn it off if you want to place notes without any snapping-to. The same will apply to any note edits which move or resize the note length.
The duration of the note is indicated by its horizontal length on the piano roll. Different note lengths can be selected for placement on the left of the interface using the Note Length Selector. Note lengths can be changed manually (in both Draw and Edit modes) by long pressing, holding and sliding on its end point (right hand edge). Note event lengths can also be adjusted using the white handles shown in the Timeline/Marker Display area when a note is first placed or is selected by long pressing on it (it is also possible to use this method to alter the length of multiple notes once they've been selected with the rectangular marquee tool). Tap, hold and slide on one of the handles to alter the length of the note from the end or, unlike the previous method, the beginning. Again, this will happen in accordance with the piano roll Grid snap-to settings.
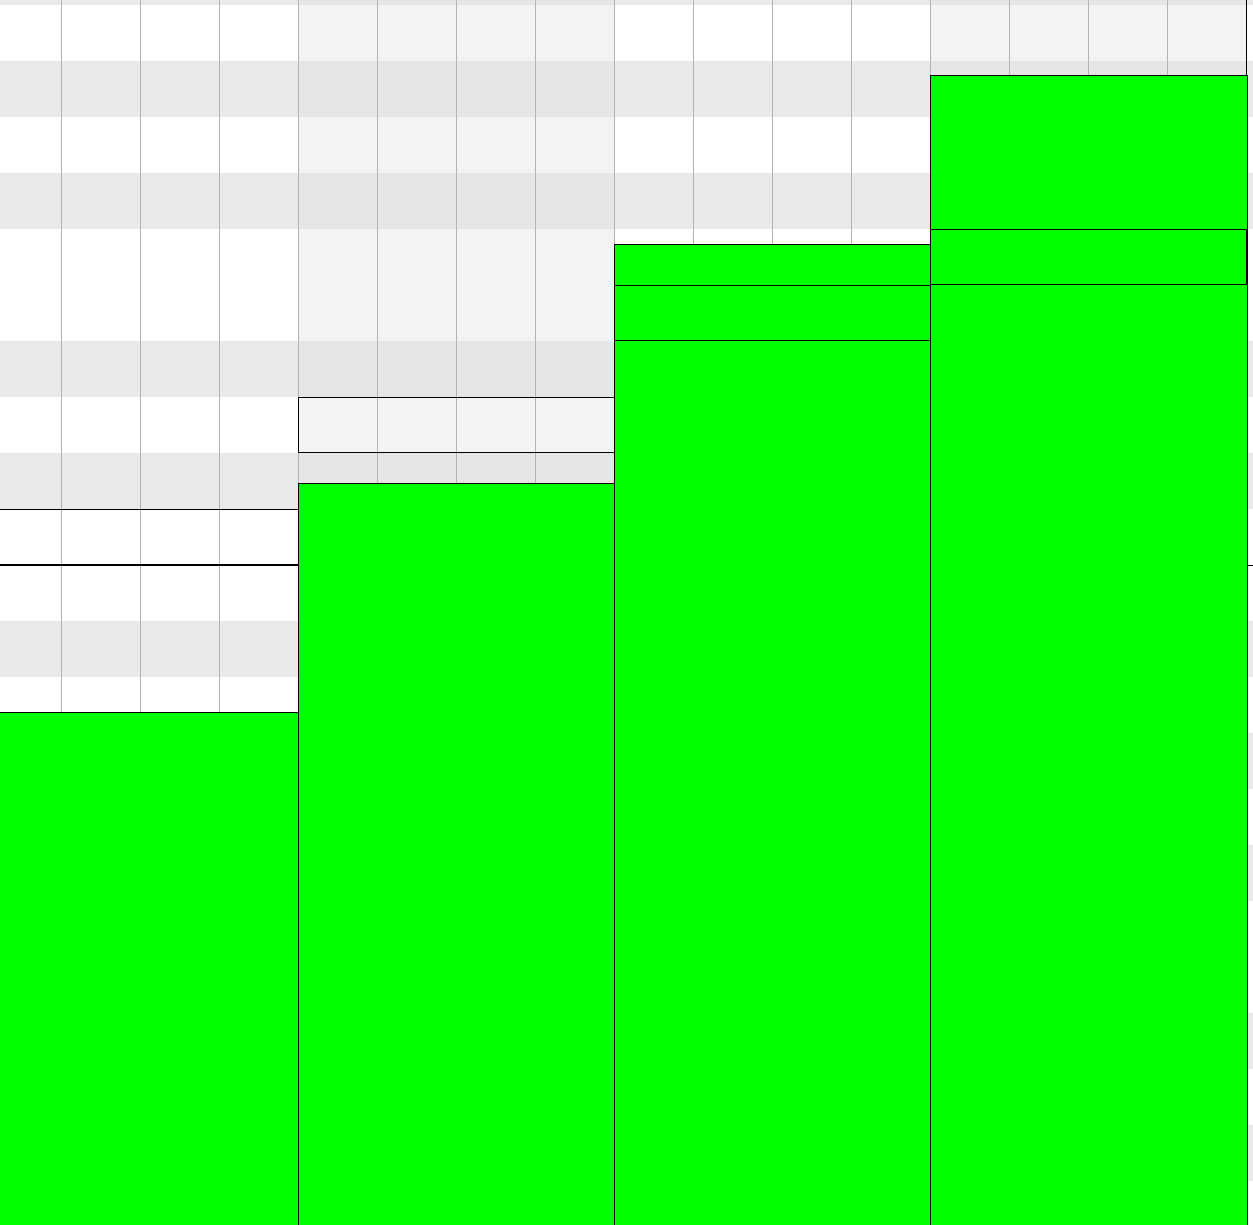
As can be seen in the screenshot below, the velocity level of each note on the piano roll is indicated by a horizontal black line within the note itself. The greater the note's velocity, the longer the line, relative to the note's length, running from left to right until it it fills the full width of the note at maximum velocity (127). In this example below, the velocity of each note is higher than the previous one. For more information on velocity and how to edit it, please see below, here.

The Piano roll editor event selection time can be user defined in the User interface section of the Settings ![]() if the notes/events aren't responding to your touch as quickly as you'd like. This setting also defines how notes respond to your touch after you've placed them.
if the notes/events aren't responding to your touch as quickly as you'd like. This setting also defines how notes respond to your touch after you've placed them.
- Tapping on a non-selected note within the time specified in the preference option 'Piano roll editor event selection time' will delete the note
- Tapping on a selected or non-selected note and holding it longer than the time specified in the preference option 'Piano roll editor event selection time' will allow the note to be moved and will select it upon release.
- Tapping on a selected note (notes turn black when selected) within the time specified in the preference option 'Piano roll editor event selection time', will open the note Options seen here.

As you can see, these options allow you to Cut (remove and copy to clipboard), Copy (copy to clipboard), Delete and Quantize (snap to exact musical increments of the tempo). When Quantize is selected a further dialog will open allowing you to tailor the quantization to your requirements as described here.
You can also select multiple notes by long pressing and holding in an empty area of the piano roll grid to activate the rectangular marquee tool which you can then slide around the notes you want to select.
To deselect notes, tap once in any empty area of the piano roll grid.
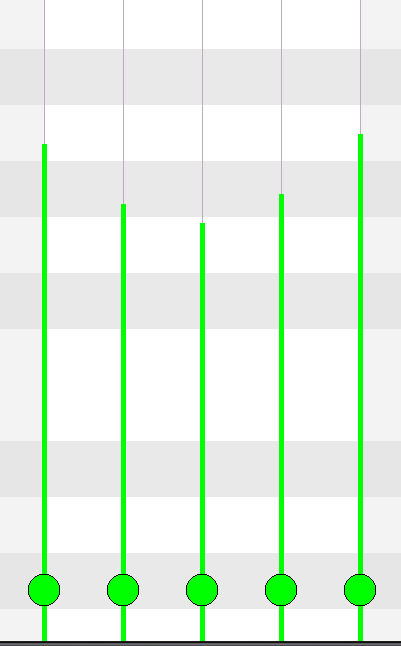
- Note Velocity. This allows you to set the note velocity. Note velocity is often thought of as the note volume but this isn't correct. Velocity refers to how hard (the speed at which - the velocity) an instrument is hit, or struck or strummed etc. A piano key played very softly is not only much quieter, but it also has a different sound characteristic (timbre) from the same key being struck very hard. Virtual instruments can contain 'velocity layers', meaning they have multiple sets of samples representing the different velocities at which the instrument can be played. The Note Velocity setting for each individual note will then determine which sample, from which set, is used, resulting in a much more realistic recreation of the instrument. When active, each note in the composition will be represented by a vertical bar, as seen below. These bars can be moved up and down with your finger, from 0 to 127, to set each note's velocity. The Piano roll editor event selection time can be user defined in the User interface section of the Settings
 if the bars aren't responding to your touch as quickly as you'd like. The velocity level will be displayed in the Playback Timer Display as the bars are adjusted. As can be seen here, the notes to which each velocity bar belongs are shown as outlines when in Note Velocity mode.
NOTE. Not all virtual instruments have velocity layers and instead use just one set/layer of samples. In this case, changing the velocity will only change the volume of the notes.
- Control Change. Control Change messages are usually referred to as a CC, with a controller number ranging from 0-127. Most hardware MIDI equipment will send these CC messages from their dials, buttons, faders etc., with a different number allocated to each dial or button. Software can recognize these messages and therefore allocate, or map, particular functions within the software to be controlled by those dials or buttons on the external MIDI equipment. This is what happens when you set up your MIDI remote control.
The Control Change option here, though, allows you to Draw and Edit the same type of events (Modulation Wheel, Sustain On/Off, Pan, Portamento and lots more) on the piano roll editor if you do not have any external MIDI equipment connected to control and record changes to these parameters live. Selecting Control Change will open a full list of the options. Select the option you want and draw the levels of that parameter you want at different points onto the piano roll. Be aware that the event points will be created in accordance with the piano roll Grid snap-to settings - turn it off if you want to create continuous smooth changes. Use the Edit mode to change events without adding any more. The value of each individual control change point created will be shown in the Playback Timer Display as they are created or edited. Use the Remove mode to remove events completely. Control Change events are represented on the piano roll by thin lines whose height represents the level at that point, seen below. The circles at the bottom of the lines indicate the parameter chosen to be controlled from the list of options. If you also add events for a different parameter, you will notice that the circles are in a different place vertically, to distinguish the two sets of events.
- Program Change. Also known as a 'Patch change', the program change option allows you to change the program/patch/preset used by the loaded virtual instrument mid-composition on the same track. If the virtual instrument uses the General MIDI (GM) Mapping, as Audio Evolution Mobile's Default Sound Set does, you can refer to the list of instruments found here to set which instrument is assigned to which program number. If the virtual instrument does not conform to the GM standard it will be up to the virtual instrument creator to decide which program/patch/preset is assigned to which program number. As such, it can be a case of trial and error with such instruments.
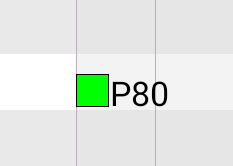
With Program Change selected, place program change points on the piano roll using the Draw mode. Tap and hold to place, sliding up or down to define the program number and left or right to define their position in the timeline. Be aware that the event points will be created/moved in accordance with the piano roll Grid snap-to settings - turn it off if you want to place a program change completely freely. Use the Edit mode to change events without adding any more. Use the Remove mode to remove events completely. The number of each program change event created will be shown in the Playback Timer Display as it is created or edited. Program change events are represented on the piano roll by a colored square with the program (P) number next to it as seen here.
- Channel Pressure. Channel Pressure refers to the pressure applied to a key, or button/pad, after the initial touch. For this reason it is also known as 'Monophonic Aftertouch' (distinct from 'Polyphonic Aftertouch' because the setting is applied across all notes being sounded at that point - across the whole channel - rather than being set for each note individually). The channel pressure level is assigned to control other parameters. Some external MIDI devices therefore allow you to manually link the channel pressure events to the parameter of your choice. So, you might, for example, assign the channel pressure to a filter, which would mean that when you press and hold a key, or pad, you hear the note and then the greater the pressure you place on, or lift off, the key, the greater or lesser the effect of filter applied, all in real time.
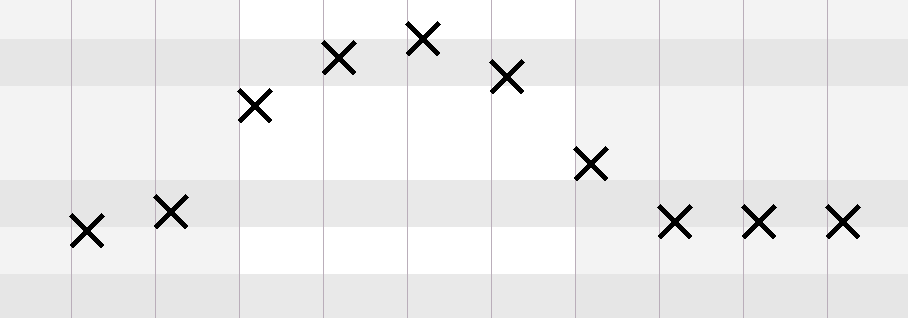
The Channel Pressure mode in Audio Evolution Mobile's piano roll editor therefore allows you to Draw and Edit channel pressure events which can then be used by external MIDI instruments when you're controlling them using the app, provided they have this functionality. Just remember that, since the events are applied across the whole channel, not on a per-note basis, the effect will be heard affecting every note sounding at that point. Be aware that the event points will be created/moved in accordance with the piano roll Grid snap-to settings - turn it off if you want to place channel pressure events completely freely. Channel pressure events are represented on the piano roll by cross marks, seen here.
Soundfonts can also have a parameter - most likely the one most pertinent to that instrument or preset - assigned to the Channel Pressure by the creator of the soundfont, so you may find that creating and editing channel pressure events does have an effect even when you are using it without an external MIDI instrument which supports it.
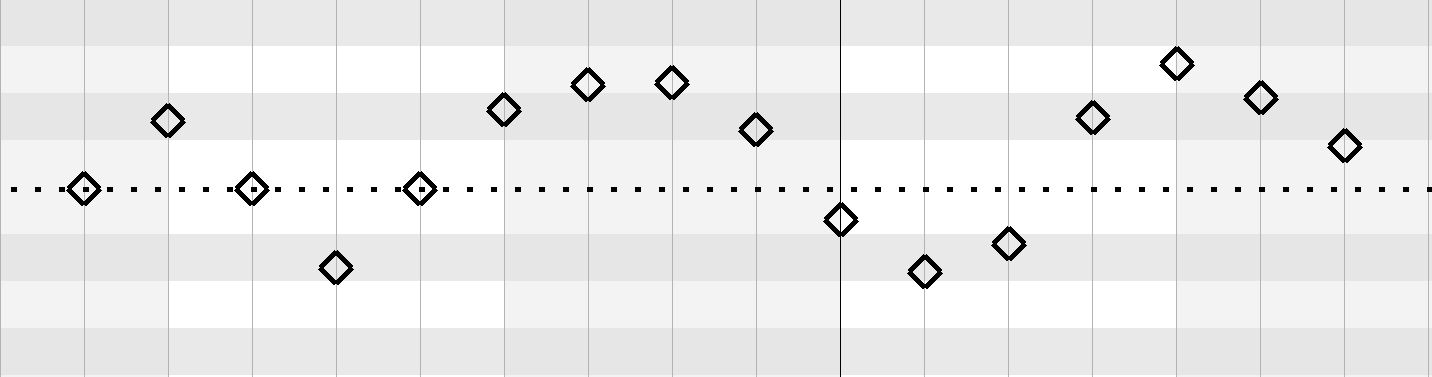
- Pitch Bend. This allows you to manually Draw and Edit pitch bend events on the piano roll. When this event mode is active, there will be a thin dotted line displayed across the length of the piano roll (try moving the piano roll display if you can't see it - it might be hidden by one of the lines of the piano roll initially). This dotted line represents the normal pitch without any pitch bend applied. Events placed below this dotted line will bend pitch of all notes sounding at that point downwards. Events placed above that dotted line will bend pitch of all notes sounding at that point upwards. Be aware that the event points will be created/moved in accordance with the piano roll Grid snap-to settings - turn it off if you want to place pitch bend events completely freely. Pitch bend events are represented on the piano roll by small diamond shapes with the thin dotted line representing the standard pitch, seen below.
16 Note Length Selector  . This is where, when you're placing notes on the piano roll in Draw mode, you can quickly and easily select the length of note you want to place. The range of notes available covers from one full note (one whole bar) all the way up to 1/32T (Triplet) note. Notes can always be resized after they've been placed by long pressing, holding and sliding on their right hand edge. This action will follow the piano roll Grid snap-to settings; turn it OFF to freely resize notes without any snapping-to.
17 Velocity ![]() . This velocity slider allows you to set the velocity of notes before you place them on the piano roll. The range is from 0 to 127 and the default level is 100. The slider can also be used to alter the velocity of notes already present (when in Draw mode and with Note selected in the Event Type Selector) by selecting a note or multiple notes with the rectangular marquee (long-press to initiate a rectangular marquee), and moving the velocity slider. The velocity value will be displayed in the Playback Timer Display as the slider is moved.
. This velocity slider allows you to set the velocity of notes before you place them on the piano roll. The range is from 0 to 127 and the default level is 100. The slider can also be used to alter the velocity of notes already present (when in Draw mode and with Note selected in the Event Type Selector) by selecting a note or multiple notes with the rectangular marquee (long-press to initiate a rectangular marquee), and moving the velocity slider. The velocity value will be displayed in the Playback Timer Display as the slider is moved.
18 Playback Transport Controls ![]() . These are the controls for starting and stopping playback and recording.
. These are the controls for starting and stopping playback and recording.
![]() Start Playback from the beginning of the project.
Start Playback from the beginning of the project.
![]() Playback from the position of the Time Marker (The green marker
Playback from the position of the Time Marker (The green marker ![]() in the Timeline/Marker Display).
in the Timeline/Marker Display).
![]() Stop Playback or Recording.
Stop Playback or Recording.
![]() Record.
Record.
19 Playback Timer Display ![]() . This display shows the current time during playback and recording. When playback and recording are stopped it displays the current position of the Time Marker (the green marker
. This display shows the current time during playback and recording. When playback and recording are stopped it displays the current position of the Time Marker (the green marker ![]() shown in the Timeline/Marker Display). Tapping the Playback Time Display once will open the Tempo options for the current project. The top counter shows the time in minutes, seconds and milliseconds. The bottom counter shows the time in bars (or measures), beats and ticks (the resolution is 192 ticks per beat) according to the project Tempo settings. This is also the place where most parameter levels are displayed as they are being changed.
shown in the Timeline/Marker Display). Tapping the Playback Time Display once will open the Tempo options for the current project. The top counter shows the time in minutes, seconds and milliseconds. The bottom counter shows the time in bars (or measures), beats and ticks (the resolution is 192 ticks per beat) according to the project Tempo settings. This is also the place where most parameter levels are displayed as they are being changed.
20 MIDI Clip Overview / Scrollpad ![]() . Working on the same principle as the Project Overview/Scrollpad on the Arranger Screen, this area represents the entire MIDI clip you're currently editing in the piano roll. Sliding you finger across it allows you to very quickly move your viewpoint to a particular point and simultaneously position the Time Marker
. Working on the same principle as the Project Overview/Scrollpad on the Arranger Screen, this area represents the entire MIDI clip you're currently editing in the piano roll. Sliding you finger across it allows you to very quickly move your viewpoint to a particular point and simultaneously position the Time Marker ![]() .
.
21 Piano Roll Virtual Keyboard ![]() . The vertical increments of the piano roll represent the pitch of the notes: lowest at the bottom and highest at the top. To help with this, Audio Evolution Mobile provides a virtual keyboard along the vertical axis to the left. The keys can be pressed and the notes heard. Each new octave is labeled on its first note (C0, C1, C2 etc.). Sliding with one finger in the piano roll grid area will move the piano roll and the virtual keyboard will move accordingly when it is moved up or down.
. The vertical increments of the piano roll represent the pitch of the notes: lowest at the bottom and highest at the top. To help with this, Audio Evolution Mobile provides a virtual keyboard along the vertical axis to the left. The keys can be pressed and the notes heard. Each new octave is labeled on its first note (C0, C1, C2 etc.). Sliding with one finger in the piano roll grid area will move the piano roll and the virtual keyboard will move accordingly when it is moved up or down.
22 Piano Roll Grid Area. This is the main area of the piano roll editor, the place where you add and edit MIDI events. Sliding with one finger in this area will move the piano roll viewpoint around. Use pinch/pull to zoom in and out. The grid displayed is shown dynamically depending on the level of zoom. When you reach the part of the piano roll which has a red overlay, this indicates that that area is beyond the current clip size, meaning that the clip needs to be trimmed for any content placed there to be heard during playback. If notes are present on this red area, returning to the Arranger Screen using the Next ![]() button will display a pop-up asking if you want the clip to be resized to include those events. Alternatively, you can trim the clip yourself by selecting it on the Arranger Screen and using the Clip Trimming Handles to reveal the hidden MIDI events.
button will display a pop-up asking if you want the clip to be resized to include those events. Alternatively, you can trim the clip yourself by selecting it on the Arranger Screen and using the Clip Trimming Handles to reveal the hidden MIDI events.
NOTE. Don't forget that the appearance of the piano roll editor grid will also be affected by the Time Signature settings in the Tempo Options.
23 Timeline/Marker Display showing the Time Marker ( the green marker ![]() ) at the beginning of the project timeline.
) at the beginning of the project timeline. ![]() . The numbers on the top show the the duration in minutes and seconds. The numbers on the bottom show the duration in musical bars according to the Tempo Settings. Any Markers and Tempo changes you add to your project will be displayed here as well as the Loop markers when Loop Mode is active and Punch In and Punch Out markers when they are present. For more information on Punch In/Out see here. For more information on Tempo Changes, see here. Single tap on the Timeline/Marker Display to move the Time Marker to that point. Double tap on the Timeline/Marker Display to open the Marker Options.
. The numbers on the top show the the duration in minutes and seconds. The numbers on the bottom show the duration in musical bars according to the Tempo Settings. Any Markers and Tempo changes you add to your project will be displayed here as well as the Loop markers when Loop Mode is active and Punch In and Punch Out markers when they are present. For more information on Punch In/Out see here. For more information on Tempo Changes, see here. Single tap on the Timeline/Marker Display to move the Time Marker to that point. Double tap on the Timeline/Marker Display to open the Marker Options.