Creating a Multi-instrument Drum Instrument
Using the multi-instrument option when creating a drum pattern track allows you to create your own custom drum kits for use in the drum pattern sequencer. These can be made up of a combination of sounds from the soundfont instruments installed on your device, high quality drum samples from the Audio Evolution Mobile factory library (whether that's the 80 free samples included (download required) or the 420 additional samples available to be downloaded after an in-app purchase) and your own samples, which can be easily imported for use.
Creating a bespoke instrument in this way also opens up much greater control over each individual element of the drum kit as each sample used has its own full channel strip, with FX Grid and an additional ADSR button via which can be accessed the sample's ADSR volume envelope, as well as a low pass filter, pitch controls, a rudimentary reverb effect and Cut Groups for the sample.
NOTE. If you just want that greater control over each sample within an existing drum kit, simply choose that kit as the Base instrument for your multi-instrument and don't replace any of the drums present.
How to create a multi-instrument drum instrument
Press the Add Track ![]() button towards the bottom right of the Arranger Screen to open the following dialog and select Add drum pattern track.
button towards the bottom right of the Arranger Screen to open the following dialog and select Add drum pattern track.

This opens the following instrument selection screen.
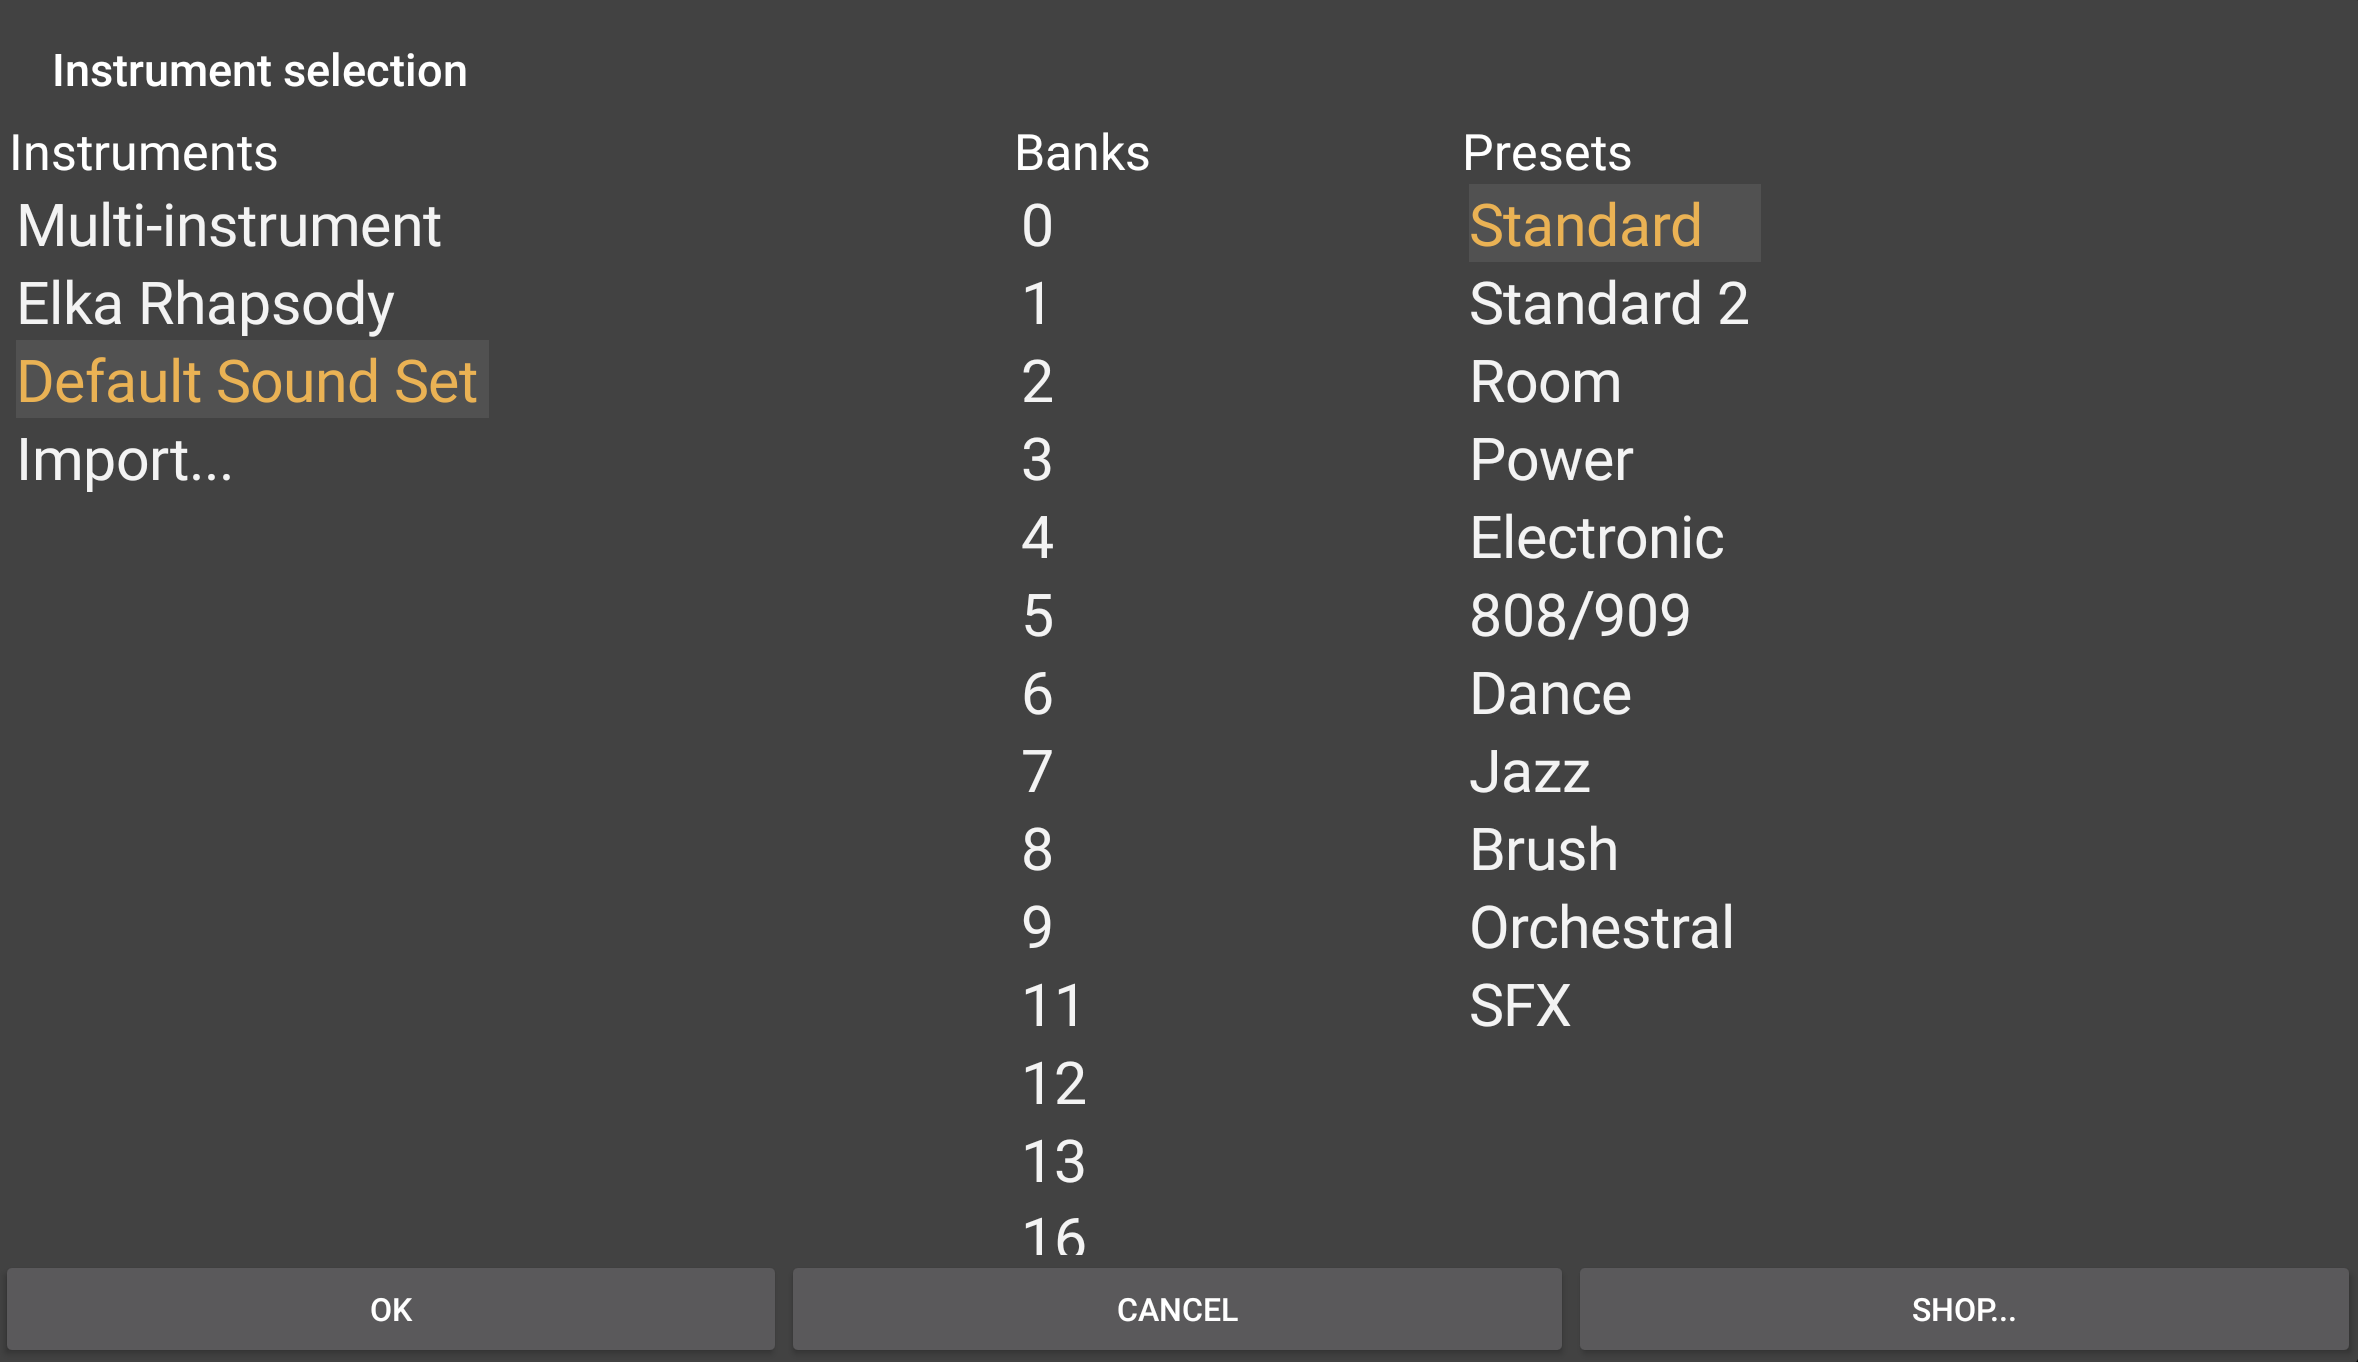
Select Multi-instrument. You will now see the following options on the instrument selection screen.
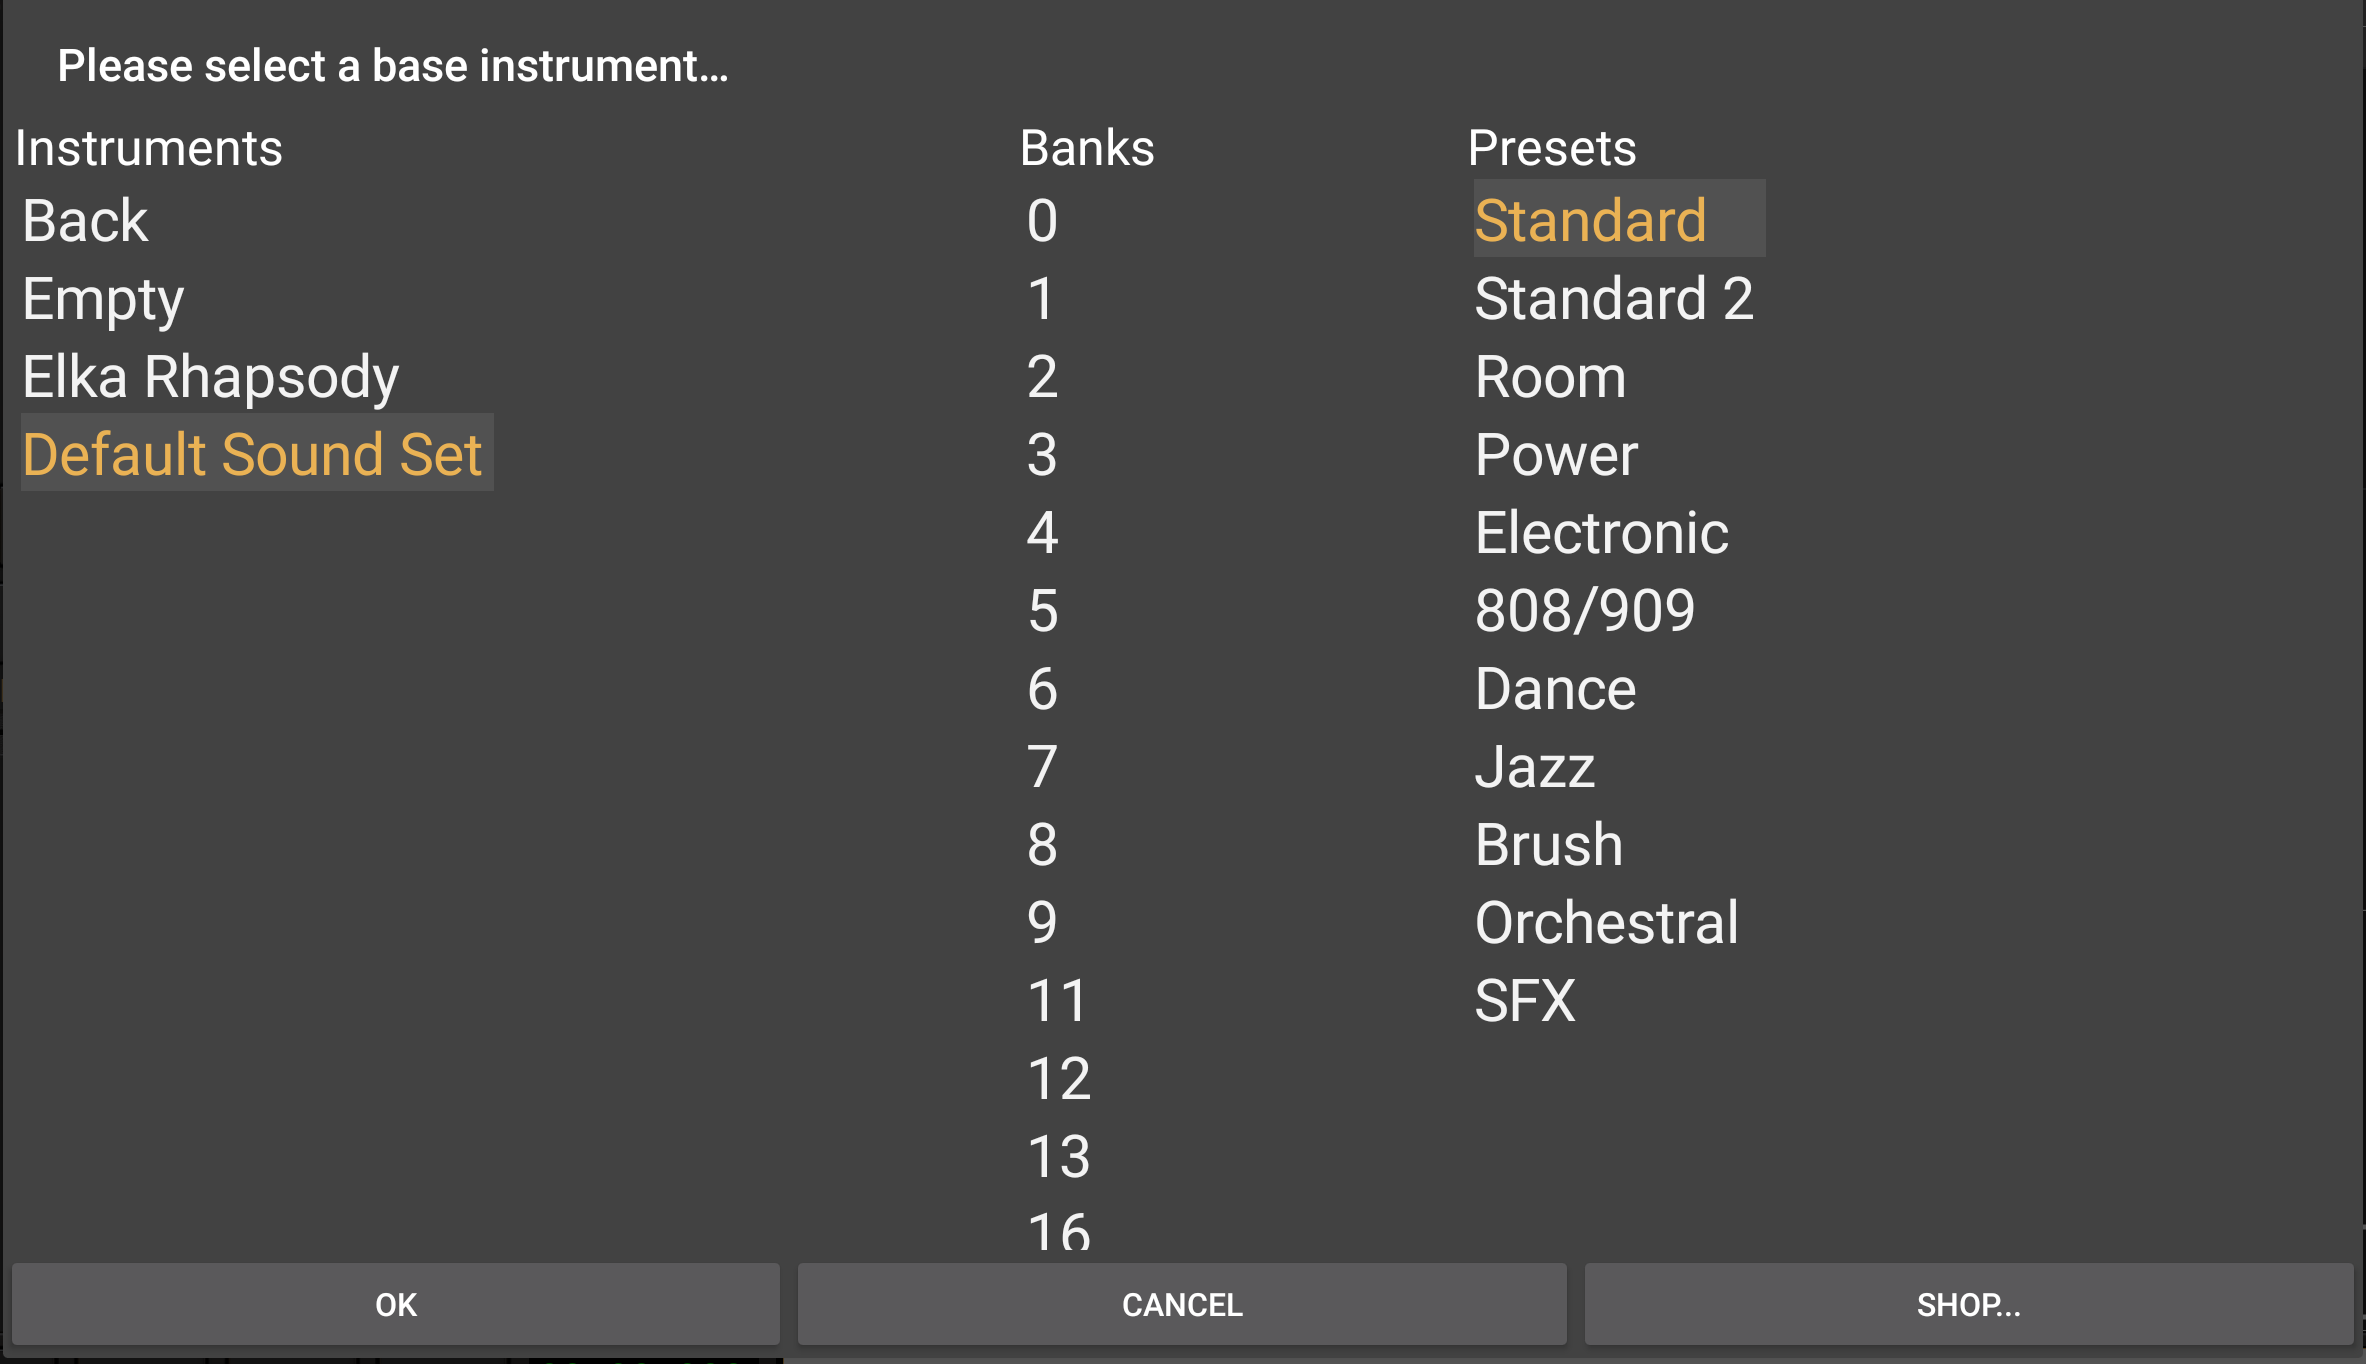
On this screen you can select a base instrument upon which to build your custom drum kit by replacing any elements you wish to. In the screenshot above, the Standard drum kit from the Default Sound Set is selected as the base instrument.
Pressing Back will take you back to the first instrument selection screen.
Choosing Empty will create an empty multi-instrument drum instrument, ready for you to add whatever sample elements you require.
Choose your base instrument or select Empty and click on OK. This will open the drum pattern sequencer with either the selected base instrument loaded (seen below, top) or without any samples loaded (seen below, bottom). If this is the first time you've used this feature, you'll be asked if you want to download the 80 free high quality drum samples into the Factory samples folder. This can be downloaded later if you prefer via the Samples folder within the drum sound browser. An in-app purchase is also available via the Samples folder which allows you to buy and download an additional 420 high quality drum samples split across several popular genres.
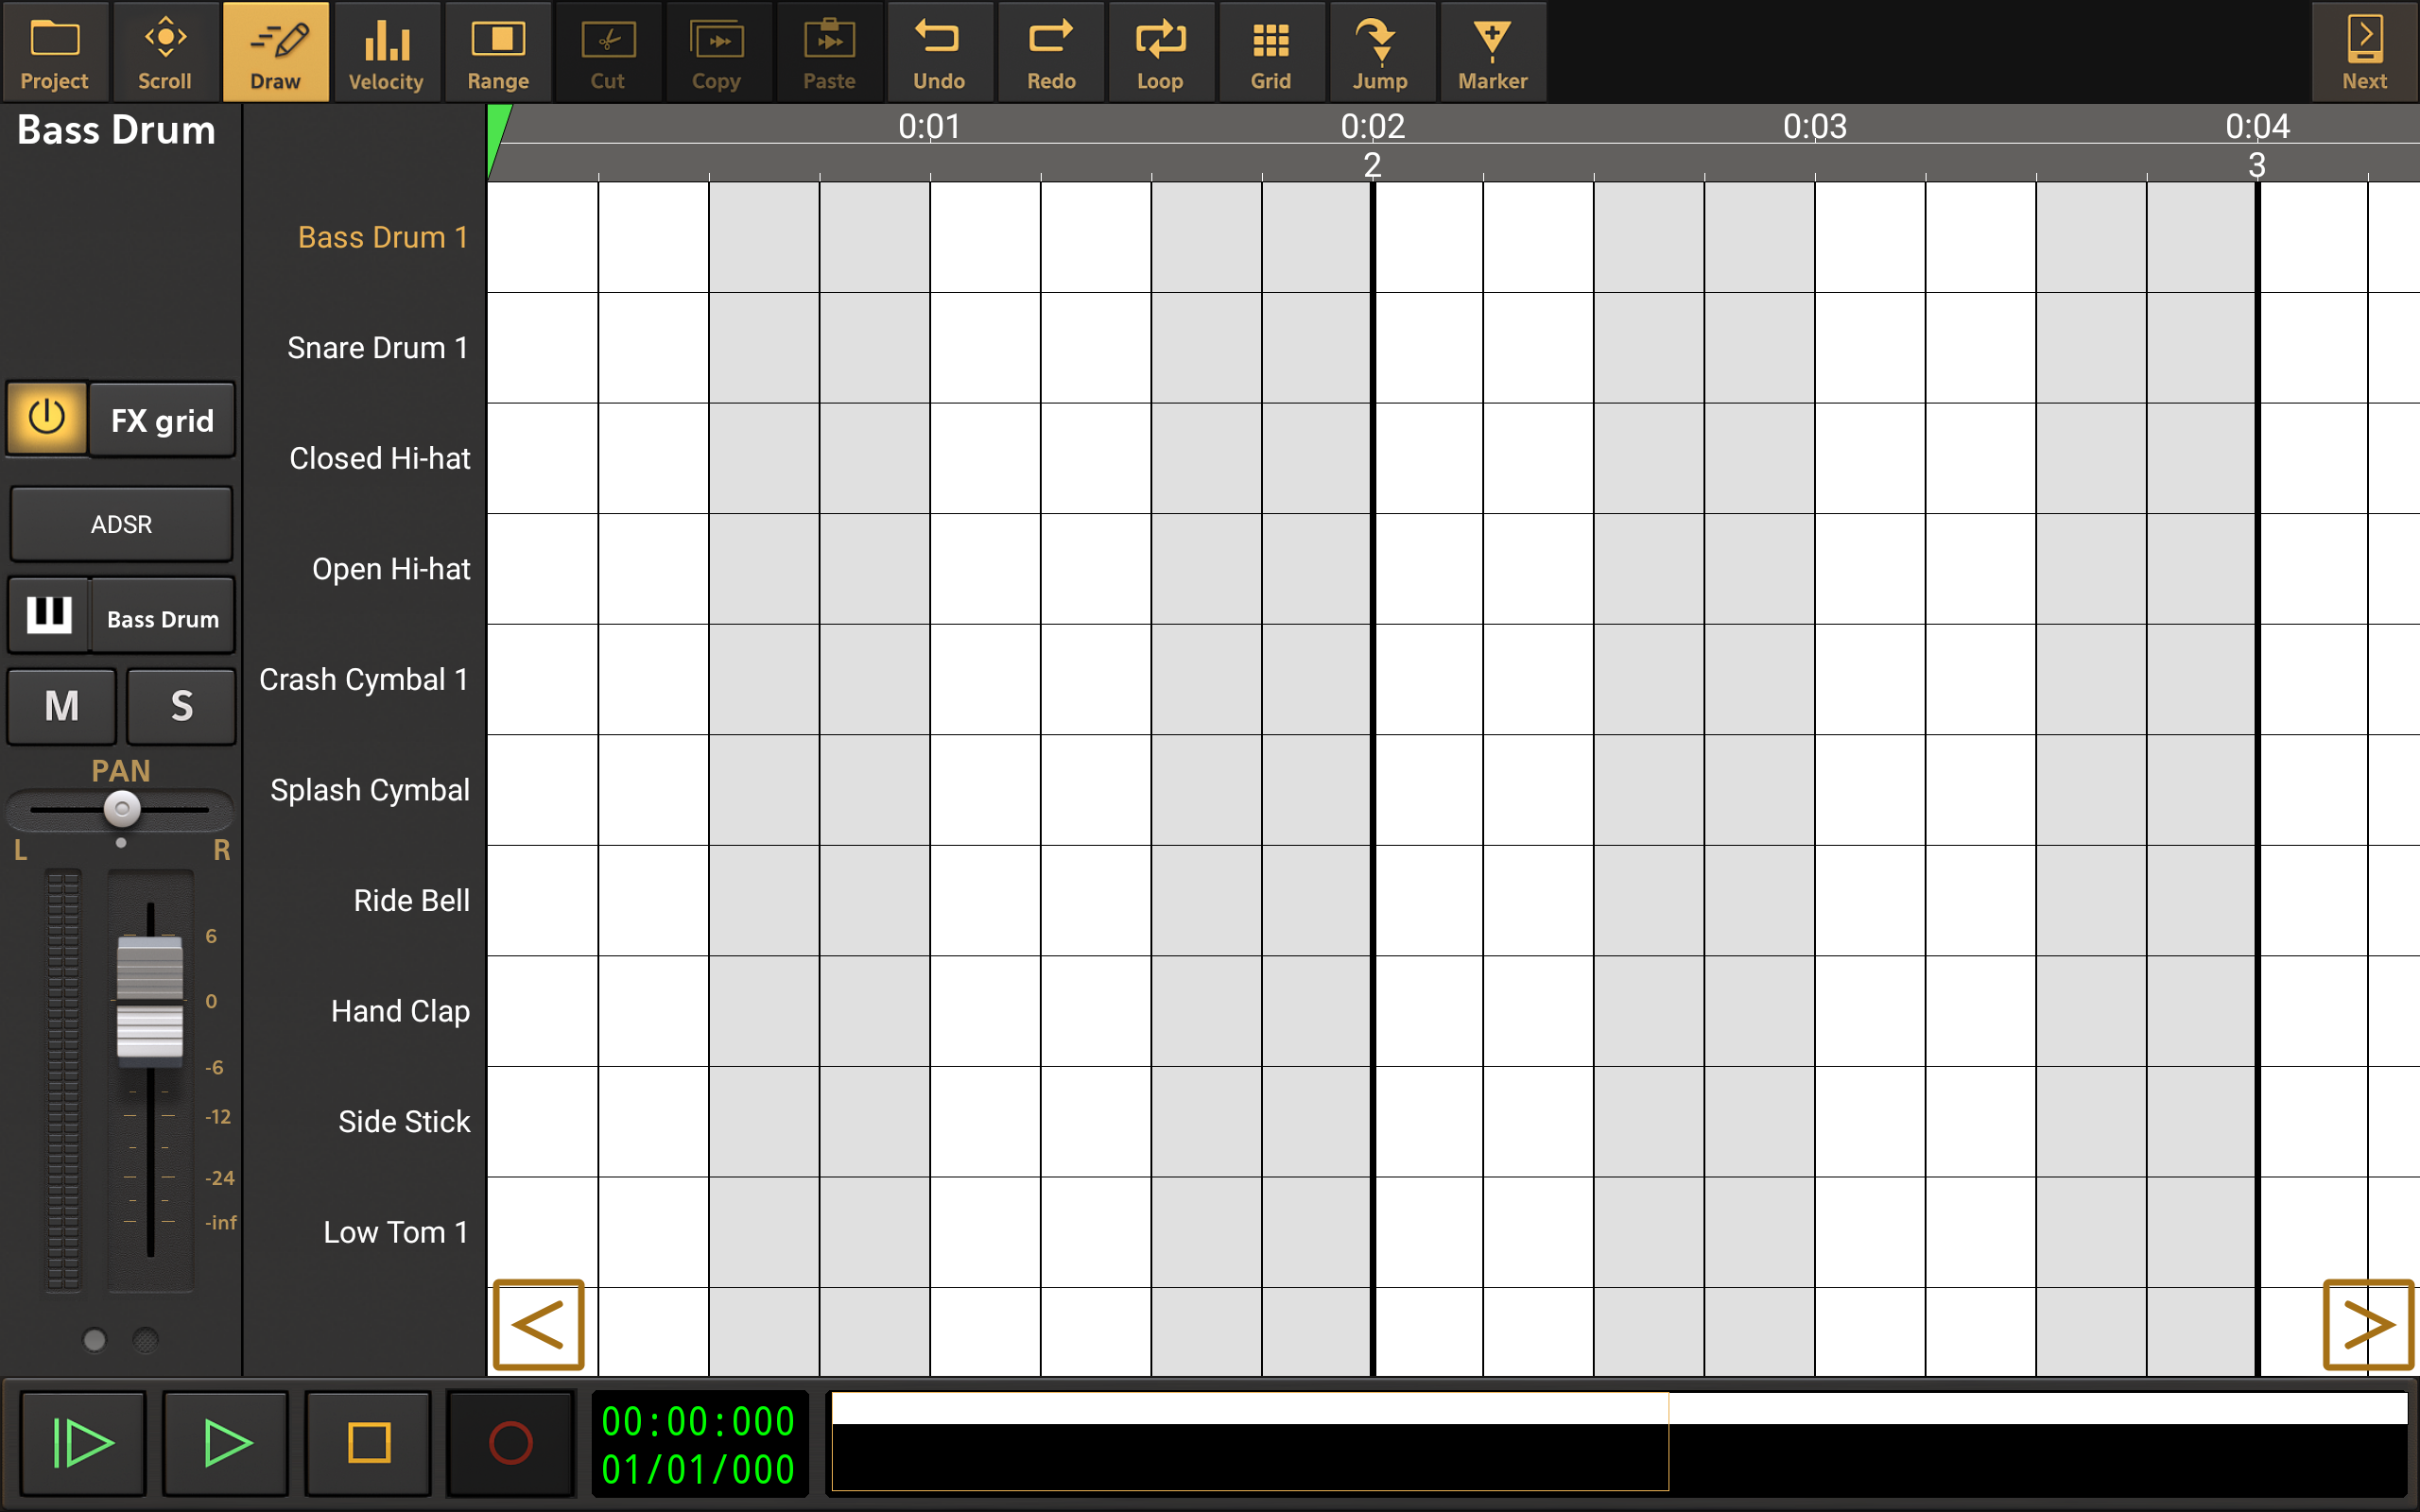
Base instrument used for multi-instrument drum pattern instrument.
![]()
Empty multi-instrument drum pattern instrument.
As you can see on the drum pattern sequencer with the base instrument used, Bass Drum 1 is selected (tap once on a sample name to select it) at the top of the list of drum samples and to the left can be seen its channel strip. Every sample within the kit has its own channel strip, visible when the sample is selected, offering great control over the samples and, via cut groups, the drum patterns you create. To hide the channel strip and maximize the size of the drum pattern sequencer, swipe left on the bar containing the names of the drum samples. To reveal the channel strip again, swipe to the right on the bar containing the names of the drum samples.
Now you have a multi-instrument drum pattern track, it is simply a case of selecting and importing the samples you want to use in your custom drum kit.
If you have chosen to use a base instrument, you can change which samples are used for any of the elements by tapping on the name of a selected sample on the drum pattern editor (tap once to select a sample, tap again to open the Options). This will open the Options seen here.
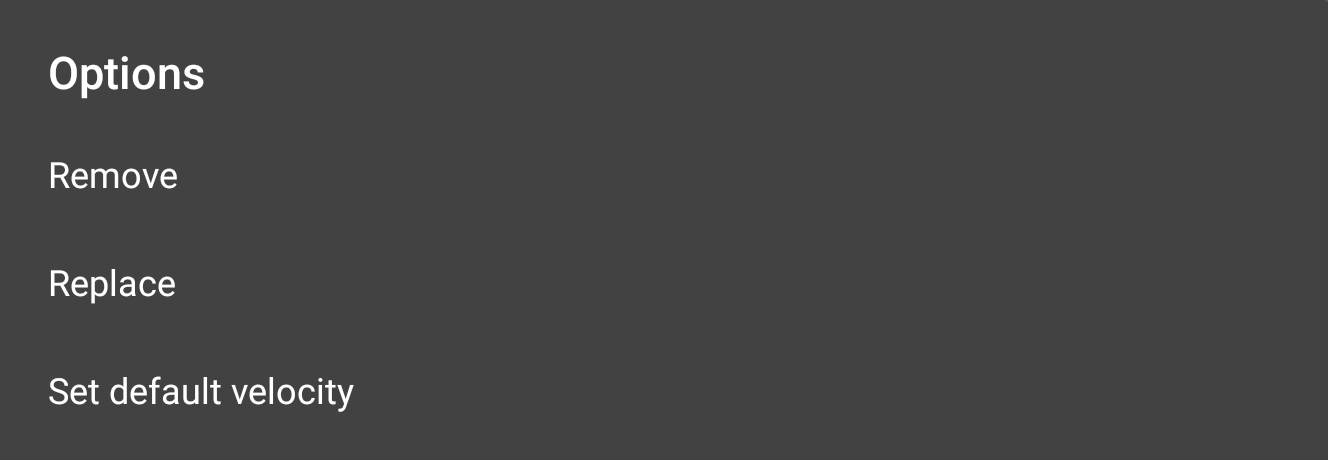
Press Remove to clear that sample from the drum pattern sequencer.
Press Replace to choose another sample to be used instead of the current one.
As can be seen, you can also set the default velocity for the current sample from these options.
NOTE. Where samples already exist on the multi-instrument drum pattern sequencer, you can also change the sample used by clicking on the sample name button ![]() on its channel strip which will immediately open the drum sample browser.
on its channel strip which will immediately open the drum sample browser.
If you chose to start off with an empty multi-instrument drum pattern sequencer, as seen on the right above, you simply need to press the + symbol to load your first sample.
When you press Replace, or the + symbol, the drum sample browser will be opened. The drum sample browser utilizes a standard tree view because of the numerous sub-folders which might be present when navigating to the samples contained in soundfont instruments. Please be aware, therefore, that if you press Replace, you will initially be taken to the location of the currently loaded sample, meaning you may wish to close down several levels to get back to the root of the browser, seen below, to begin browsing for your sample more easily. Pressing + will immediately show you this screen.
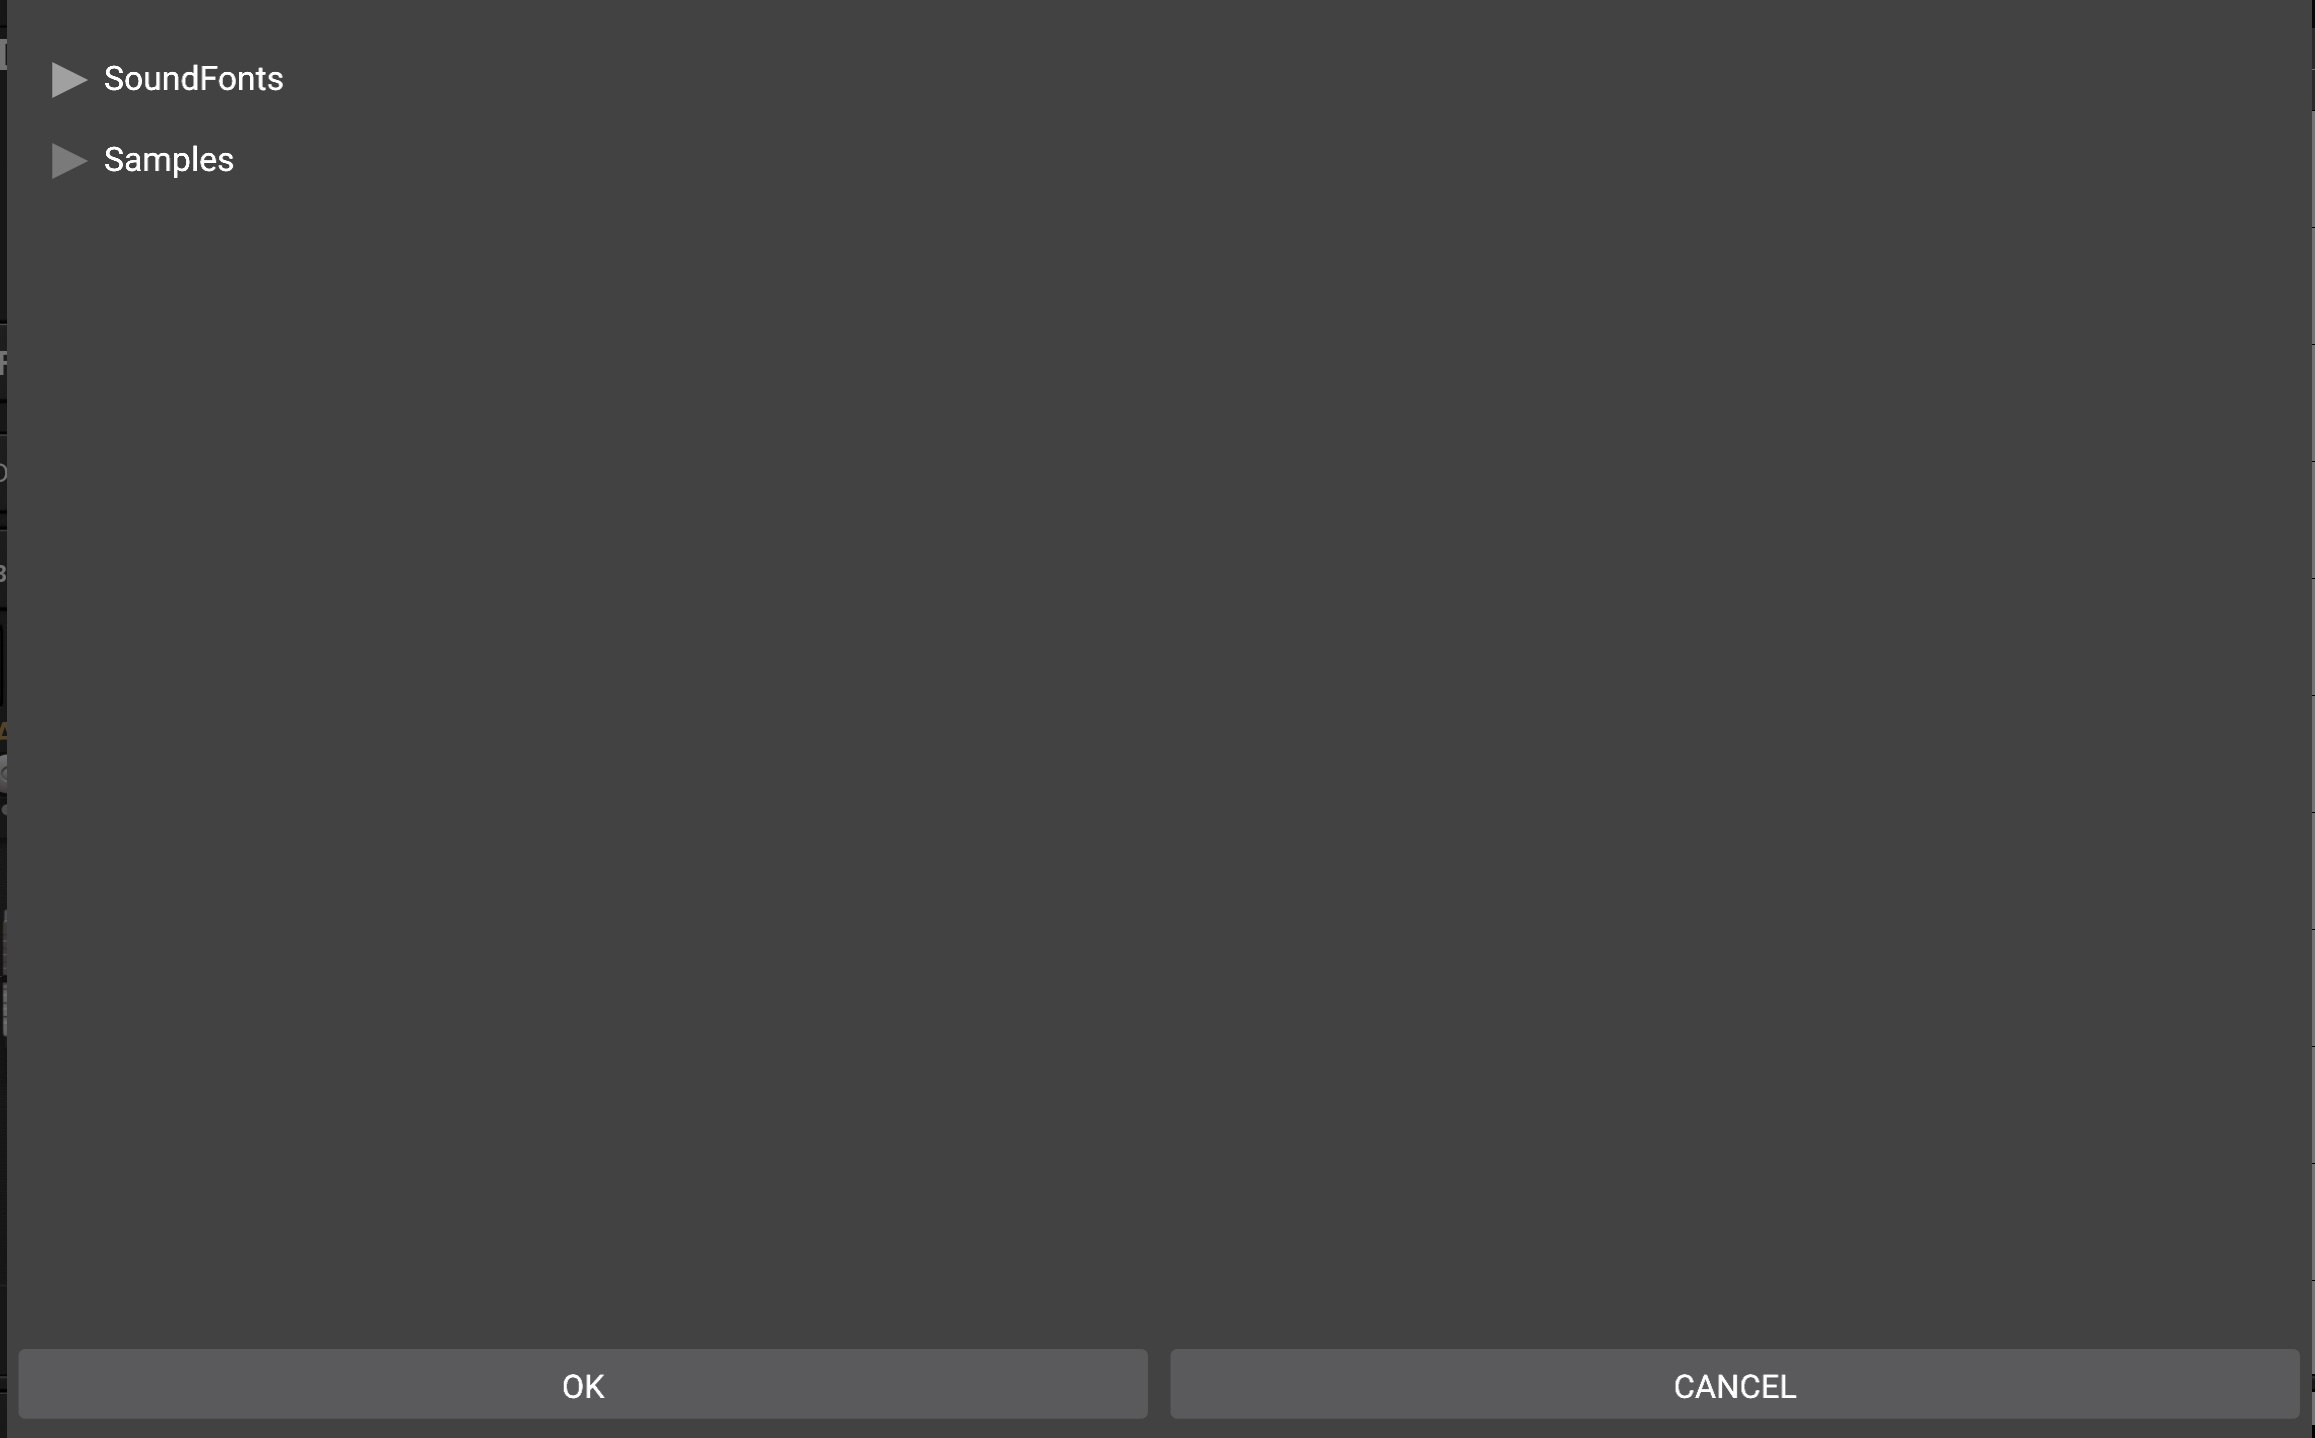
Opening up the browser tree view a few levels will give you a better idea of how to use it.
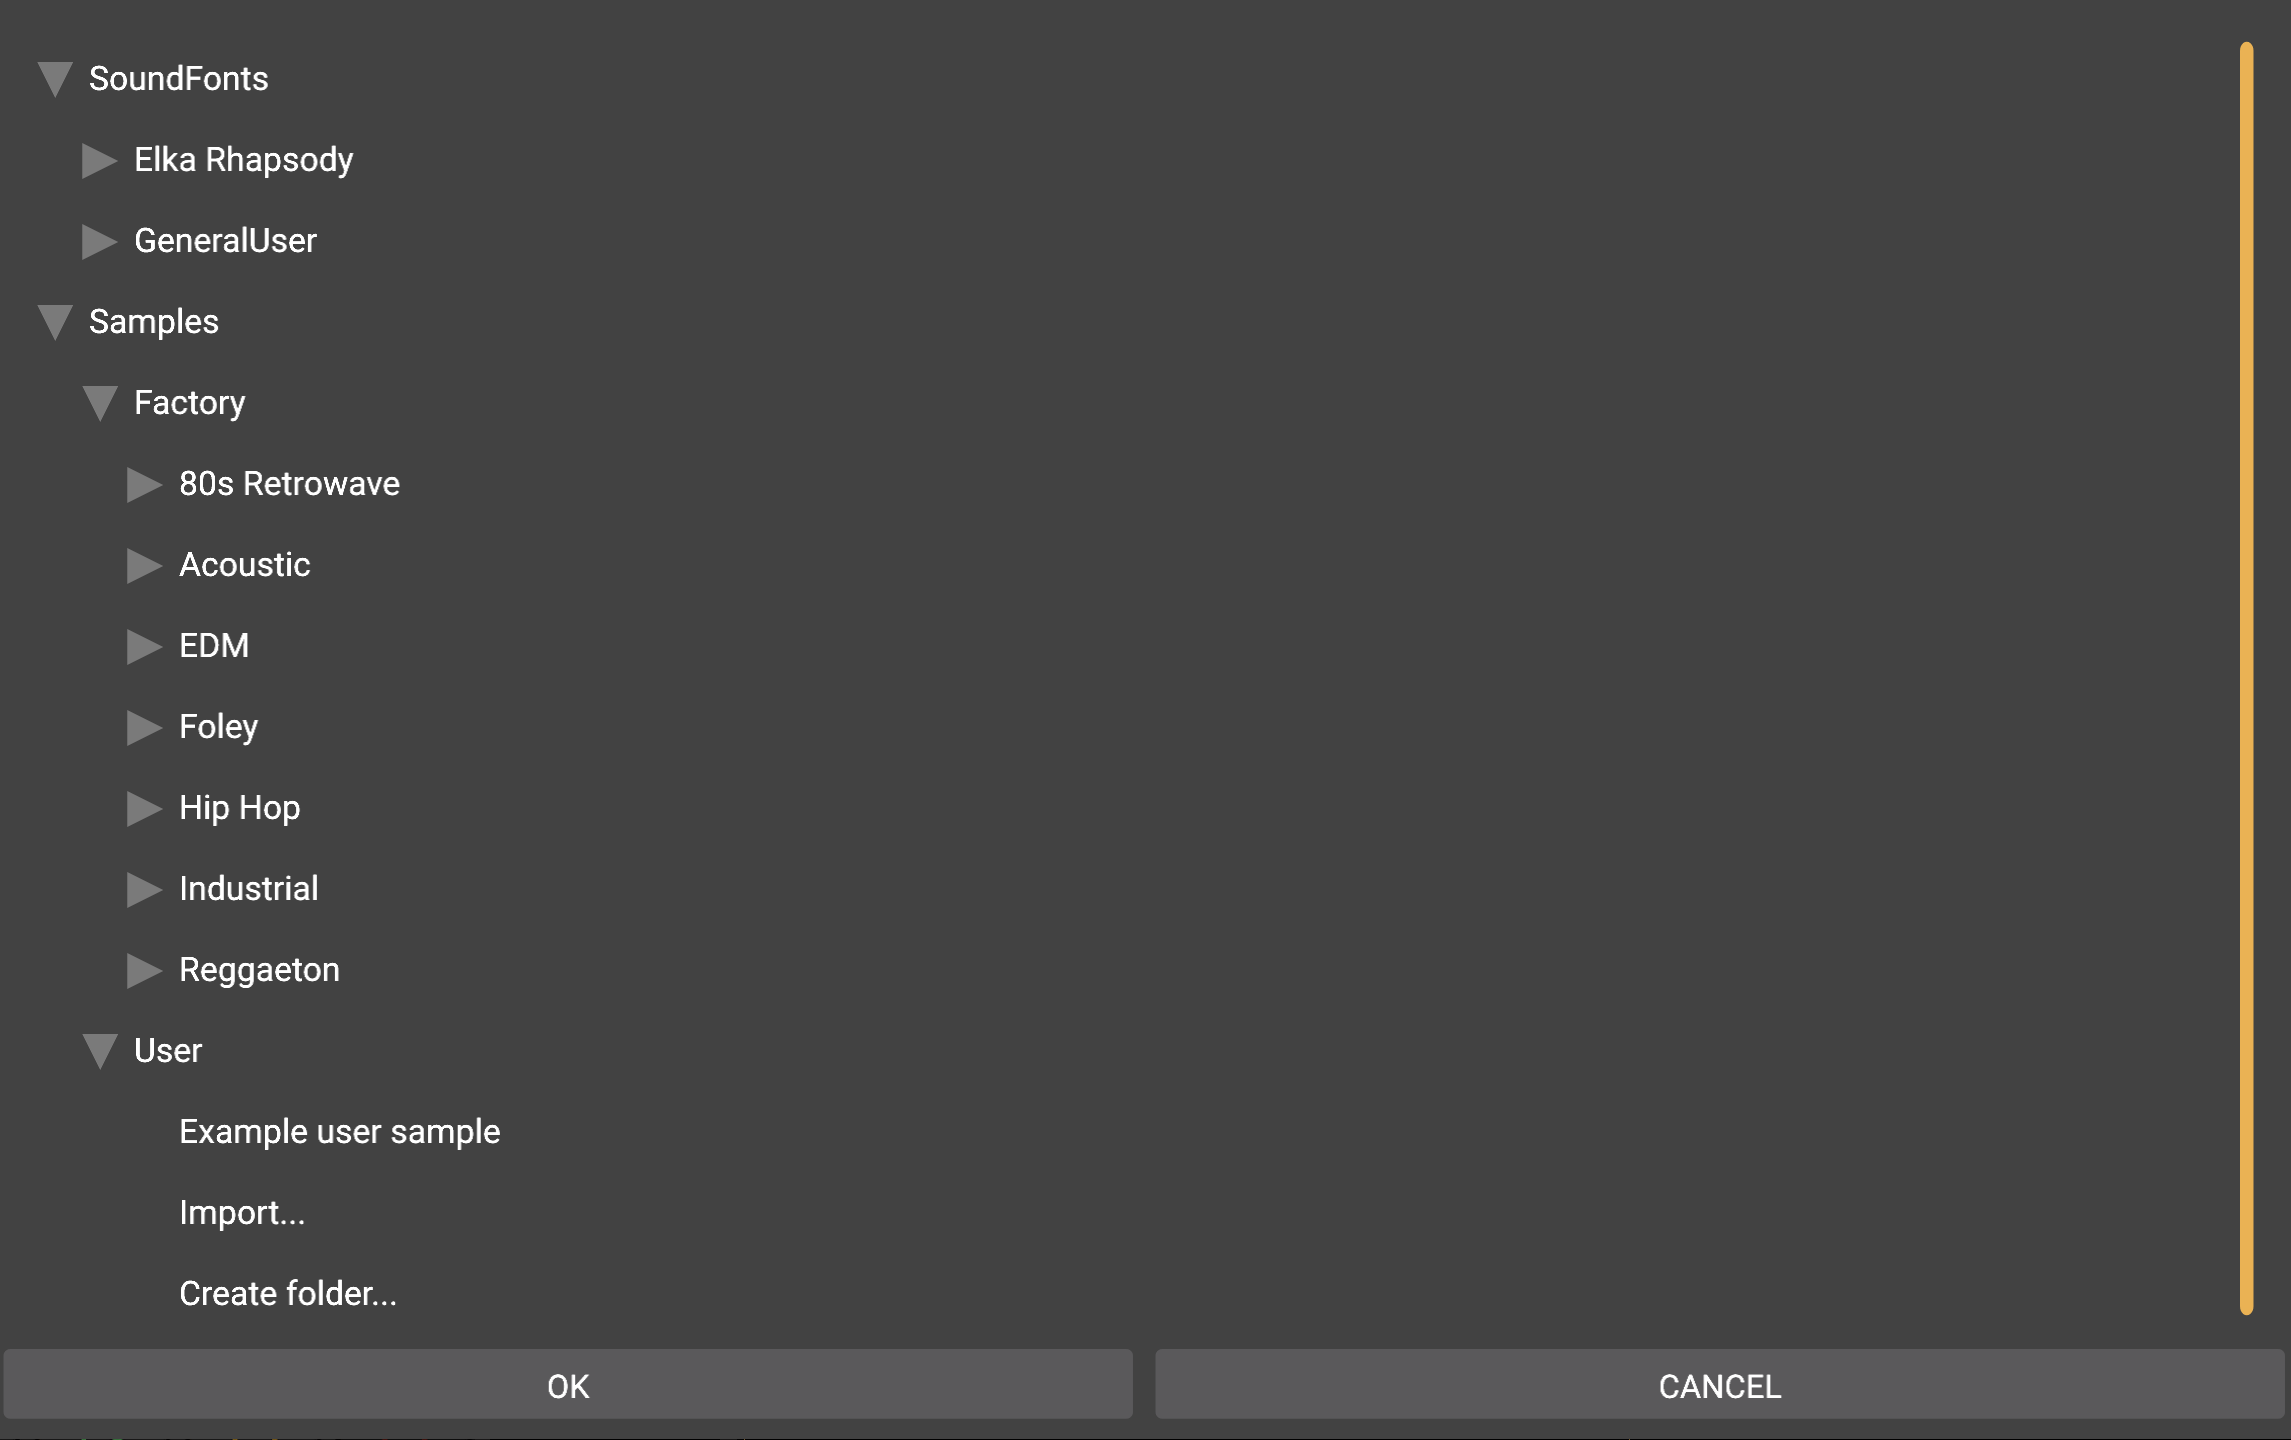
As can be seen, there are two main folders - Soundfonts and Samples.
Soundfonts contains all of the soundfont instruments installed for Audio Evolution Mobile on your device. As you open up the levels of a soundfont, you'll be able to select a specific preset within the soundfont and from there you will be shown the list of General MIDI mapped drums for you to pick from. Tapping on the drum names in the list will preview the sample. It is important to remember that if the preset selected does not have the drums mapped correctly according to the General MIDI standard within the soundfont, these names may, or may not, accurately represent the samples mapped to those notes. This is particularly true if you select an instrument soundfont, such as Elka Rhapsody above, rather than a drum soundfont: you will still be able to select, for example, Bass Drum 1 from a preset within that soundfont but what you'll hear/load is the note from that preset which is mapped to the same location as the Bass Drum 1 would be within a General MIDI drum kit. This opens up creative possibilities of its own though when combined with the ADSR controls for loaded samples! The drum kits in the General User soundfont for Audio Evolution Mobile and all of the high quality drum soundfonts from Digital Sound Factory, available to buy as in-app purchases within Audio Evolution Mobile, are correctly mapped according to General MIDI standard.
Samples contains the Factory samples and your own User samples. As already explained, 80 high quality drum samples can be downloaded for free into the Factory samples folders, which are split across several popular genres. From this Samples folder, you are also able to make an in-app purchase which will allow you to download a further 420 excellent samples into these folders. Inside the folders, the samples are listed individually by name and tapping on the name will preview the sample.
The User folder is where you'll find the samples you have imported. In the screenshot above, you can see that 'Example user sample' has already been imported, ready to be selected. The User folder also contains the options to Import... your samples and Create folder... to help you keep your samples organized in folders within Audio Evolution Mobile.
Clicking on Import... will initially ask you whether you would like to import individual sample/s or a complete directory containing folders of samples (all of the folders of samples in a particular location imported in a single action). Choosing an option will open your device file browser. Navigate to the location where your samples are stored on your device (depending on the Android version your device is running, you may be asked for a one-time permission for Audio Evolution Mobile to access that location). Click on the sample file you wish to import and the sample will be imported into Audio Evolution Mobile's private storage space where it will show up to be selected in the User section of the drum sample browser.
Long click on sample names or folder names in the drum sample browser to be given the option to delete them from Audio Evolution Mobile's private app storage.
NOTE. Audio Evolution Mobile only supports sample files which are less than 4MB in size when importing for use in a multi-instrument drum pattern kit.
Once you've located the sample you want in the drum sample browser, press OK to load it into the drum pattern sequencer and repeat the process to complete your custom drum kit.
Having created a kit you are pleased with, you can save the kit by pressing the Project ![]() button on the drum pattern sequencer screen. Pressing this button also gives you the opportunity to load previously saved user multi-instrument drum kits.
button on the drum pattern sequencer screen. Pressing this button also gives you the opportunity to load previously saved user multi-instrument drum kits.
NOTE. It is important to point out that, though the drum samples in the Factory folder are of the highest quality, they are one-shot samples whereas the Digital Sound Factory drum kit soundfonts, available to purchase in the Audio Evolution Mobile soundfont shop, include many different samples per velocity layer and round-robin samples for a more realistic sound, all recorded with the same high quality equipment in the same locations and at the same time, giving the individual drums a completeness together as a kit. This is the reason for the relative difference in price between the in-app purchase of the extra 420 one shot samples for the Factory samples folders and the cost of purchasing one of the Digital Sound Factory drum soundfonts.
The channel strips shown for each individual sample within a multi-instrument drum pattern, seen below, have a unique element not seen on other channels strips within the app: the ADSR ![]() button.
button.


NOTE. Channel strips show controls spread over several pages which are accessed using the circular gray buttons at the bottom of the channel strip. The number of pages will vary according to the size of your device's screen.
Pressing the ADSR button opens the following screen which offers various controls to fine-tune the sample for your needs.
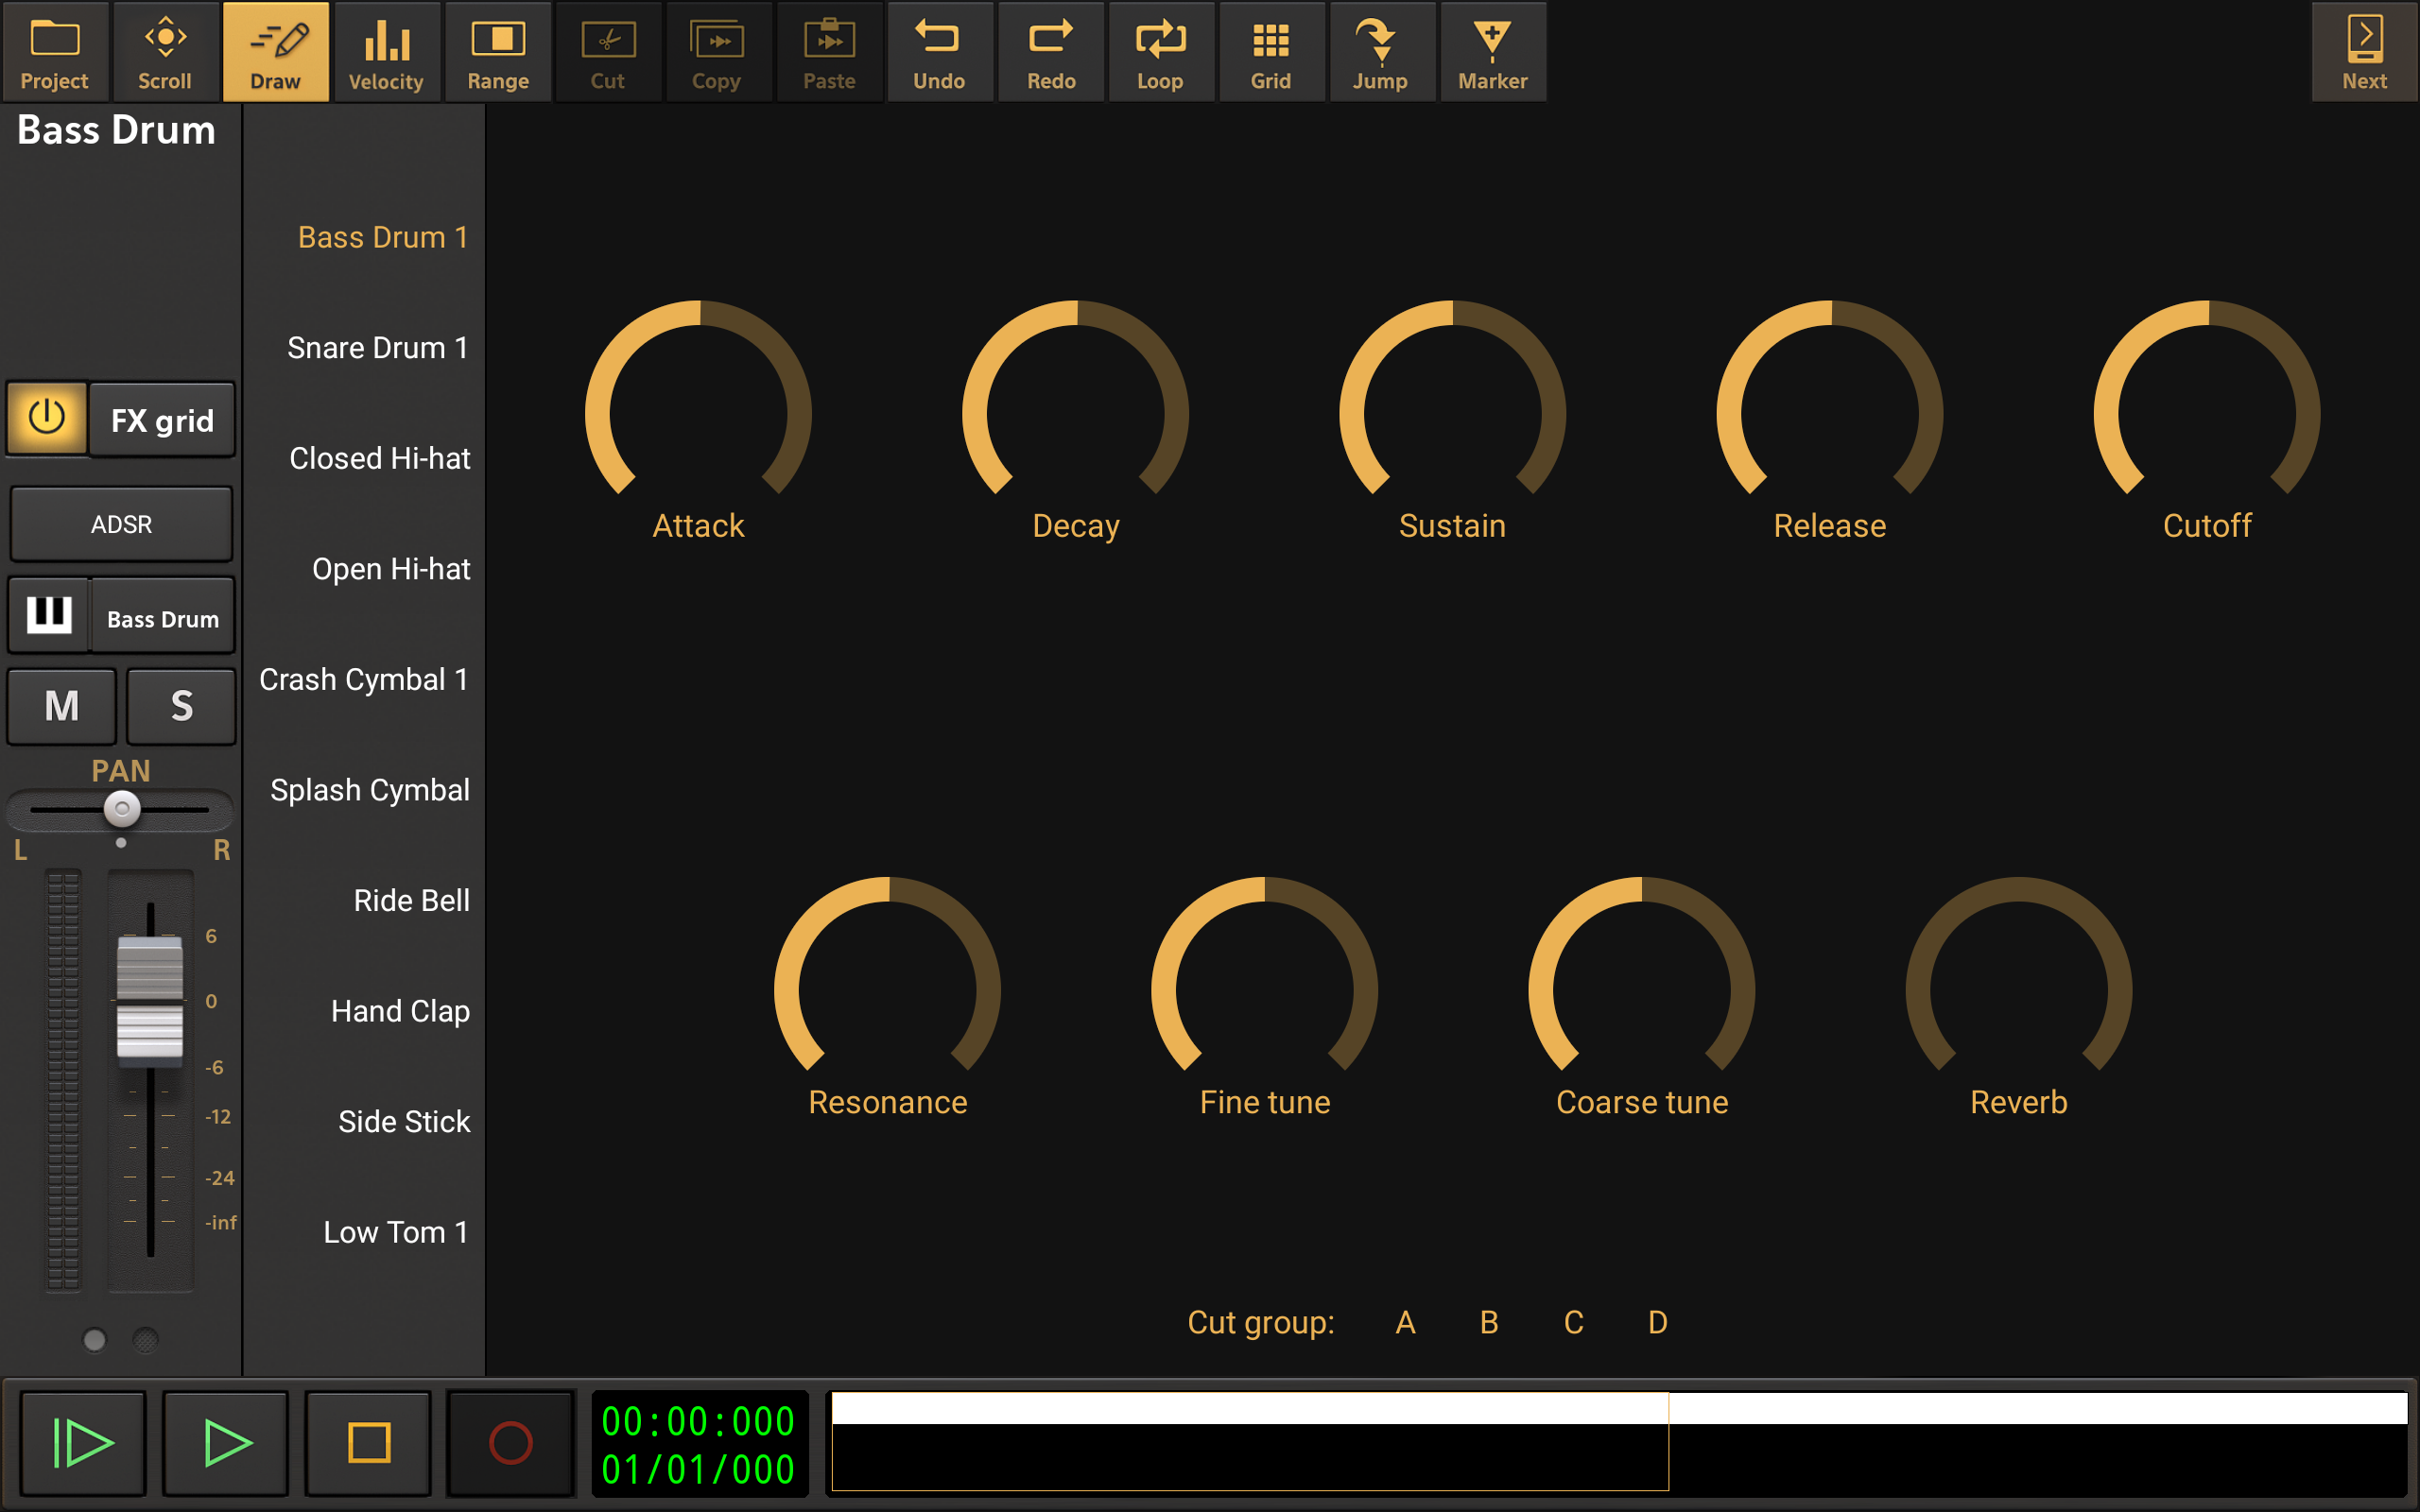
Attack Attack, Decay, Sustain and Release (ADSR) are the volume envelope controls for sample. Attack defines how long it takes the sample to reach its maximum volume.
Decay Decay defines the length of time it takes for the sample volume to drop to the Sustain level after it has reached its maximum volume.
Sustain Sustain is the volume level the sample settles on after the Attack and Decay phases for as long as it remains triggered.
Release Release defines how long it takes the sample volume to drop to complete silence after the trigger is released.
NOTE. For more information on ADSR volume envelopes, please see here.
Cutoff Cutoff and Resonance control a low pass filter for the sample. Cutoff defines the frequency point at which only frequencies lower than that point are let through the filter and heard.
Resonance Resonance controls the the amount that the frequencies specifically around the cutoff point are boosted.
NOTE. For more information on Low Pass filters, please see here.
Fine tune Fine tune and Coarse tune allow you to alter the pitch of your sample. Fine tune makes very small pitch adjustments in cents.
Coarse tune Coarse tune allows you to alter the pitch of the sample in semitones.
Reverb Reverb is a rudimentary reverb effect which can be easily applied to your sample.
Cut group Cut groups are an important aspect of any drum machine. If a sample has been assigned a cut group, its sound will be immediately cut as soon as another sample assigned to the same cut group is triggered on the sequencer during playback. So, for example, if you have the Closed High-hat and Open High-hat both assigned to cut group A, then the naturally long Release of the Open High-hat will be realistically cut short if a Closed High-hat (or any other sample assigned to cut group A) is triggered on the sequencer before it has naturally reached silence. You can choose to assign samples to one, or more, of four cut groups - A, B, C and D.
Double tapping on the parameter dials shown on the ADSR screen will open the following options.
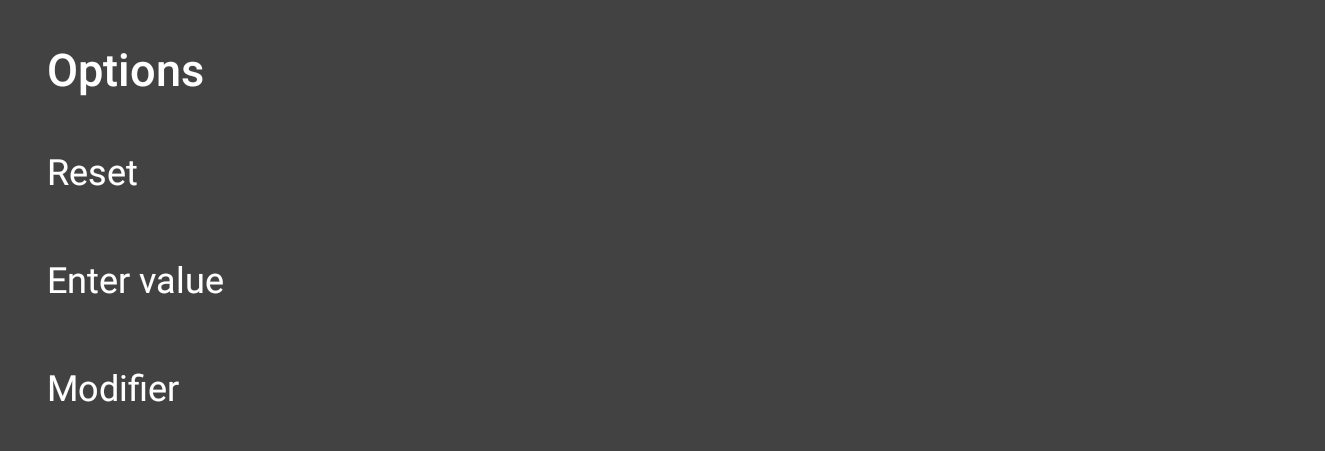
Reset will return the dial to its default value.
Enter value allows you to enter a precise value for the dial/parameter using the numerical keyboard and will be shown the value constraints for the parameter selected (e.g. Enter value between 0 and 127).
Modifier allows you to apply an LFO modulation source to the parameter. For information about LFO modifiers, please see here.
NOTE Parameters for the individual elements within a multi-instrument drum pattern (such as the parameters on the samples' channel strips and effects on their FX grids) are not automatable. The only automation possible on a per-sample basis is via the use of modifiers on the parameters within the ADSR section.
For details on the other parameters and controls shown on the channels strips within a multi-instrument drum pattern sequencer, please see the section on Channel Strips here.