Quick Tutorial
This is a quick start guide to give you an overview of Audio Evolution Mobile and get you making your music straight away. This is, of course, only a suggested workflow to get some immediate results and is not meant in any way to give the impression that this is the way you should approach making your music: do it in whatever way feels right for you! It also, for the sake of simplicity, leaves out a huge amount of Audio Evolution Mobile's functionality and creative possibilities in all areas, so please do explore further and don't think that this is all that the app has to offer...
- Launch the app and create a new project by pressing the Project
 button, top left, and selecting New project. Give your project a name and click OK. Any time you want to save your project, return to the Project Options and select Save project (Audio Evolution Mobile also has an auto-save function running in the background).
- Now, press the Add Track
 button at the lower right hand side of the screen. From the options shown, select Add drum pattern track. This will create the drum track and open the Instrument Selection dialog at the drum options of the Default Sound Set. Press OK to load the Standard drum kit and open the Drum Pattern Sequencer seen here.
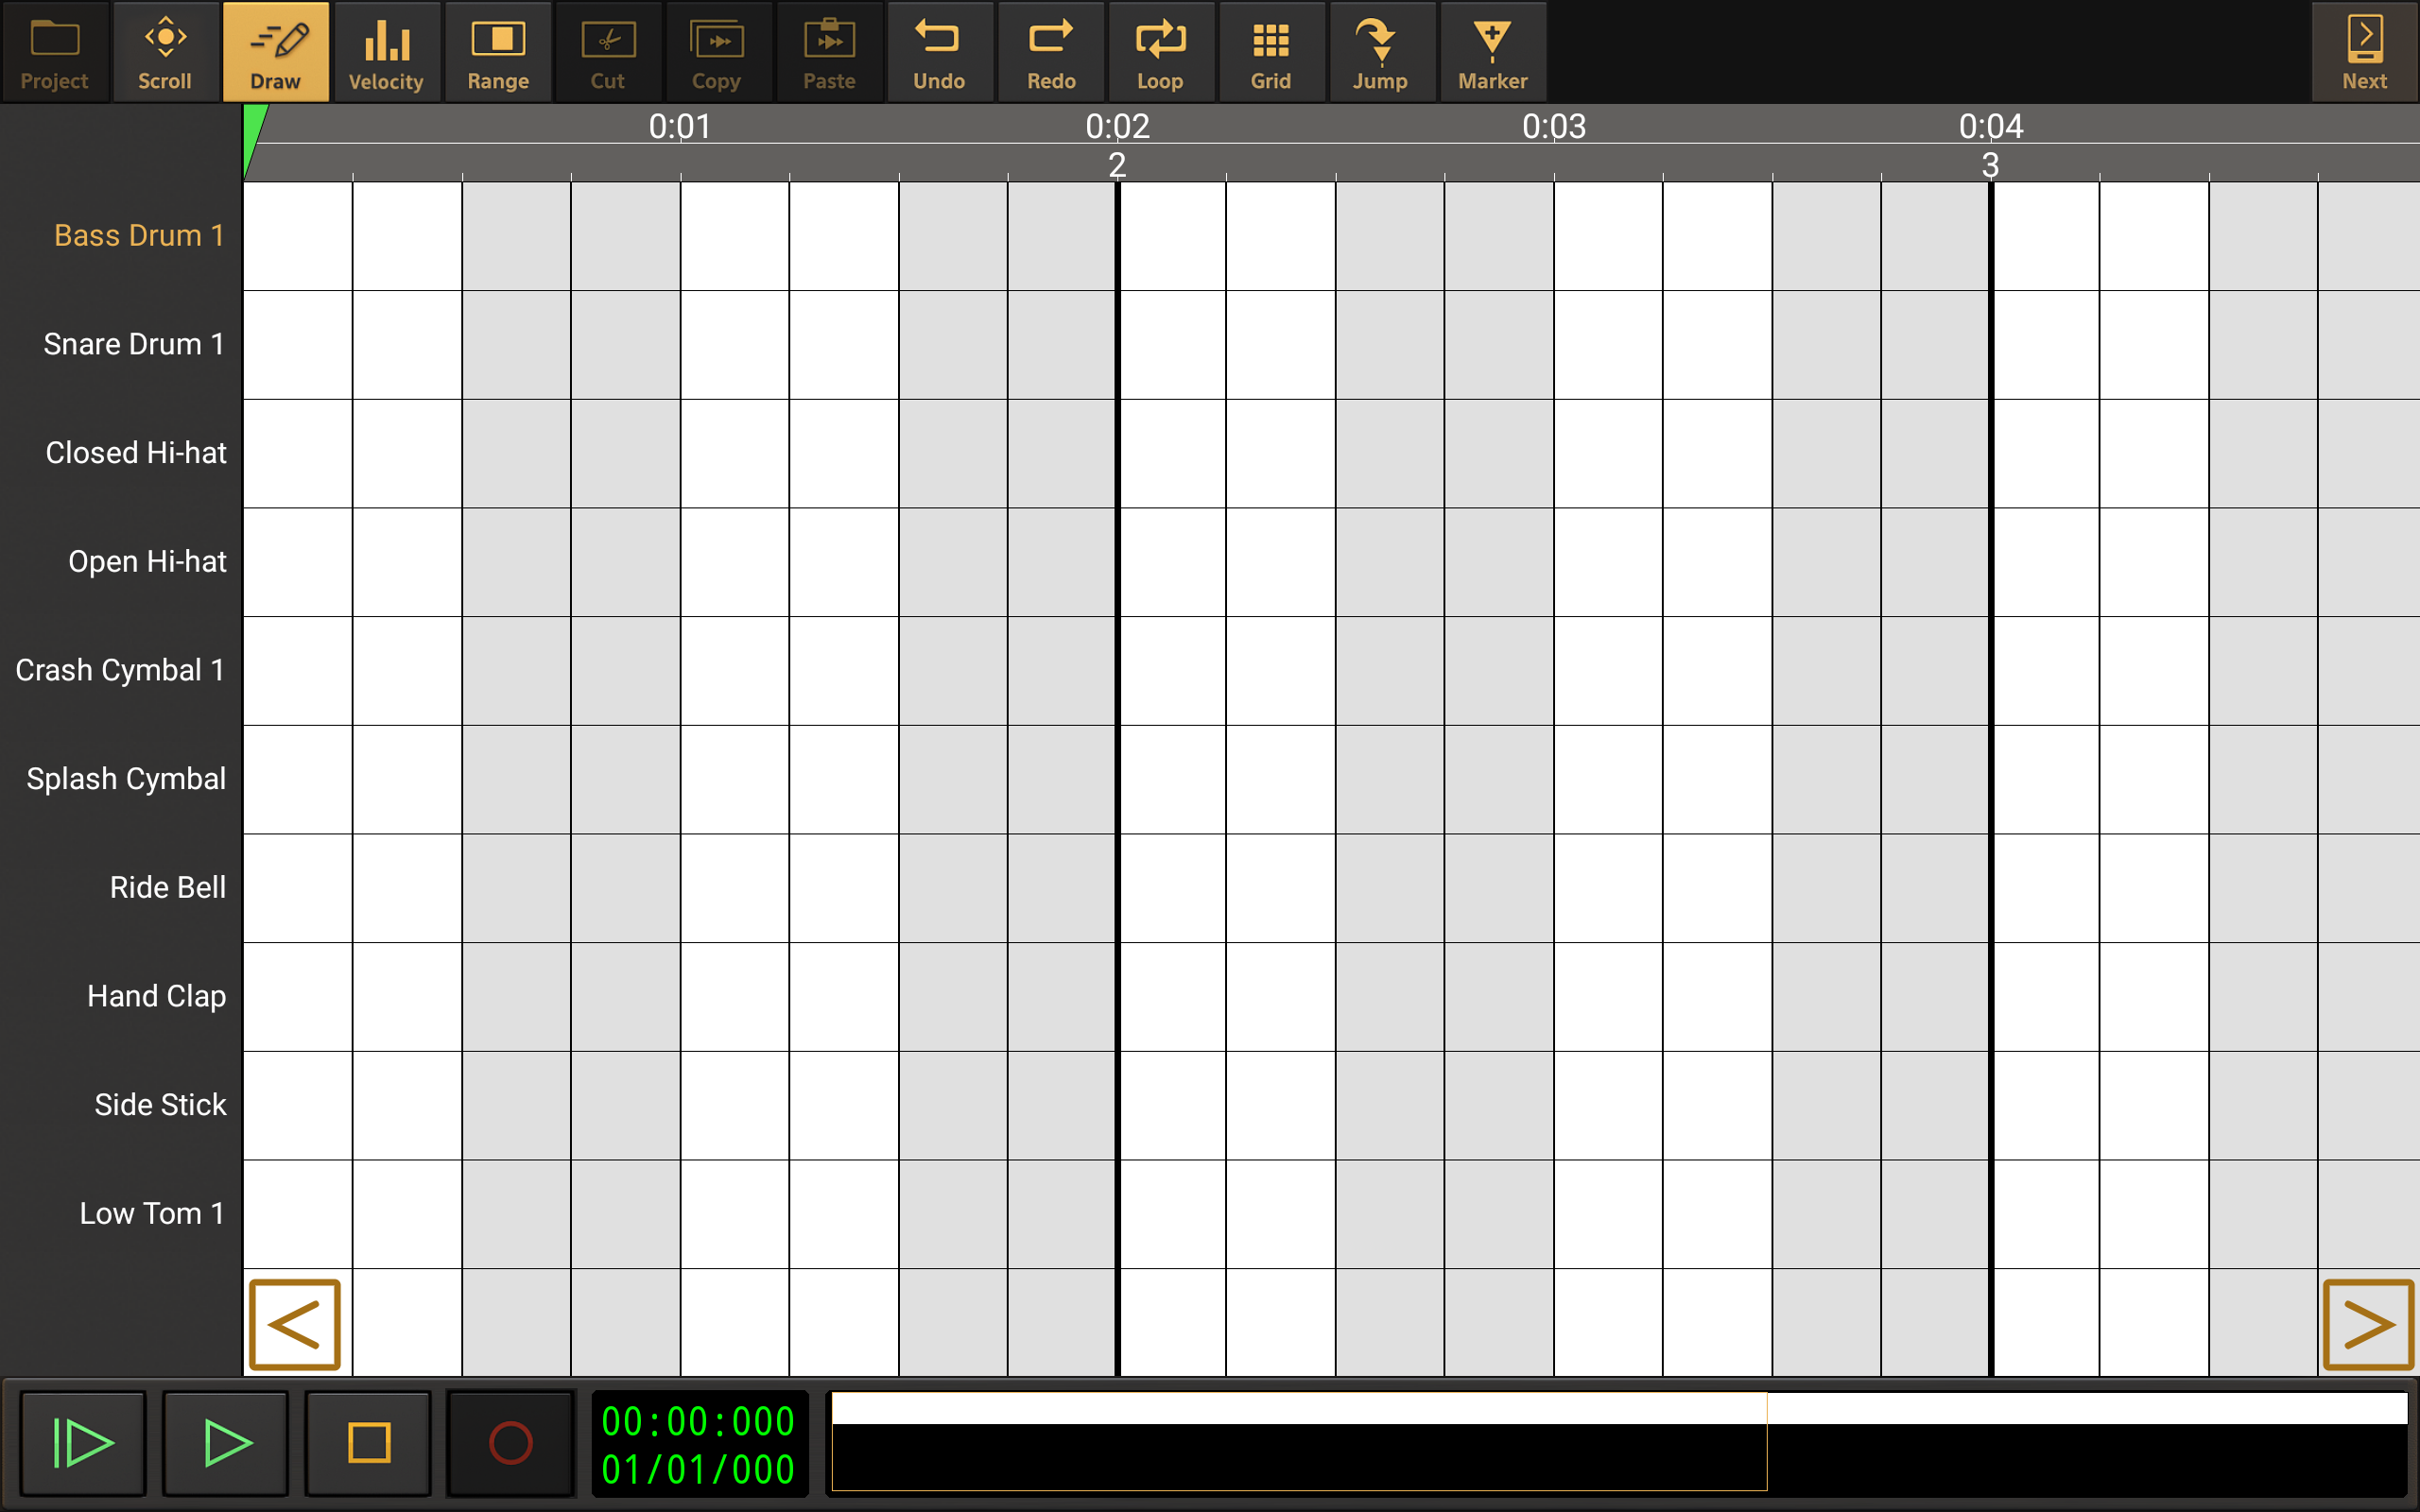
- Tap on the white/gray grid to add/remove your drum beats for each type of drum shown down the left hand side (you can scroll down to see and add more types). Each red dot will trigger the instrument displayed at the left panel. Click on the Play from beginning of project
 button to start playback and hear your beats. Press the Loop
  button to activate looped playback mode if you want. Position the yellow loop markers
  to define the section to be looped.
- If you want to change the tempo/speed of your project, tap on the Playback Timer Display
 to open the Tempo Settings.
- Once you're happy with your beats, press the Next
 button, top right, to return to the main Arranger Screen area.
- Press the Add Track button again and, this time, add a MIDI instrument track. This will open the Instrument Selector again. The Stereo Grand piano preset from the Default Sound Set will be selected by default. Select a different instrument on the right if you want and press OK to return you to the Arranger Screen.
- Your MIDI instrument track has been created and named Track 2 but it has no clip on it yet. You now have the choice of whether you want to use the virtual keyboard (or connected external MIDI keyboard if you have one) to input notes and 'live record' onto a clip on the track OR enter note events on the Piano Roll Editor to compose your music. If you want to record using the onscreen keyboard, press the Arm
 button on the track's Channel Strip, to the left, to arm the track, ready for recording to, and open the onscreen keyboard interface. On this occasion, though, we shall use the Piano Roll Editor. To do this, double tap in Track 2's timeline between the beginning of the project and the start of the second bar (as indicated above, on the Timeline/Marker Display
  ). This will ensure that the MIDI clip created will be place at the beginning of the project and simultaneously open the Piano Roll Editor, seen here.
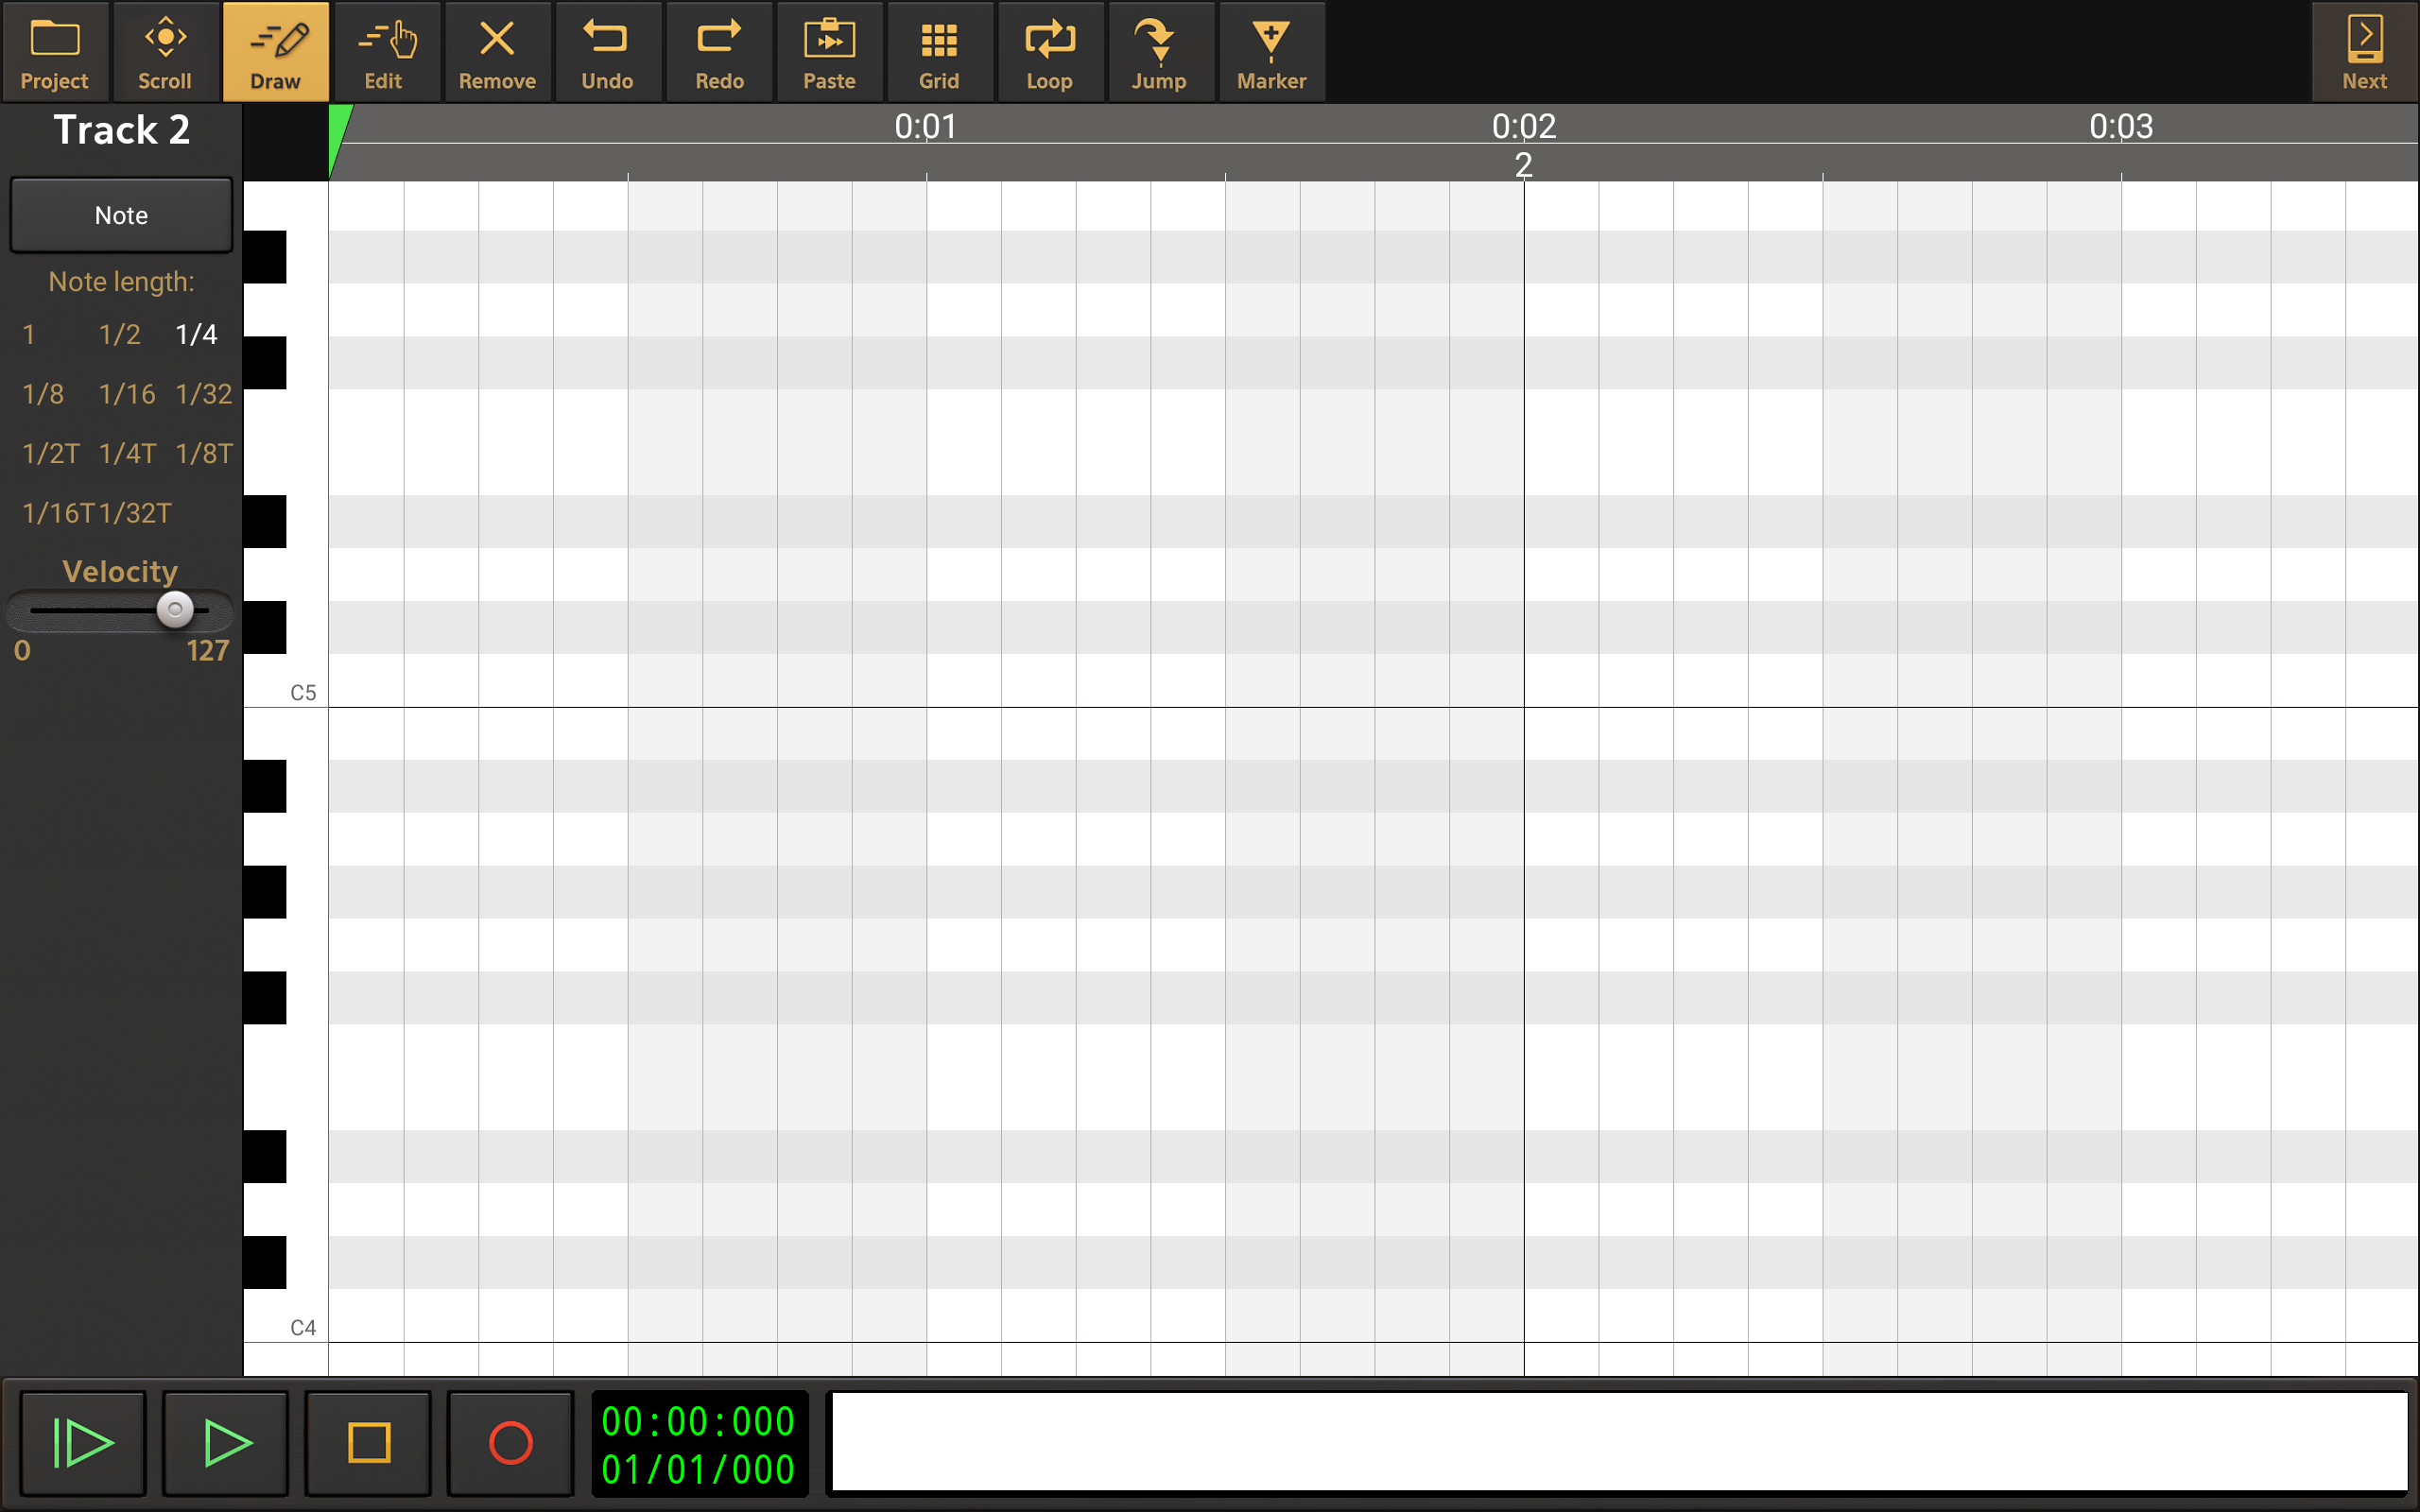
- When in Draw Mode
 , as you will be by default upon opening the Piano Roll Editor, tap on the white/gray grid to place your notes. The vertical axis represents the pitch of the note and the horizontal axis represents time, and therefore, the length of the note. Select your note length on the upper left of the display. Place notes within the same time period to form chords. Switch to Remove mode
  to remove notes (there are many ways to interact with and edit notes on the grid but, for the sake of simplicity, they're not being mentioned in this quick tutorial: for full details, please see here).
 - Once you are done, press the Next button, top right, to return to the main Arranger Screen area again. At this moment you will see two tracks, each with a (MIDI) clip on them. To record some audio, pressing the Record
 button would directly create a new audio track and start recording audio (if you don't have any track armed). You could sing along the first tracks or play an acoustic instrument. If you don't have any headphones or headset connected, you will notice when playing back the recording, that audio from the first two tracks is being recorded faintly on the third (audio) track. This is because the device's microphone will pick up any sound, including the audio that you would be playing through the speaker. Therefore, it is highly recommended to use headphones, a headset or USB audio interface/mic when recording audio, to keep the signals separated.
The next steps could be recording more tracks, continuing recording on existing tracks, editing clips, applying effects, making a mix, etc. The next chapters will go into detail on all these topics.