Vocal Tune Studio Standalone App - Getting started
NOTE. Though Vocal Tune Studio can be fully utilized in its standalone form, the app is really designed to be used as an AUv3 plug-in in conjunction with a host app. This will allow it to be used within full song productions in a way which the standalone app cannot do because it can only work on one audio file in isolation at a time (and only one monophonic signal at a time within the Pitch and time correction mode as explained here). What's more, loading Vocal Tune Studio as an AUv3 plug-in within a host will allow you to set the host to the correct time signature and tempo for your piece, which Vocal Tune Studio will follow, meaning that, for example, bar lines will appear at the correct position in the interface which is very useful when applying time correction to your recorded vocal performance.
When you open the Vocal Tune Studio Standalone app by tapping on its icon on your device, presuming you have previously gone through the first use setup process as detailed here, the first thing you'll see after the splash screen is the following pop-up which allows you to select between Vocal Tune Studio's two modes: Pitch and Time Correction or Time Correction only. Pitch and Time Correction mode is designed to be used with solo vocals and other monophonic recordings as discussed here. Time Correction only mode can be used with all types of audio. If you have selected Always start in Pitch and Time mode in the Settings available via the Three Dot Button ![]() , then this dialog will not be shown.
, then this dialog will not be shown.
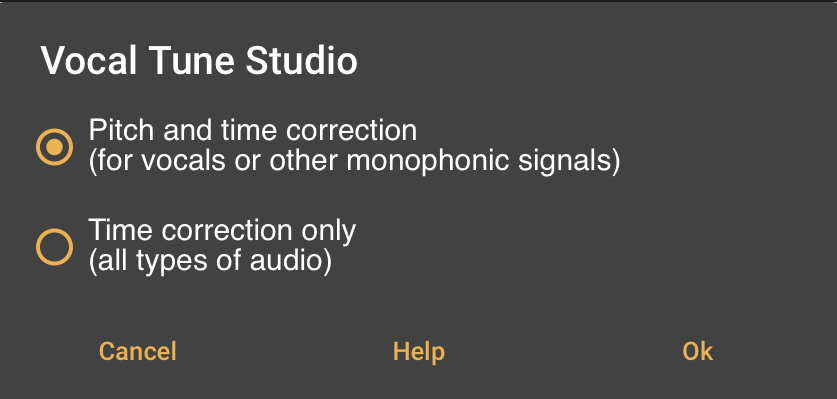
Select the mode you require and press Ok.
Vocal Tune Studio then opens in the selected mode. Below is Vocal Tune Studio Standalone opened in Pitch and time correction mode.
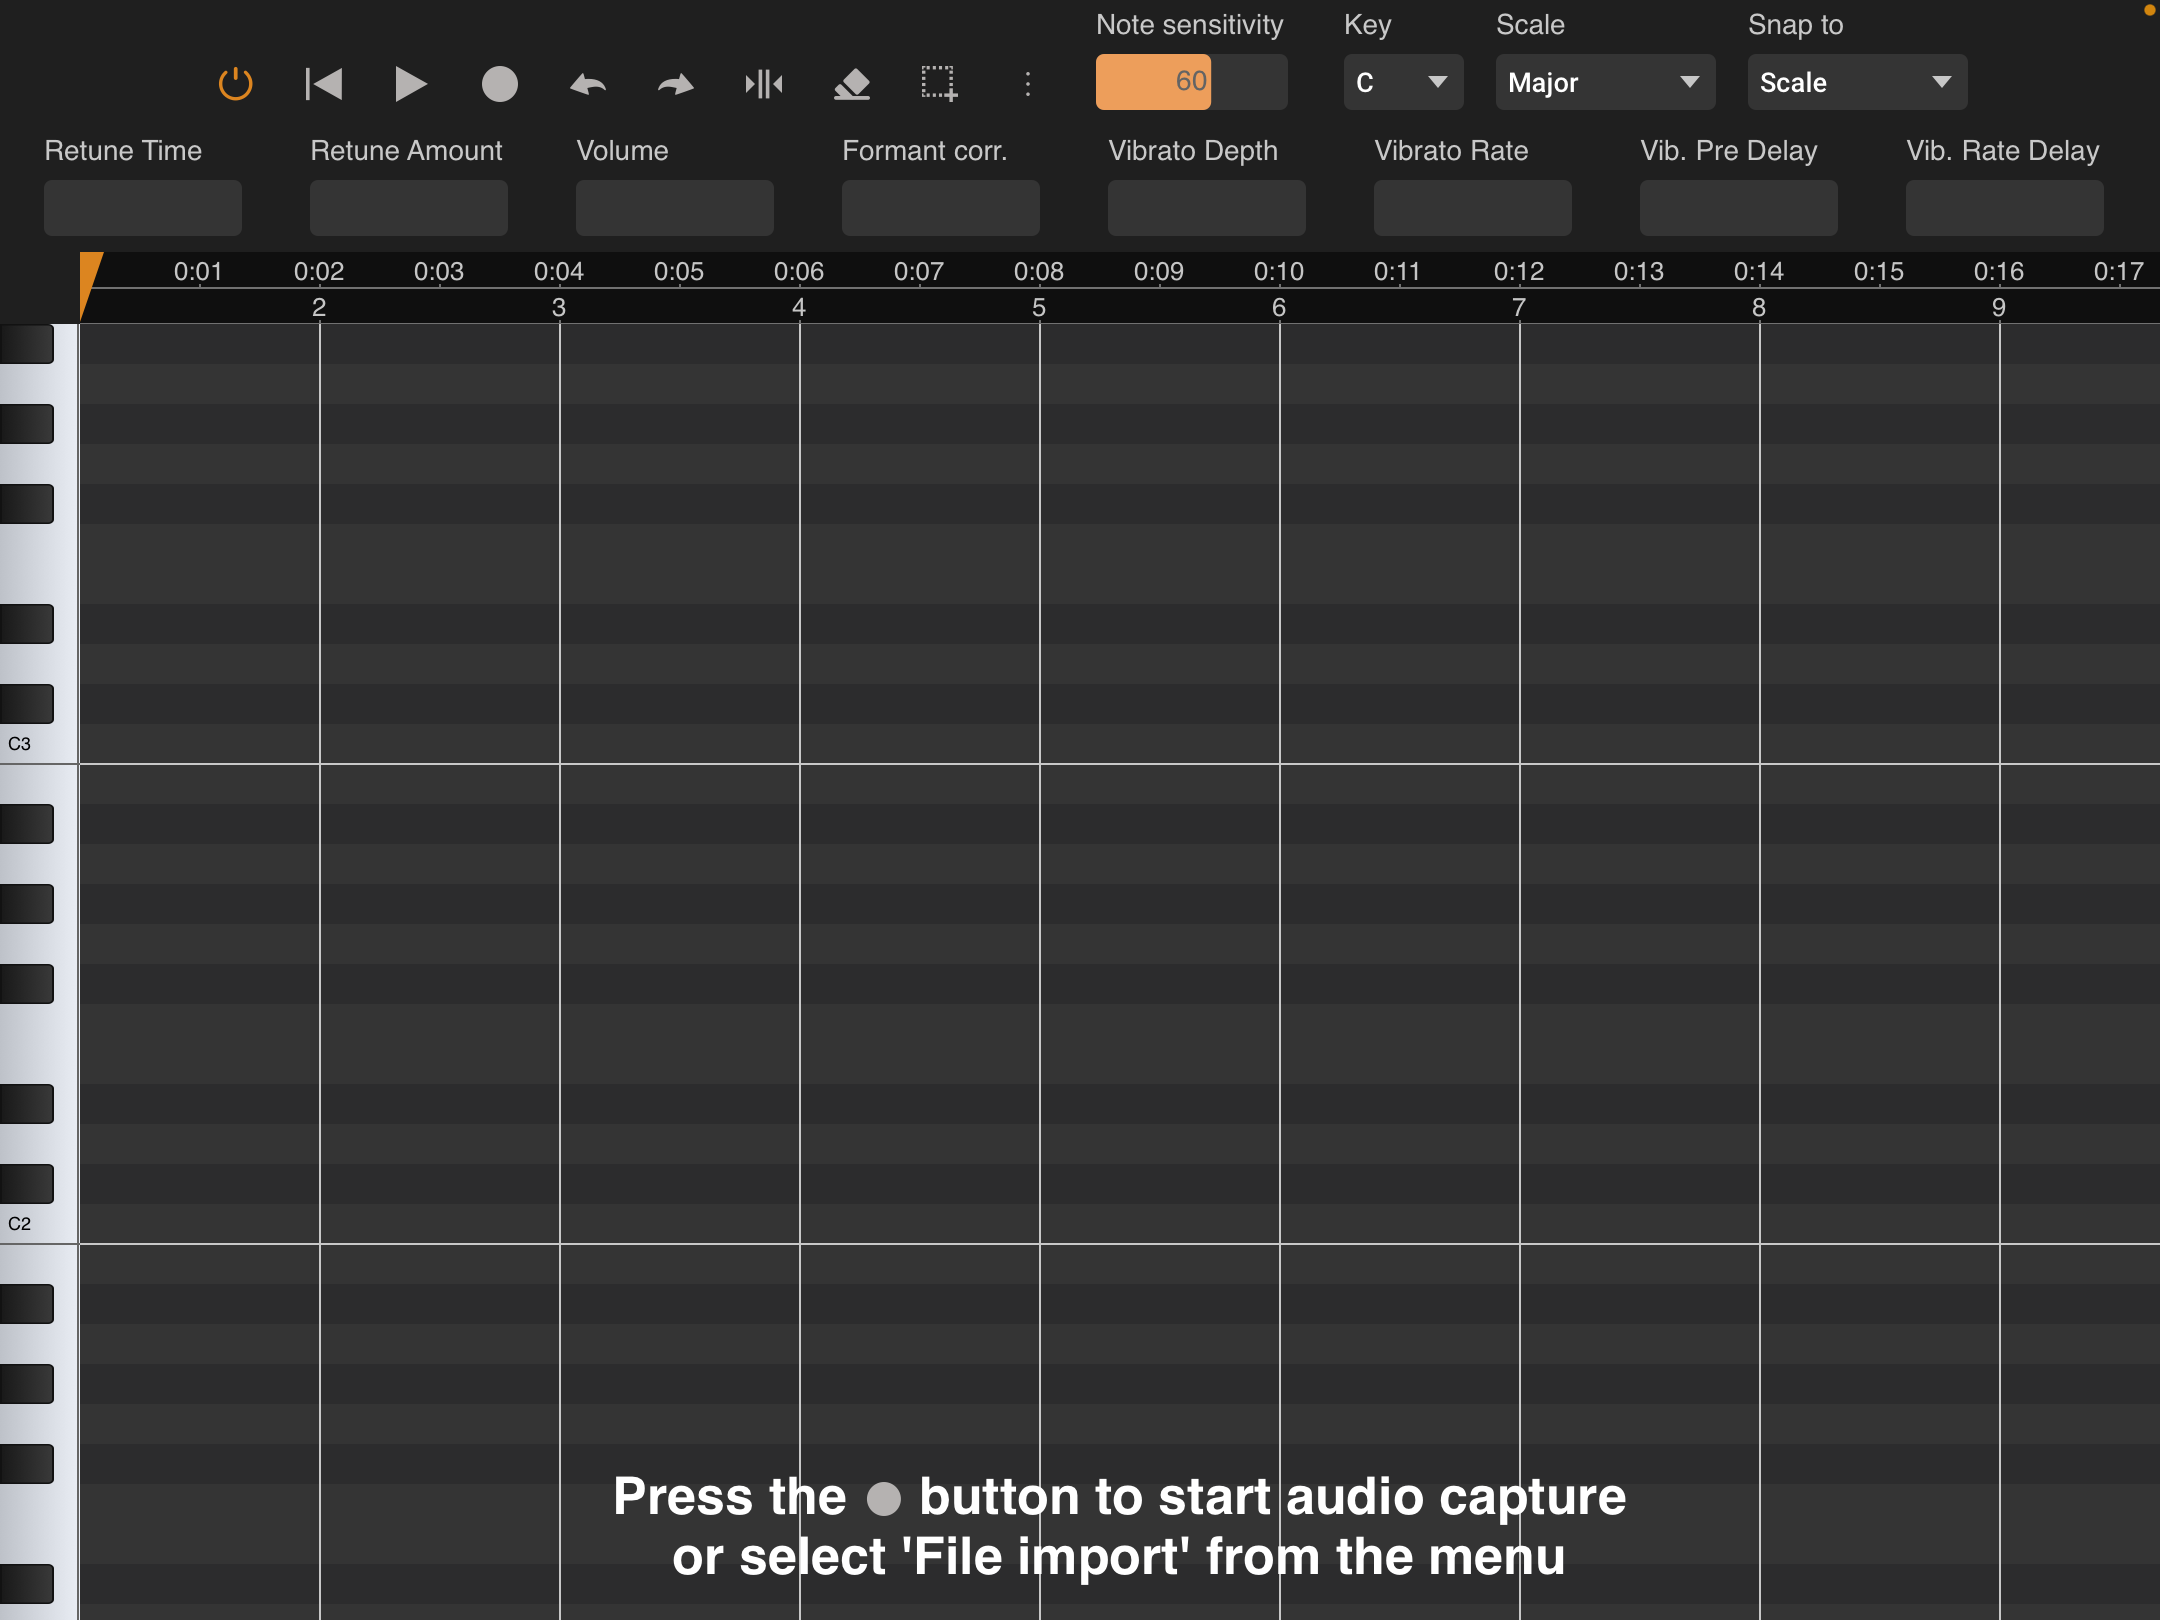
As can be seen, the interface is initially empty. This is because Vocal Tune Studio first needs some audio data to analyze and process.
In the Standalone version, you have two options: record your vocal performance directly using the device microphone or a microphone connected to your device, or import an audio file of your vocal performance you've previously recorded. In both instances, please read the advice here which will guide you towards making recordings most suitable for Vocal Tune Studio: in short, Pitch and time correction mode will only work correctly with monophonic sound sources (sources which make only one note at a time such as the solo human voice) and ideally prefers monophonic recordings (only one audio channel present) as well though if given a stereo signal it will just use the left hand channel for analysis and apply any processing identically to both channels.
NOTE. Please be aware that Vocal Tune Studio Time correction only mode (in both the standalone and AUv3 versions) can be used with any audio file at all, containing any type of sound source, monophonic or polyphonic.
To record a live vocal performance using the device microphone, simply press the Record ![]() button. Once pressed, recording will start and the Play
button. Once pressed, recording will start and the Play ![]() button next to the Record button will change to a Stop button which you can press to stop the recording.
button next to the Record button will change to a Stop button which you can press to stop the recording.
To import an audio file, press the Three Dot Button ![]() and select Import audio file from the options menu. The system file browser will then open to allow you to navigate the the audio file you wish to import. Once found, tap on the file and it will be imported into Vocal Tune Studio.
and select Import audio file from the options menu. The system file browser will then open to allow you to navigate the the audio file you wish to import. Once found, tap on the file and it will be imported into Vocal Tune Studio.
Once you stop recording or tap on an audio file to import it, Vocal Tune Studio will analyze the audio to identify the pitch data it contains. If you have Estimate key/scale selected in Vocal Tune Studio's Settings (as is selected by default) AND Vocal Tune Studio has been able to estimate the key and scale, you will be shown the following dialog.
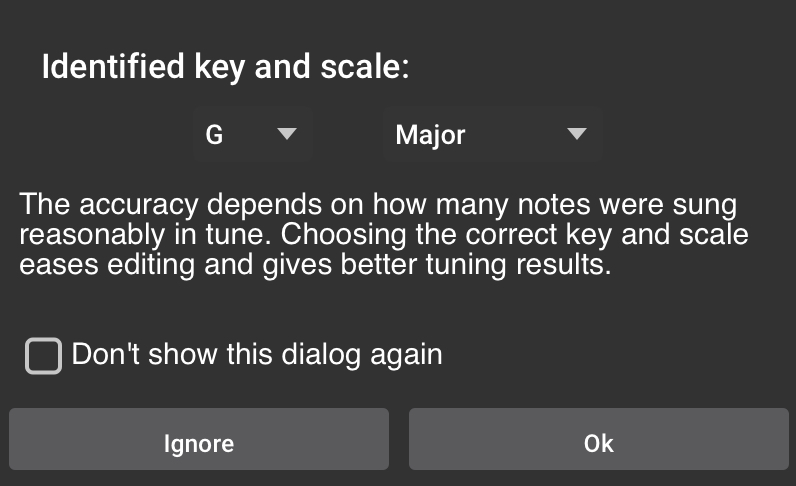
As can be seen, the accuracy of the key and scale estimation is dependent on the number of notes sung reasonably in tune available for such a judgment to be made. If the wrong key and scale has been estimated, you can use the drop-down selections to enter the correct key and scale. The key and scale can also be changed from within the Vocal Tune Studio interface. You can also choose to Ignore the identified key and scale, which will open your clip in chromatic (all notes) mode. If you would also rather Vocal Tune Studio to open in chromatic mode in the future, rather than estimating a key and scale, you can check the box for Don't show this dialog again. This option can also be selected/deselected as Estimate key/scale in Vocal Tune Studio's Settings available via its Three Dot Button ![]() . If Vocal Tune Studio has not found enough notes in reasonable pitch to be able to estimate the key and pitch, the above dialog will not be shown and it will open in chromatic mode automatically.
. If Vocal Tune Studio has not found enough notes in reasonable pitch to be able to estimate the key and pitch, the above dialog will not be shown and it will open in chromatic mode automatically.
Once you have selected your desired options in the above dialog your clip will be opened in Vocal Tune Studio Pitch and Time correction mode.
If you initially selected Time correction only mode, your audio clip will have been opened without the last step being necessary.
Once audio is present within Vocal Tune Studio standalone, should you want to loop a particular section during playback, you can do so by either double tapping on the Timeline ![]() or by selecting Loop markers via theThree Dot Button
or by selecting Loop markers via theThree Dot Button ![]() options both of which will show/hide the Loop Markers
options both of which will show/hide the Loop Markers ![]() and activate looped playback. The loop markers can be freely positioned to select the section of audio to be looped.
and activate looped playback. The loop markers can be freely positioned to select the section of audio to be looped.
Once completed, to export your corrected audio, select Save to audio file from the Three Dot Button ![]() options. This will render the corrected audio and allow you to select the location for the file to be saved to.
options. This will render the corrected audio and allow you to select the location for the file to be saved to.
To export the notes from the piano roll within Vocal Tune Studio as MIDI data, select Export as MIDI from the Three Dot Button ![]() options. This will allow you to name and select the location for the exported file to be saved to.
options. This will allow you to name and select the location for the exported file to be saved to.