The Mixer Screens
Audio Evolution Mobile has two mixer screens; one displaying all of your project's tracks and another displaying the Master output channel and any Group/auxiliary bus channels present in your project. They can be accessed by pressing the Next ![]() button, top right, on the Arranger Screen: one press takes you to the Mixer Screen, another takes you from there to the Master Screen and one more takes you back to the Arranger Screen.
button, top right, on the Arranger Screen: one press takes you to the Mixer Screen, another takes you from there to the Master Screen and one more takes you back to the Arranger Screen.
The Mixer Screen
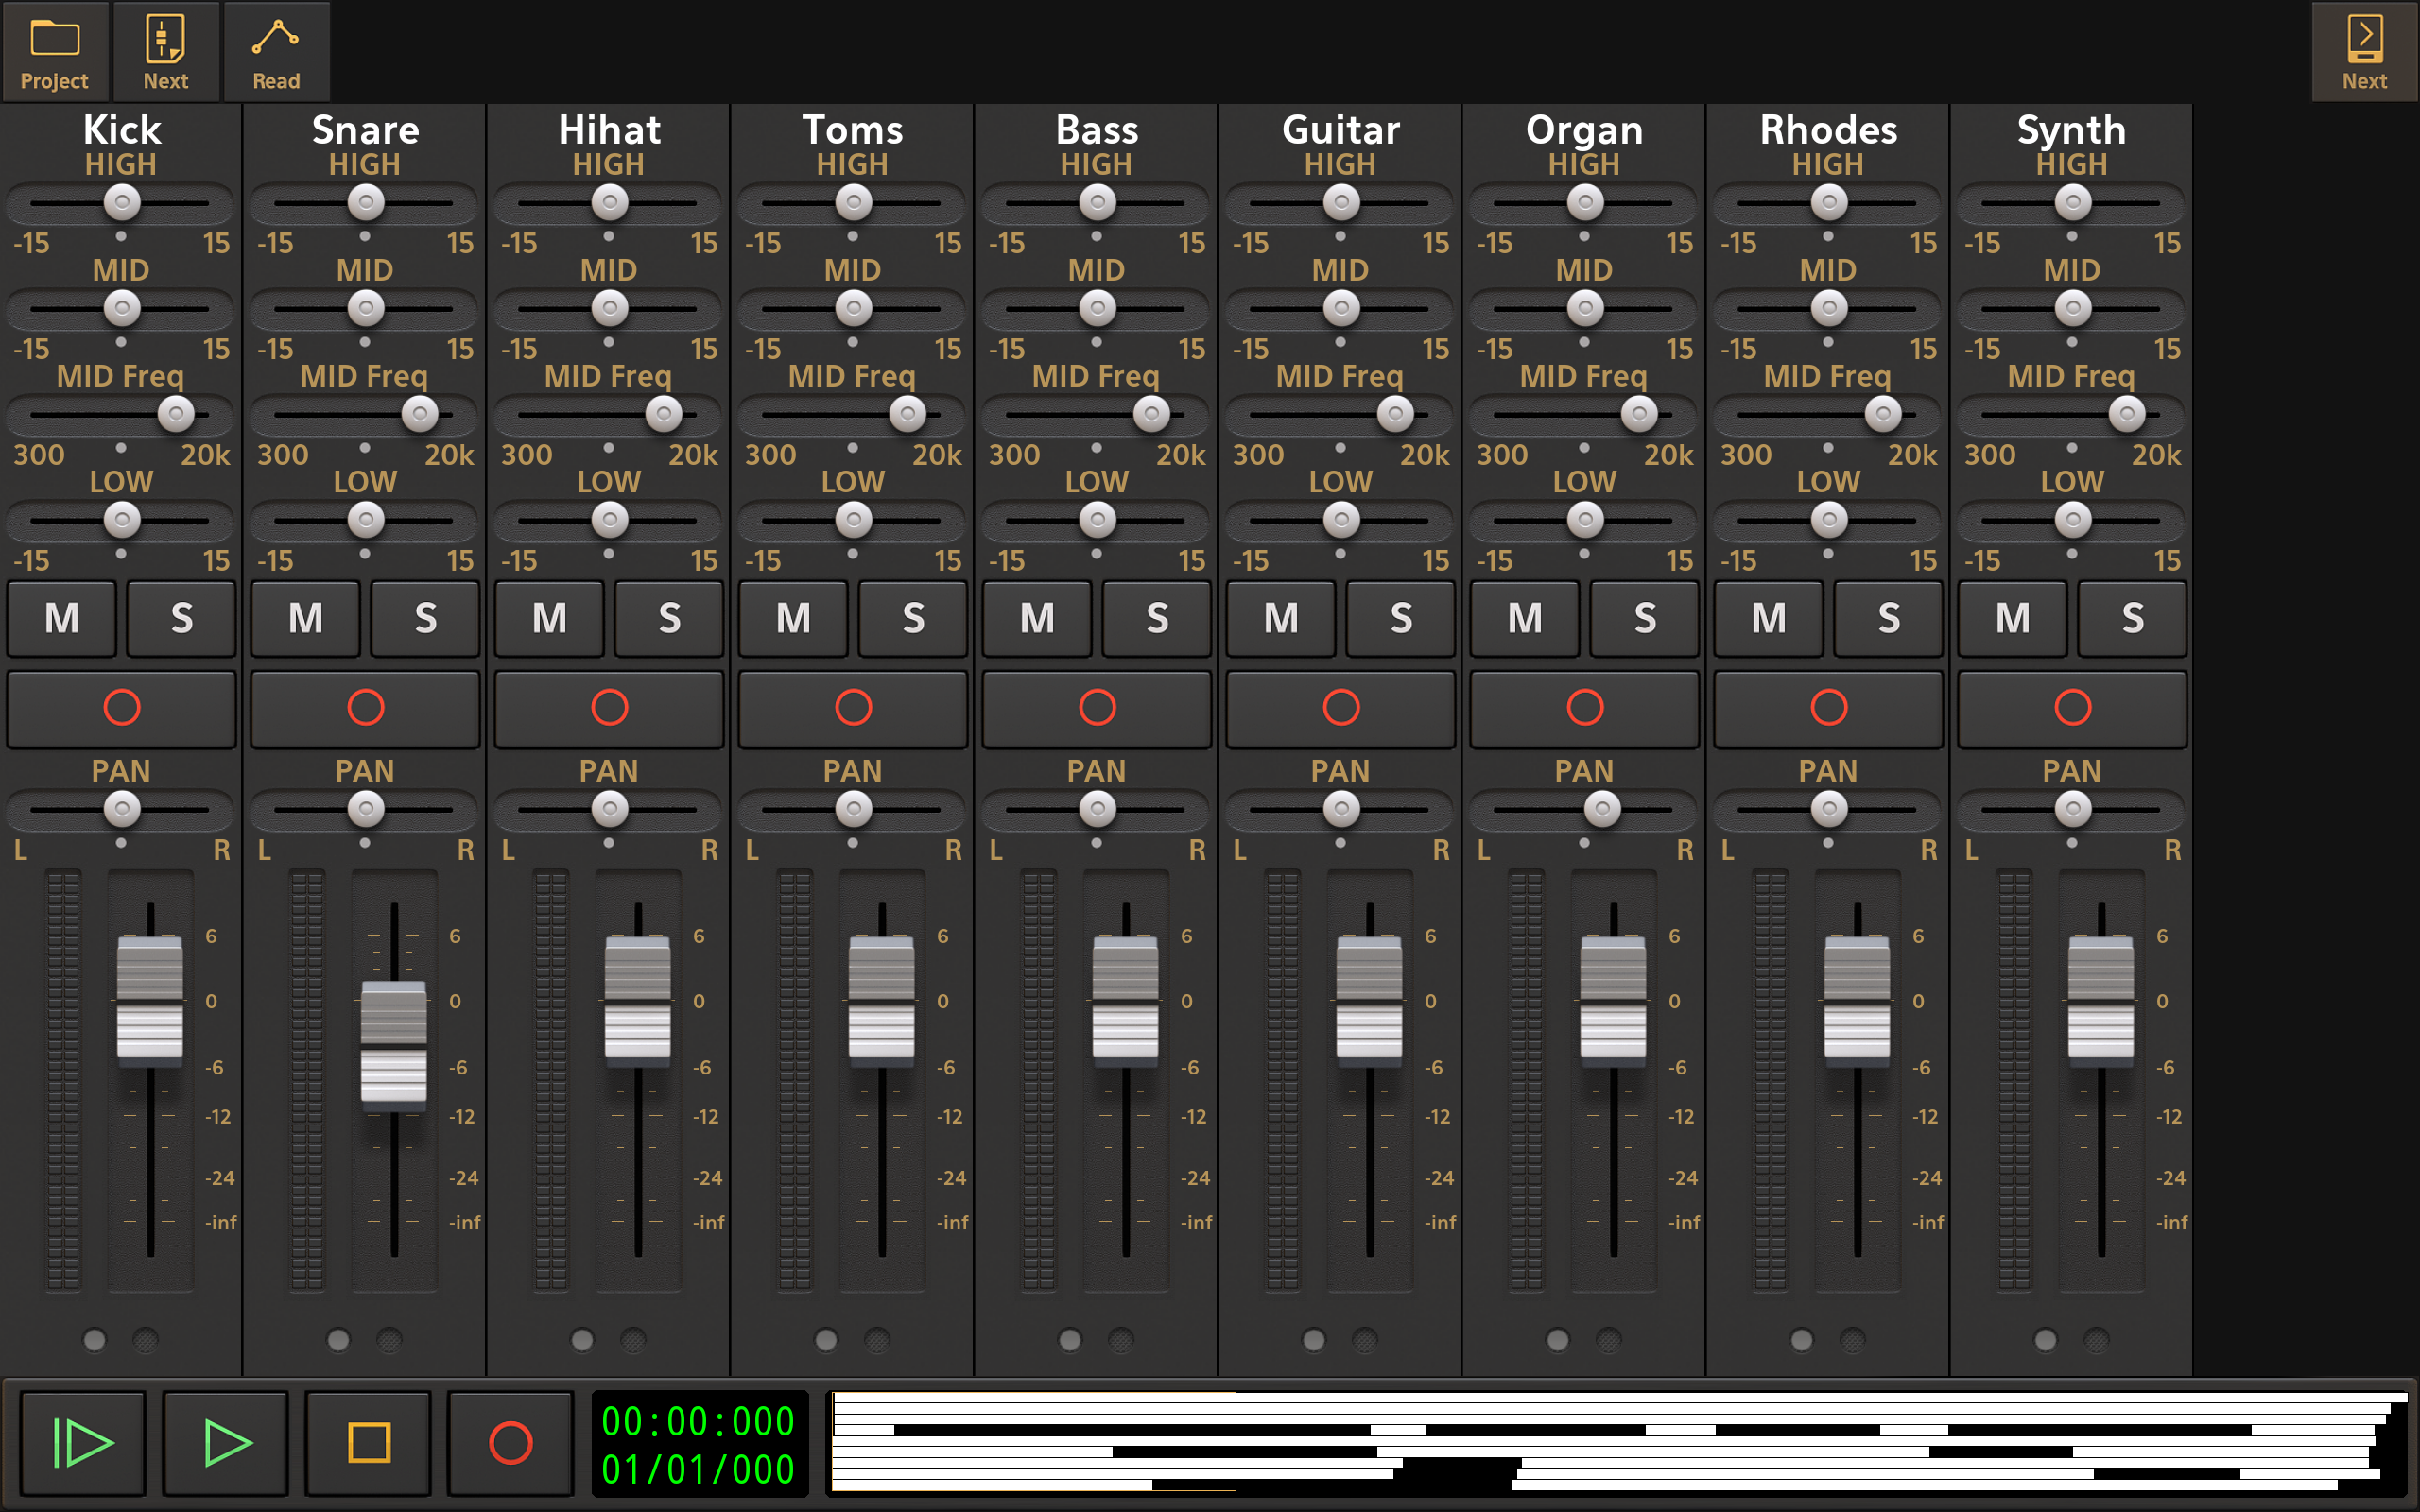
This screen displays the Channel Strips of all of the tracks in your project next to each other in the manner of a mixing console. If there are more tracks in the project than will fit on the screen all at once, you can swipe to the left over the names on the channel strips to access the channel strips of tracks which are not displayed initially.
Having all of the channel strips laid out next to each other like this allows you to much more easily set the relative volume of each track, position them in the stereo soundfield using the panorama (PAN) control, and make other mixing decisions to bring them all together and perfect your project, ready for export.
The controls found on the channel strips are covered in depth here.
In addition to the buttons and controls/displays familiar to you from the Arranger Screen, there are two other buttons at the top of the screen, next to the Project ![]() button.
button.
Since the channel strips contain more functionality than can be displayed all at once, their display is split into several 'pages'. The smaller your device screen, the greater the number of pages which will be required to show all of the functions. You can select different pages using the gray buttons ![]() at the bottom of each strip. However, pressing the Next
at the bottom of each strip. However, pressing the Next ![]() button (not to be confused with the other Next button at the top right of the screen) allows you to move all of the channel strips' displays onto the next page at the same time. Repeated presses will take you through all of the pages in order and cycle back to the first page from the final page.
button (not to be confused with the other Next button at the top right of the screen) allows you to move all of the channel strips' displays onto the next page at the same time. Repeated presses will take you through all of the pages in order and cycle back to the first page from the final page.
The button next to the Next button is the Read ![]() /Touch
/Touch ![]() Mode button. When pressed to activate Touch Mode, any changes made to parameters (with a few exceptions) during playback or recording will be recorded as automation. This means those same actions will automatically be repeated upon the next playback without you having to touch the controls. So, for example, if you want to vary the volume of tracks through the course of your project, you could use this method to automate movements of the tracks' volume sliders. For more information on Touch Automation, please see here.
Mode button. When pressed to activate Touch Mode, any changes made to parameters (with a few exceptions) during playback or recording will be recorded as automation. This means those same actions will automatically be repeated upon the next playback without you having to touch the controls. So, for example, if you want to vary the volume of tracks through the course of your project, you could use this method to automate movements of the tracks' volume sliders. For more information on Touch Automation, please see here.
Use the other Next ![]() button, top right, to move to the Master Screen.
button, top right, to move to the Master Screen.
The Master Screen
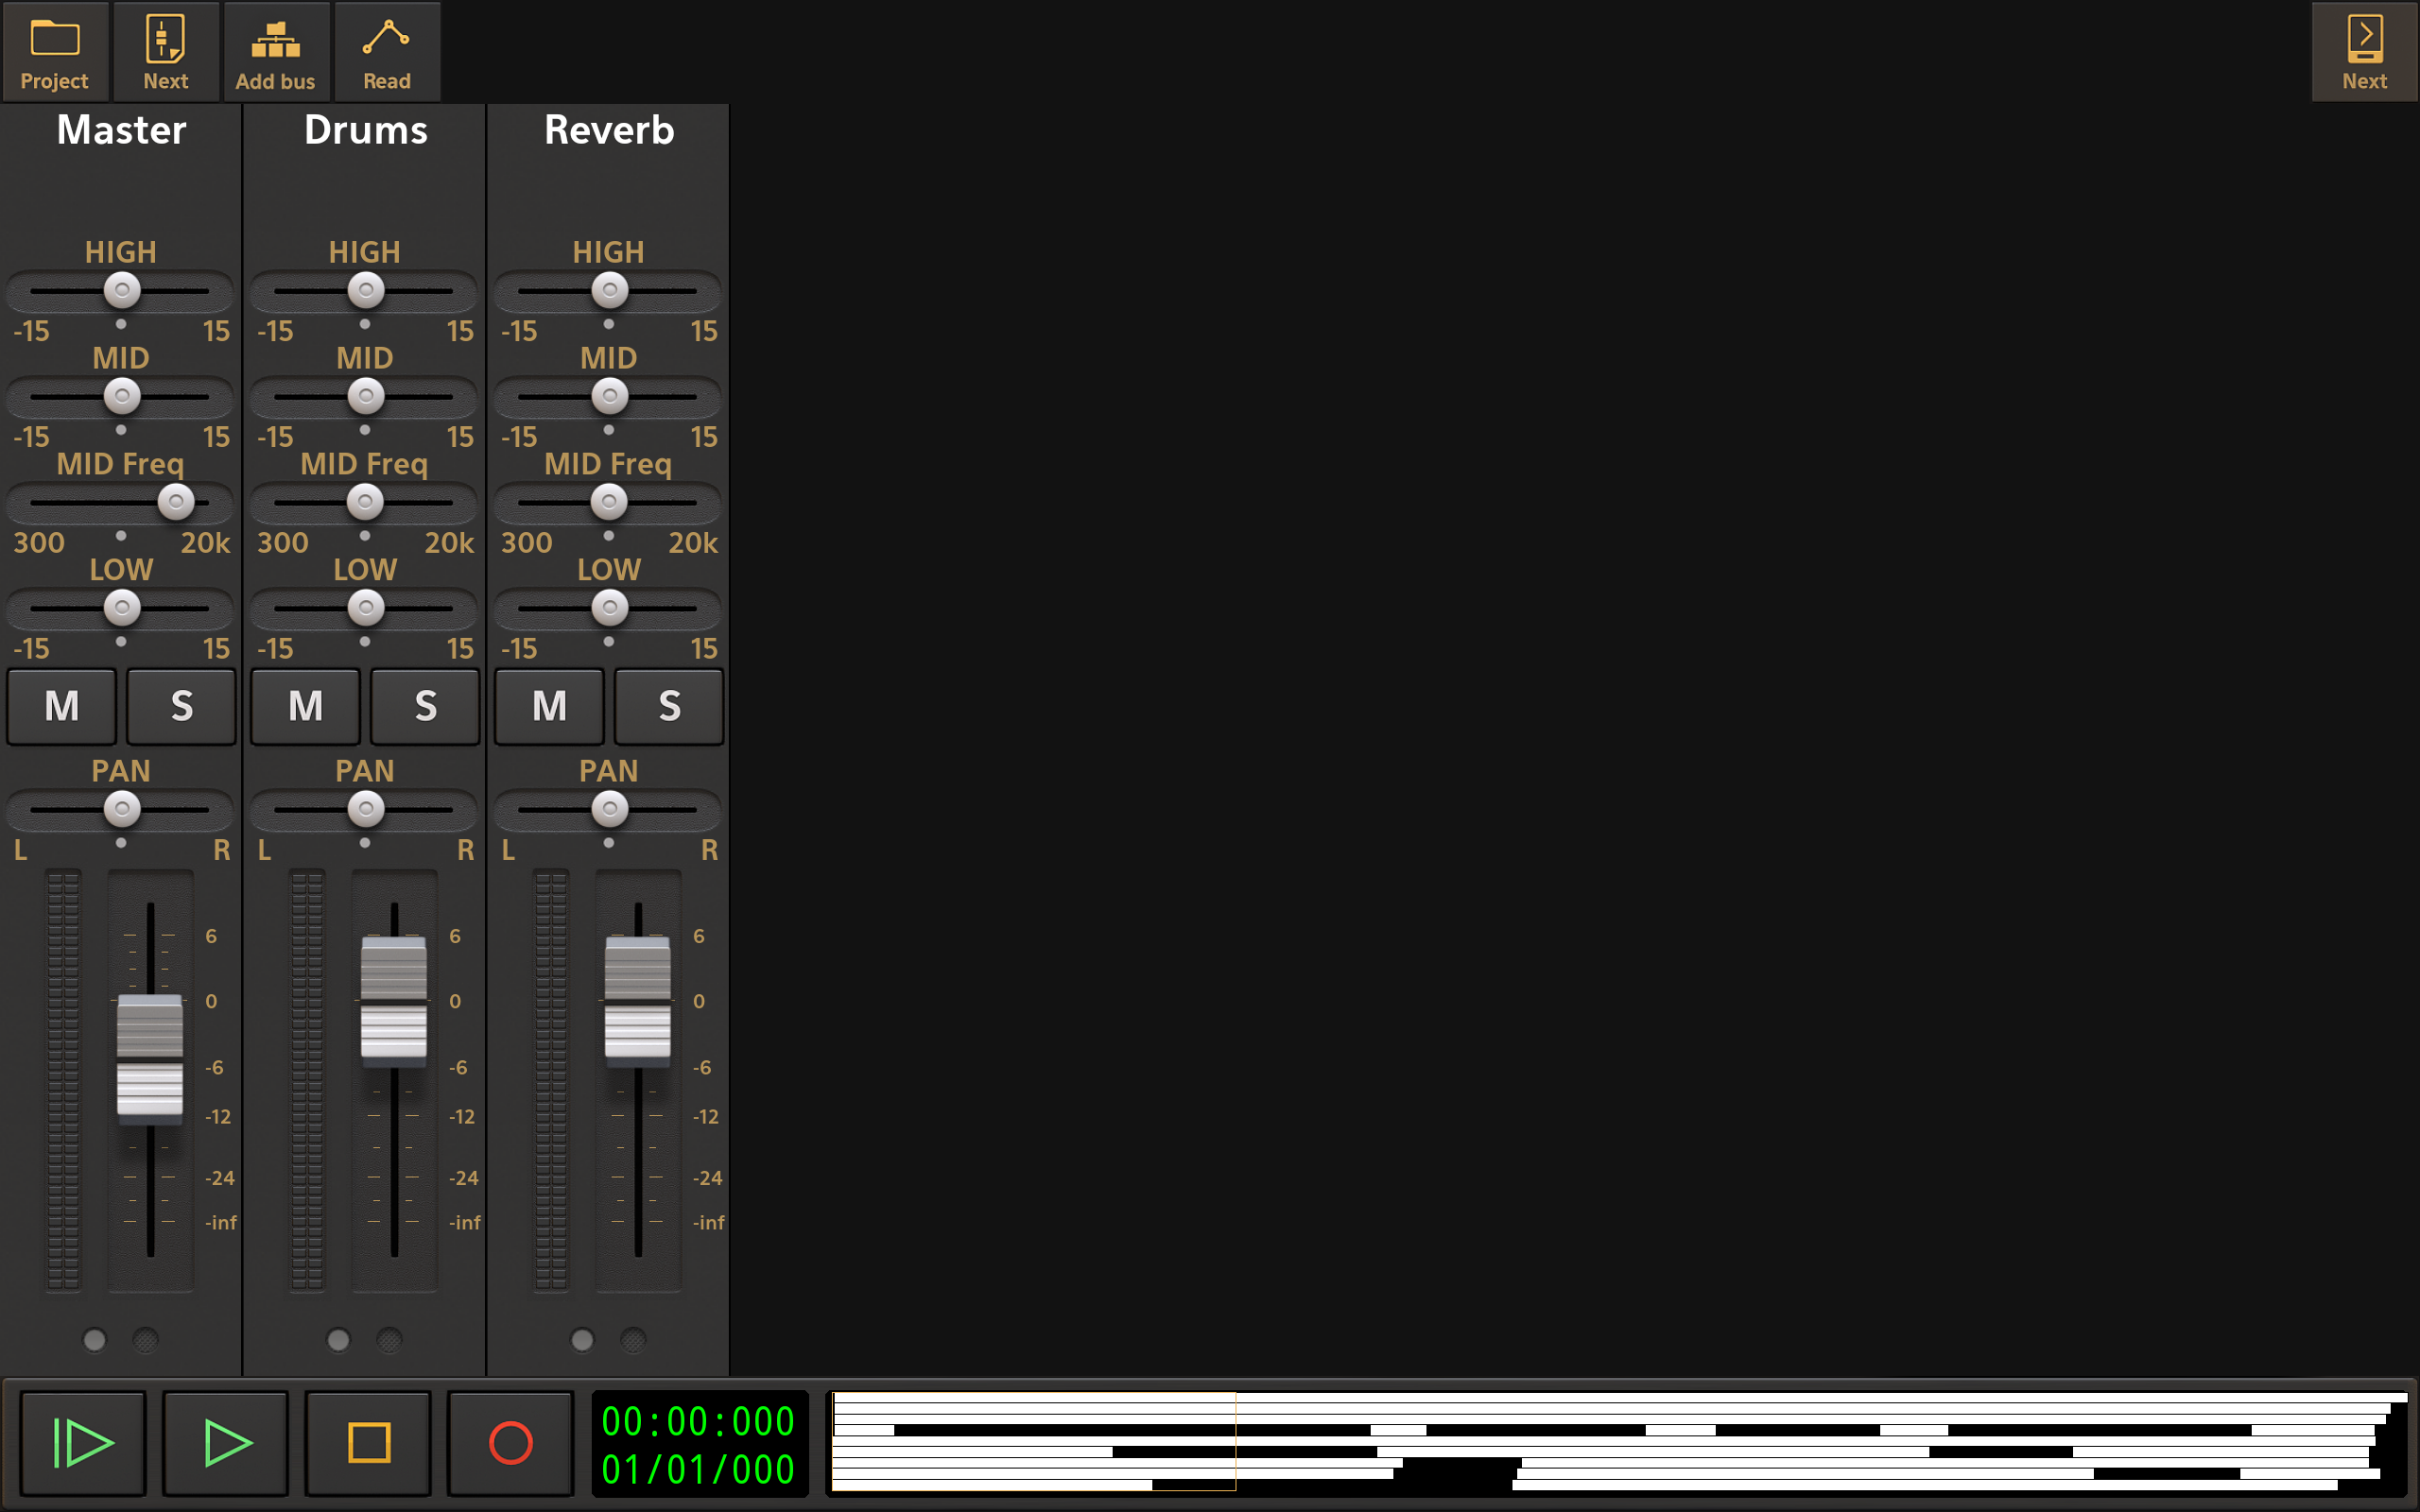
The Mixer Screen displays all of the tracks in your project next to each other. The Master Screen displays the output channels, the Master Output and any Groups/Buses you have created to use in your project.
Groups/Buses can be created for various purposes. In the example above, one group/bus has been created and named Drums. This is the channel that all of the drum tracks (Kick, Snare, Hihat, Toms) have had their Output set to. This means you can set up the parameters for all of the drum tracks in relation to each other on the Mixer Screen and then use the Drums group/bus here to control the overall level of the entire drum kit combined. For more details on this, please see here.
The second group/bus that has been created in the example above has been named Reverb. This channel is being used as a Send/Return effect for some of the tracks in the project. Since several tracks required the same reverb effect, they could either all have individual reverb effects placed on each of their FX Grids, or they could all use a single effect Send group/bus. Naturally, using just one instance of the reverb effect (on the Send group/bus's FX Grid), as opposed to several instances, is going to be much more CPU friendly and therefore preferable. For full details on using effect Sends, please see here.
The Master channel is the final output of all of the audio of your project, whether that is audio coming directly from the tracks or audio which has first been routed through Group/Bus channels.
The controls found on the channel strips are covered in depth here with extra notes specific to Master and Groups channel strips here.
In addition to the buttons and controls/displays familiar to you from the Arranger Screen, there are three other buttons at the top of the screen, next to the Project ![]() button.
button.
The Next ![]() and Read
and Read ![]() /Touch
/Touch ![]() buttons are described above in the Mixer Screen section and have the same functions here.
buttons are described above in the Mixer Screen section and have the same functions here.
In-between those two buttons can be found the Add bus ![]() button. Press this to add one or more Groups/Buses to your project. Groups can also be created by long pressing just below an existing Group's name on its channel strip to open the Group Options, via the FX Send Group Selectors
button. Press this to add one or more Groups/Buses to your project. Groups can also be created by long pressing just below an existing Group's name on its channel strip to open the Group Options, via the FX Send Group Selectors ![]() on a track's channel strip, or via the Send blocks on a track's FX Grid.
on a track's channel strip, or via the Send blocks on a track's FX Grid.
As just mentioned, long pressing in the area on their channel strip just beneath their name will open the Group Options seen here.
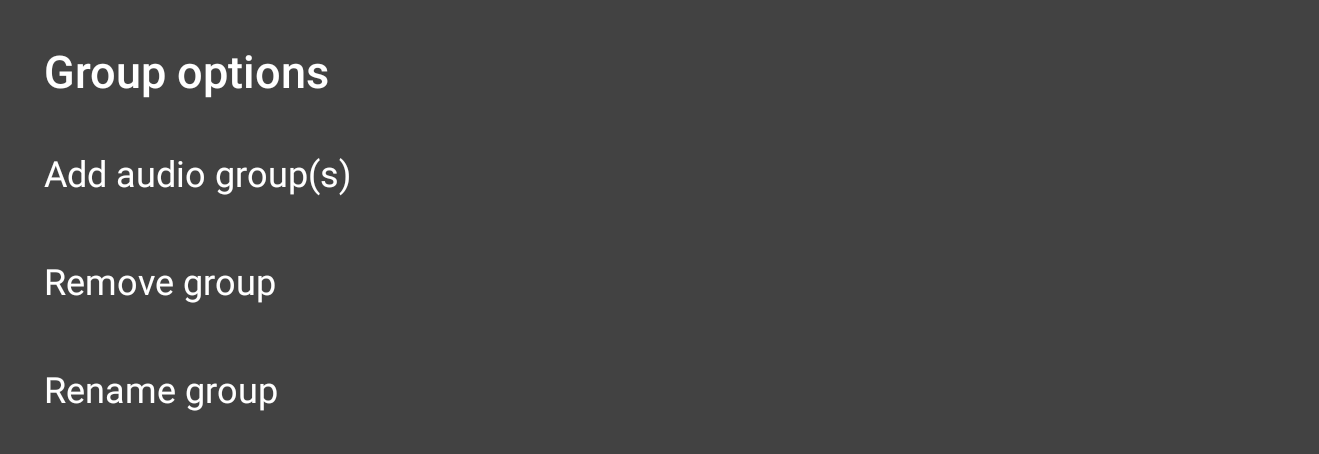
As can be seen, these options allow you to add further Groups to your project, remove the Group long pressed upon to open these options, and also rename that Group. Groups can also be renamed by long pressing on their current name on their channel strip.
Use the other Next ![]() button, top right, to move to the Arranger Screen.
button, top right, to move to the Arranger Screen.