MIDI Remote Setup
With the MIDI remote control feature, you can control mixer (volume, panning, mute, etc.), instrument and transport (play, stop, record, etc.) buttons and sliders from an external MIDI device. This can be a dedicated MIDI remote controller (like a Korg nanoKontrol, Behringer BCF2000, etc.) or buttons and controls on a MIDI keyboard.
Since every MIDI device is different in terms of number and kind of controls and you may have a personal preference on which knob does what, you will need to configure one or more MIDI remote control setups.
To do this, first make sure your MIDI device is connected correctly as described here and then launch Audio Evolution Mobile. Then, from the More ![]() menu on the Arranger Screen, select MIDI remote control. This opens the following dialog.
menu on the Arranger Screen, select MIDI remote control. This opens the following dialog.
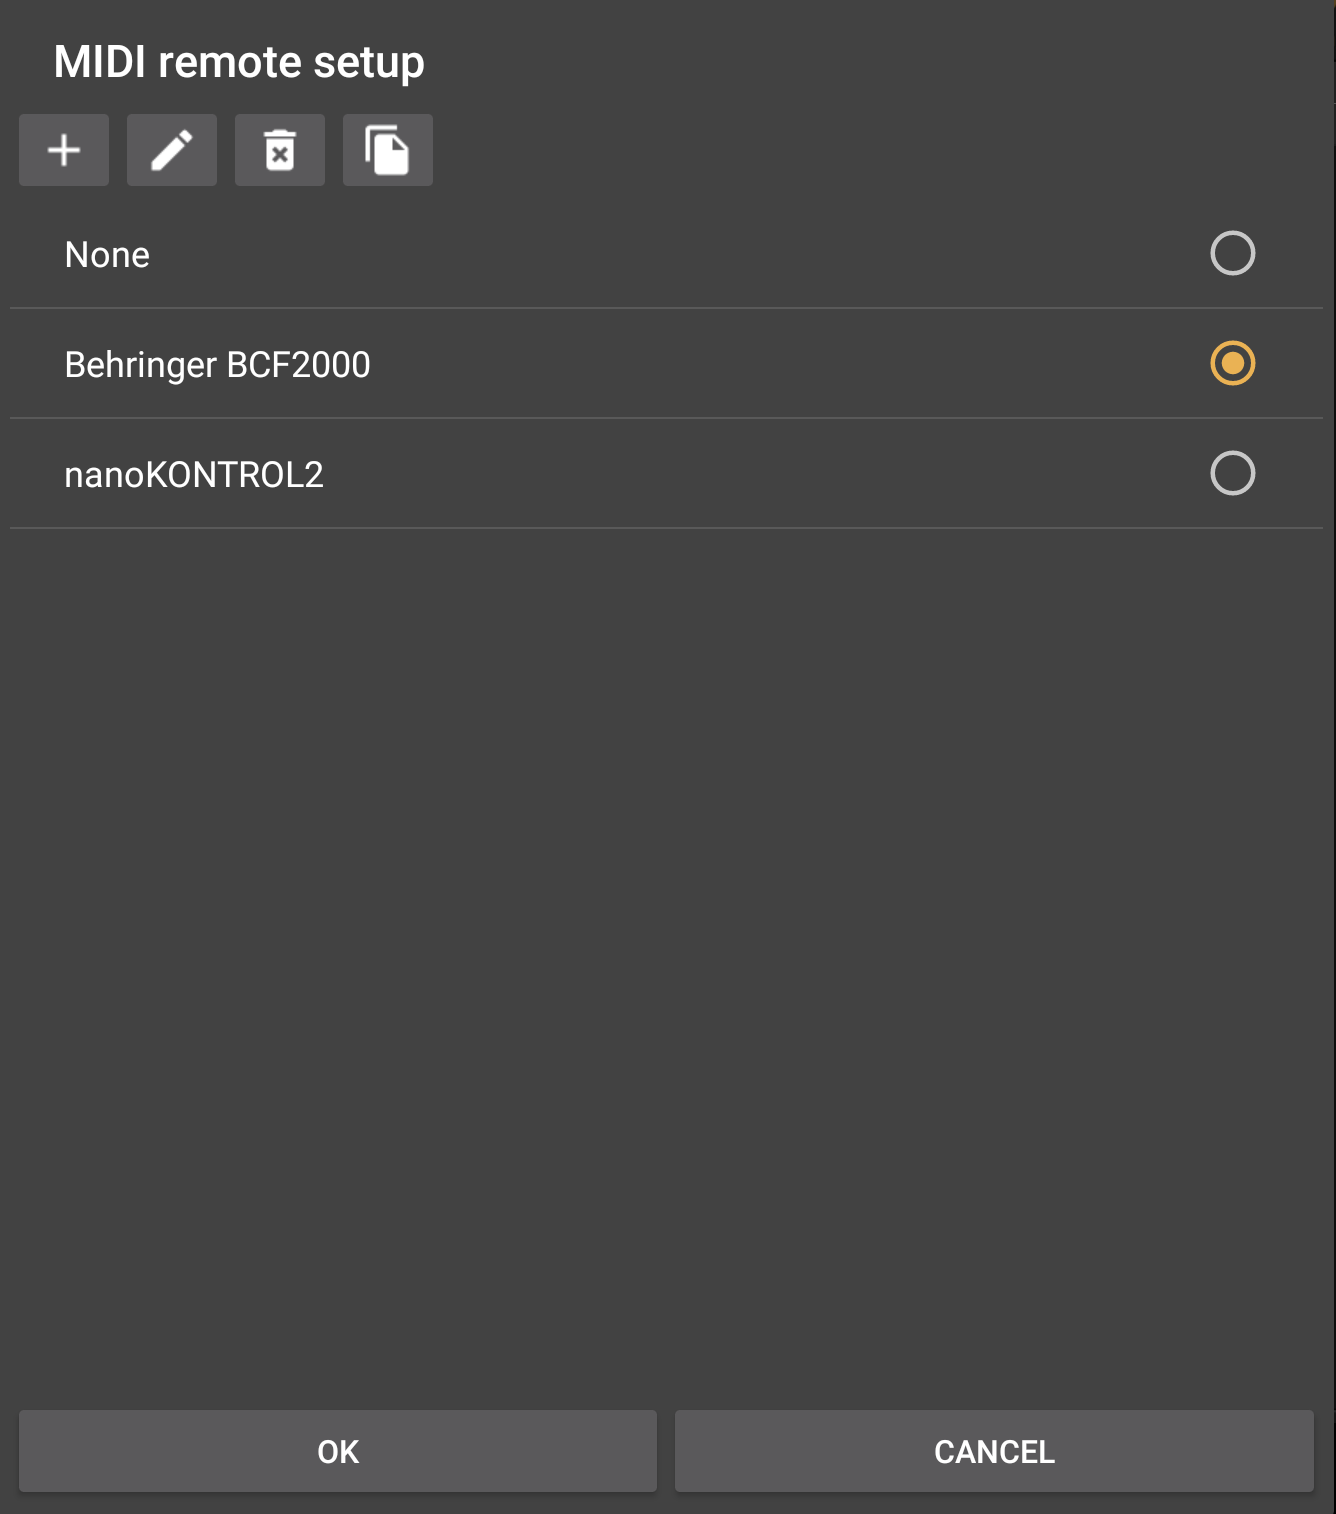
Here you can see remote setups that you have done and all pre-included setups. The buttons on top allow you to add ![]() , edit
, edit ![]() , remove
, remove ![]() and duplicate
and duplicate ![]() a setup. To create a new setup, press the
a setup. To create a new setup, press the ![]() button and give your new setup a name.
button and give your new setup a name.
Once a setup is created, or an existing one opened, the setup editor dialog, seen below, that opens allows you to assign MIDI control change (CC) numbers to various actions.
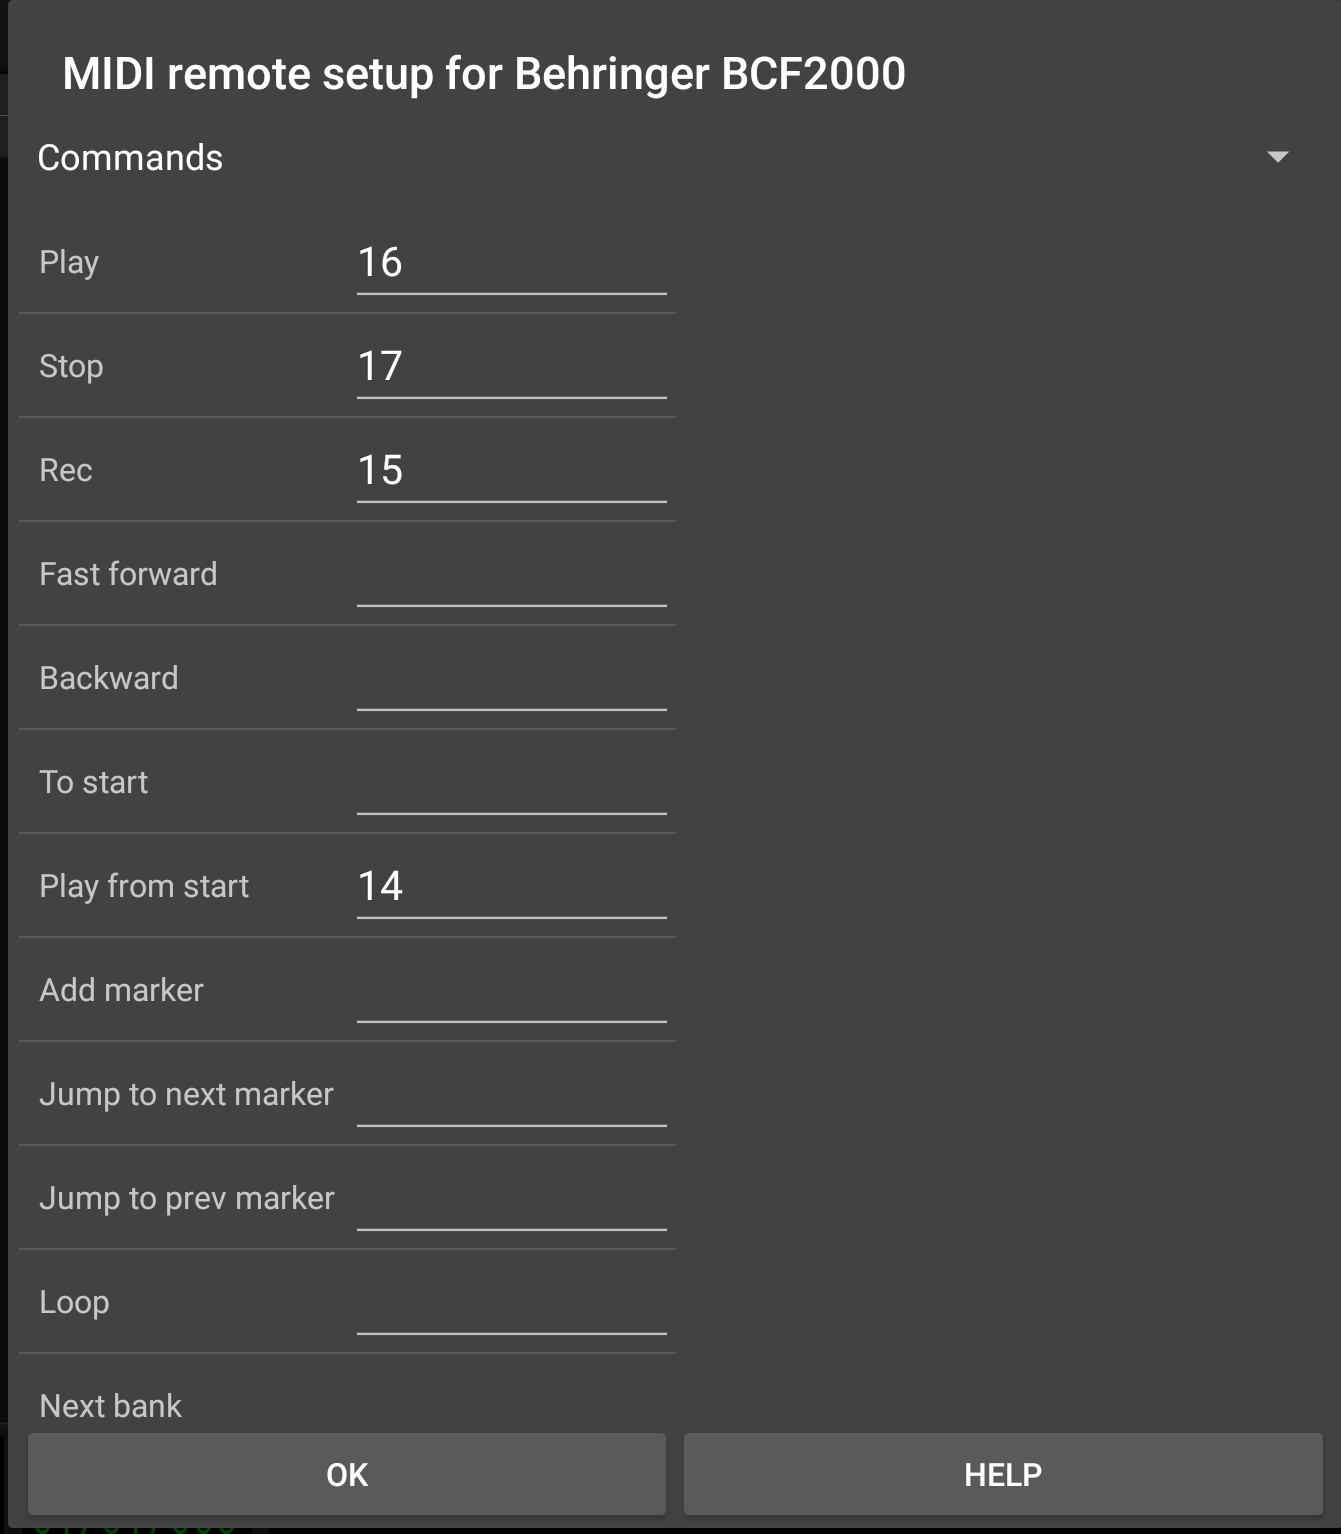
If you know the MIDI CC numbers associated with the various controls (buttons, pads, dials etc.) on your MIDI device, you can enter them manually using the on-screen keyboard. It is almost certainly going to be much easier though to allow Audio Evolution Mobile to use 'MIDI Learn' to assign controllers to the various parameters. To do this, simply select the desired parameter field by tapping on it. Now, simply turn the dial, or press the button, on your MIDI device which you'd like to use to control that parameter. The app will recognize this MIDI input and assign it to control the selected parameter. So, in the example shown above, the 'Play' parameter's field was tapped, a button was pressed on the MIDI controller and the app automatically recognized the input as coming from MIDI CC number 16 and applied it, and that button on the controller, to control the Play function within the app. In use, once the app receives a MIDI CC number over MIDI, it will look up if it is assigned to a certain action and, if so, will perform the action using that controller, just like when you touch a control on the screen directly.
The setup editor dialog is divided into several categories, selectable by the spinner control at the top:
- Commands
This section contains transport controls and other actions like enabling/disabling Loop or add and jump to markers. For each action in the scrollable list, you can assign a CC number either by entering a number manually or easier, by MIDI learn. When you select a text field of an action, instead of entering a number, you can also touch/move a control on your MIDI device and the CC number will automatically appear in the text field. This will save you from looking up the CC number in the user manual of your MIDI device. Make sure that you do not use a CC number for multiple actions.
- Track
Contains mixer channel controls for the tracks in the project, like volume, panning, mute, solo, arm and EQ controls. Since you will probably have multiple tracks and it would be tedious to assign CC numbers for the same controls on different tracks, there are two different methods to auto-assign controls on subsequent tracks: by increasing CC or by increasing MIDI channel number. If you for instance assign MIDI CC 30 to Volume and select 'Increasing CC', then track 1 would change volume when MIDI CC 30 is received and track 2 would change volume when MIDI CC 31 is received, and so on. Similarly, when choosing 'Increasing channel', track 2 would change volume when MIDI CC 30 is received on MIDI channel 2 and so on. Which method is better depends on your specific MIDI device.
What if your project has more tracks than there are controls on your MIDI control device? Or what if your MIDI device has 8 faders, but you want to use the last one to control master volume? That's where the 'Bank size' setting comes in. If you have 8 faders/sections for instance, you can set the bank size to 8. Then you can assign MIDI CC's to the 'Next bank' and 'Prev bank' actions in the Commands section to switch between multiple banks of controls. So, if you press the button on your MIDI controller assigned to 'Next bank', then the first control section would map to track 9 and so forth. If you set a bank size of 7 and have 8 volume, pan controls etc. on your MIDI device, then you could have the tracks in banks of 7 and use the last section or master channel controls.
- Bus
Similar to Tracks, but controls the busses/groups in the project. You can choose between two options: use the same MIDI CC's as you set up in the Tracks section and switch between controlling tracks or busses with one MIDI CC, or, define the controls for groups separately.
- Instrument
Here you can assign MIDI controls for the currently active instrument, like Attack, Decay and Release.
- Global
'Play triggers on 127 only': when enabled, the Play button only triggers when MIDI value 127 is received. Some MIDI controllers send a value of 0 when you release the button, which would cause the play or pause to trigger as well. In that case, enable this option.
Parameter feedback can be used to send the state of controls back to the MIDI controller. For instance, if you have automation in the project and have a MIDI controller with motorized faders, then the faders will automatically move according to the current state in the project. Some MIDI controllers also have buttons that are lit to indicate on/off state.
You can choose the MIDI device/port to which the feedback information is sent and from which MIDI remote control is received, in case you have multiple MIDI devices attached.
NOTE. The remote setups are stored as XML files inside the AudioEvolution/MIDIRemoteSetups folder. You can send/share remote setups by emailing an remote setup XML file to someone else. If you have a certain setup that you want us to include by default in the app, please send us the XML file with a short description of which device it controls and how it is set up.