Using the Automation Mode
To access the Automation Mode, seen below, press the Auto ![]() button on the Arranger Screen.
button on the Arranger Screen.
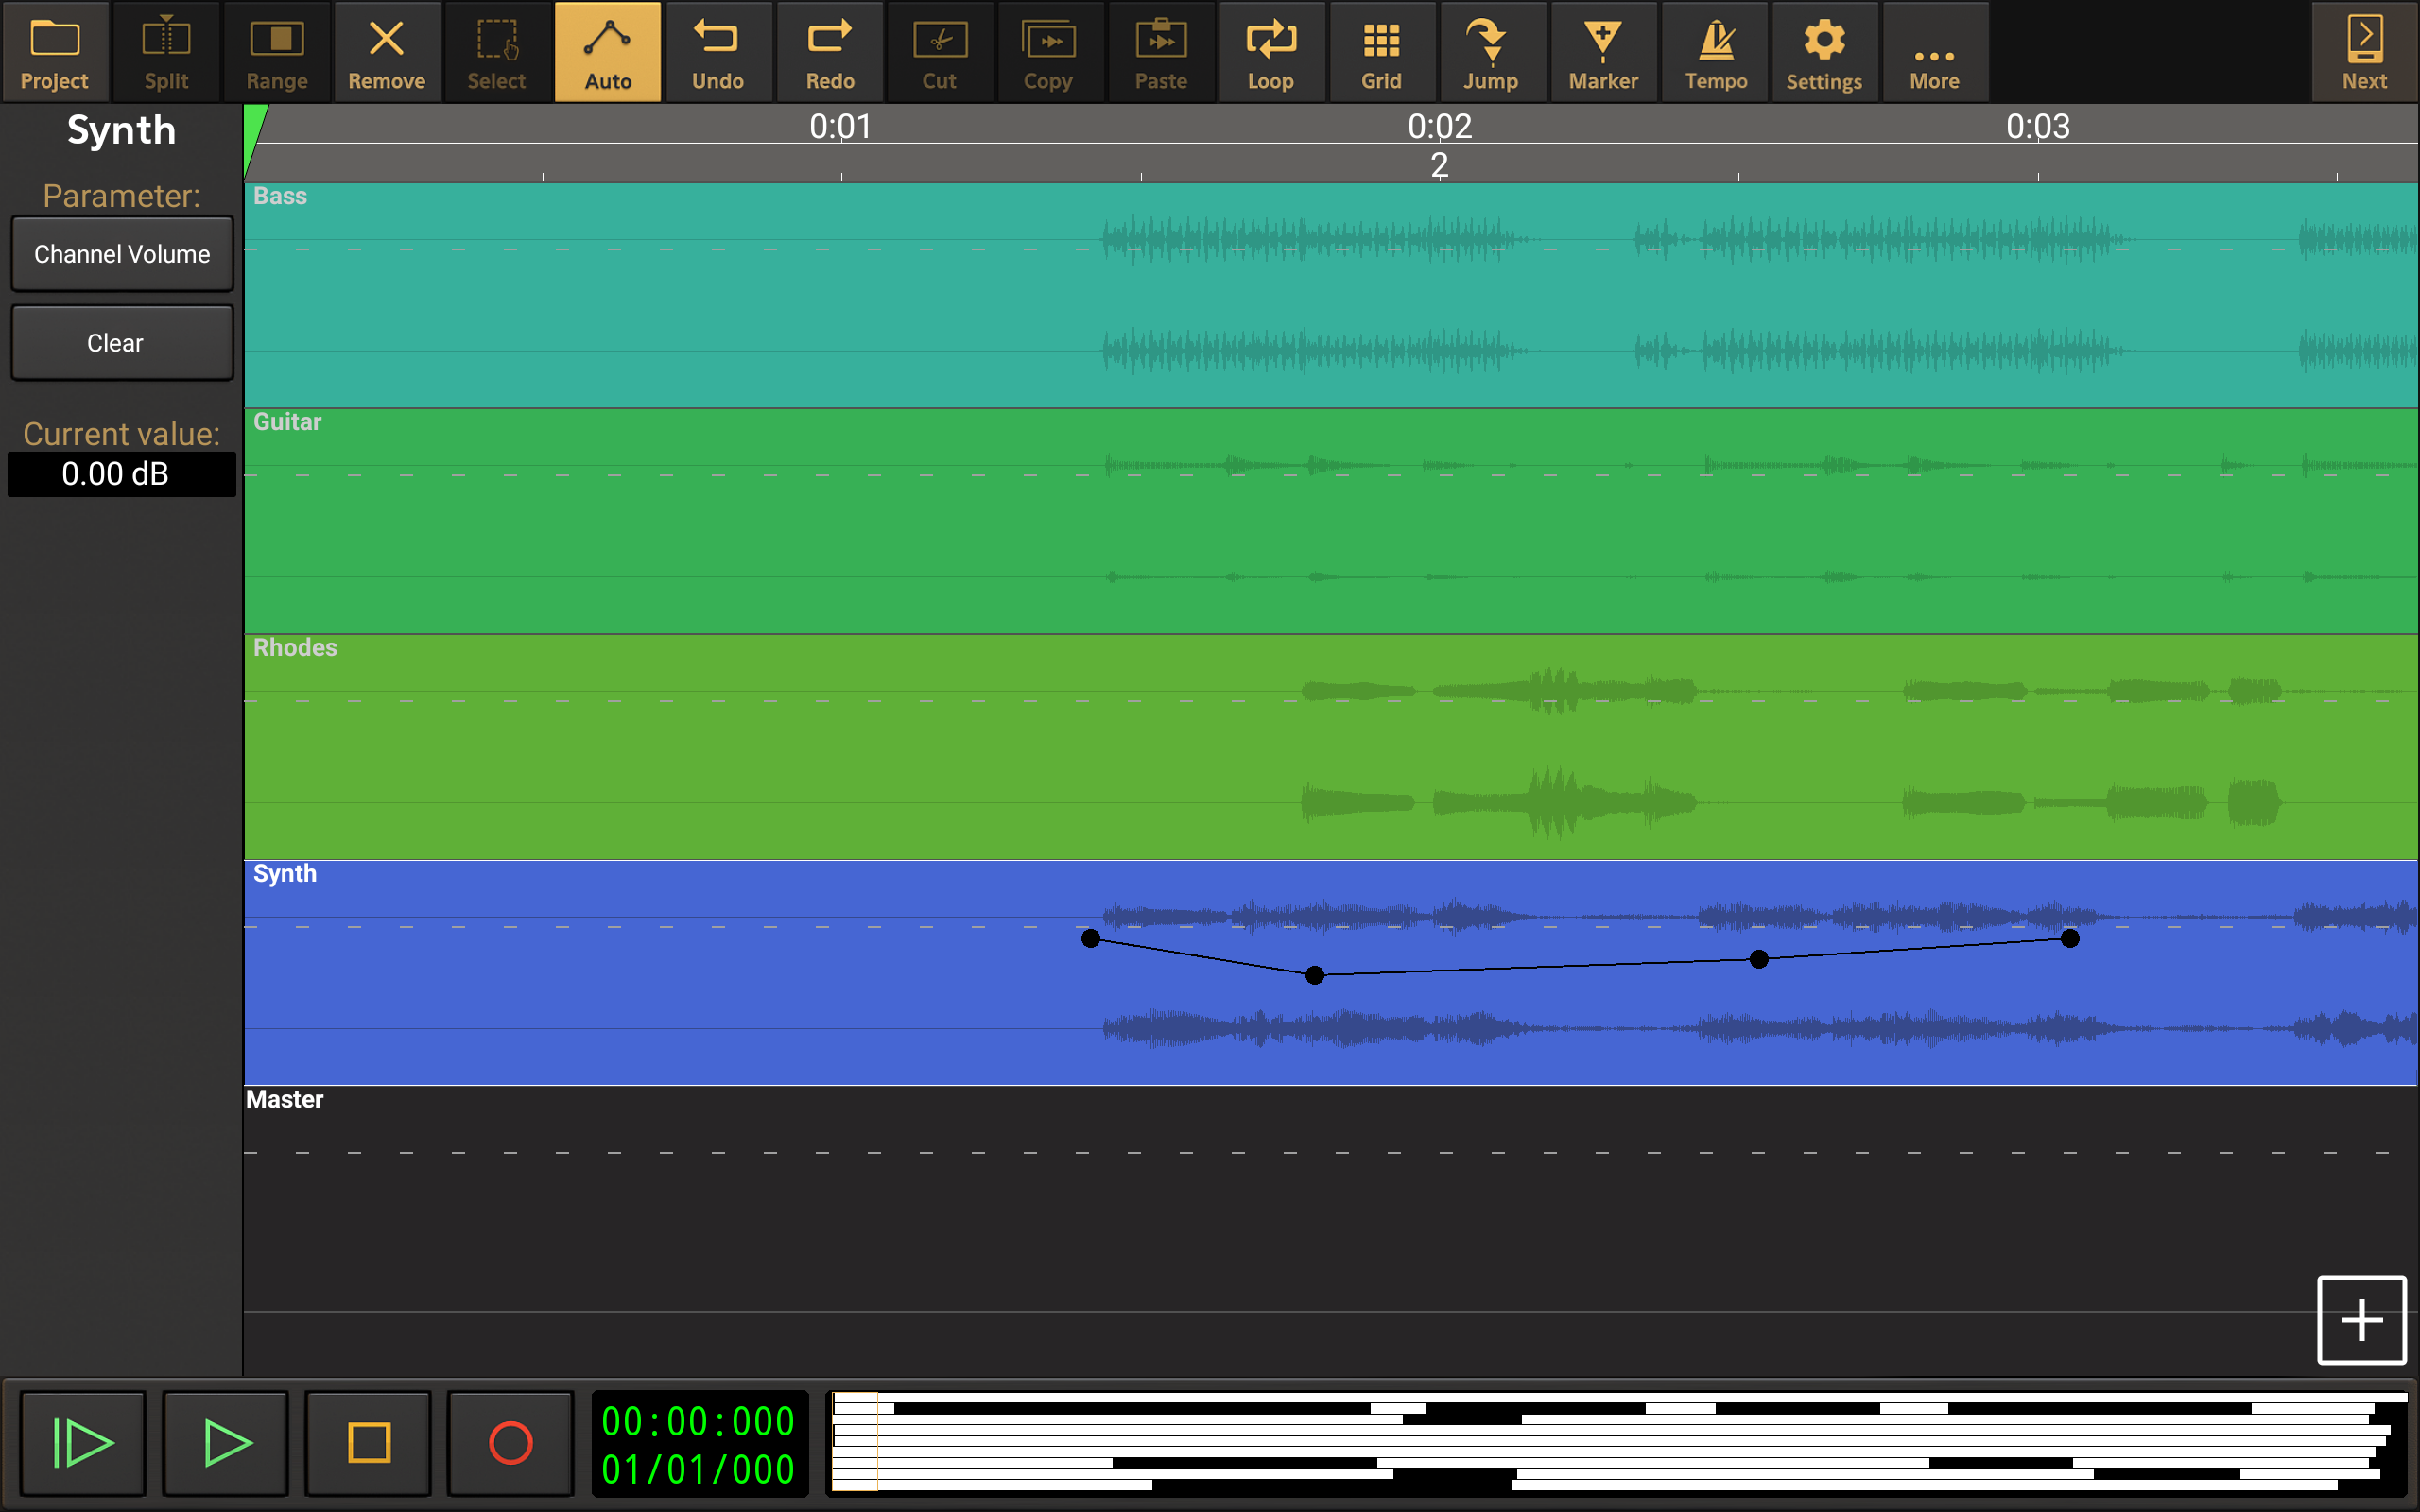
This interface allows you to access every parameter available for each track and plot the automated changes to its level along the course of its timeline. As can be seen, the Master output channel is also shown at the bottom of the tracks to allow for automation to be applied to its parameters as well. In the example above, some channel volume automation has been plotted on the blue Synth track.
On the left of the Automation Mode screen, is a panel of controls for the automation on the selected track.
The Parameter ![]() button opens a drop-down list of all of the parameters available for automation on that track, including the parameters of any virtual instrument or effect that might be present on the track. In the screenshot above, the Channel Volume parameter has been selected. This list can sometimes seem to be bewilderingly long because of the sheer number of parameters available, but if you take your time you should find what you're looking for and will, in the long term, appreciate the wealth of options available. Parameters which already have some automation applied for that track will be indicated in this list with an asterisk (*) next to their name.
button opens a drop-down list of all of the parameters available for automation on that track, including the parameters of any virtual instrument or effect that might be present on the track. In the screenshot above, the Channel Volume parameter has been selected. This list can sometimes seem to be bewilderingly long because of the sheer number of parameters available, but if you take your time you should find what you're looking for and will, in the long term, appreciate the wealth of options available. Parameters which already have some automation applied for that track will be indicated in this list with an asterisk (*) next to their name.
The Clear ![]() button removes all automation for the selected parameter from the track. A confirmation dialog will be shown before this is carried out in case it is pressed by mistake.
button removes all automation for the selected parameter from the track. A confirmation dialog will be shown before this is carried out in case it is pressed by mistake.
The Current Value display ![]() shows the parameter value/level at the last automation point touched. Importantly, tapping this display once opens a dialog which allows you to manually enter a numerical value for the level of the automation point for those times where you need greater accuracy.
shows the parameter value/level at the last automation point touched. Importantly, tapping this display once opens a dialog which allows you to manually enter a numerical value for the level of the automation point for those times where you need greater accuracy.
Once you have selected the parameter you want to automate, it is simply a case of plotting your automation points on the track itself, as seen here.
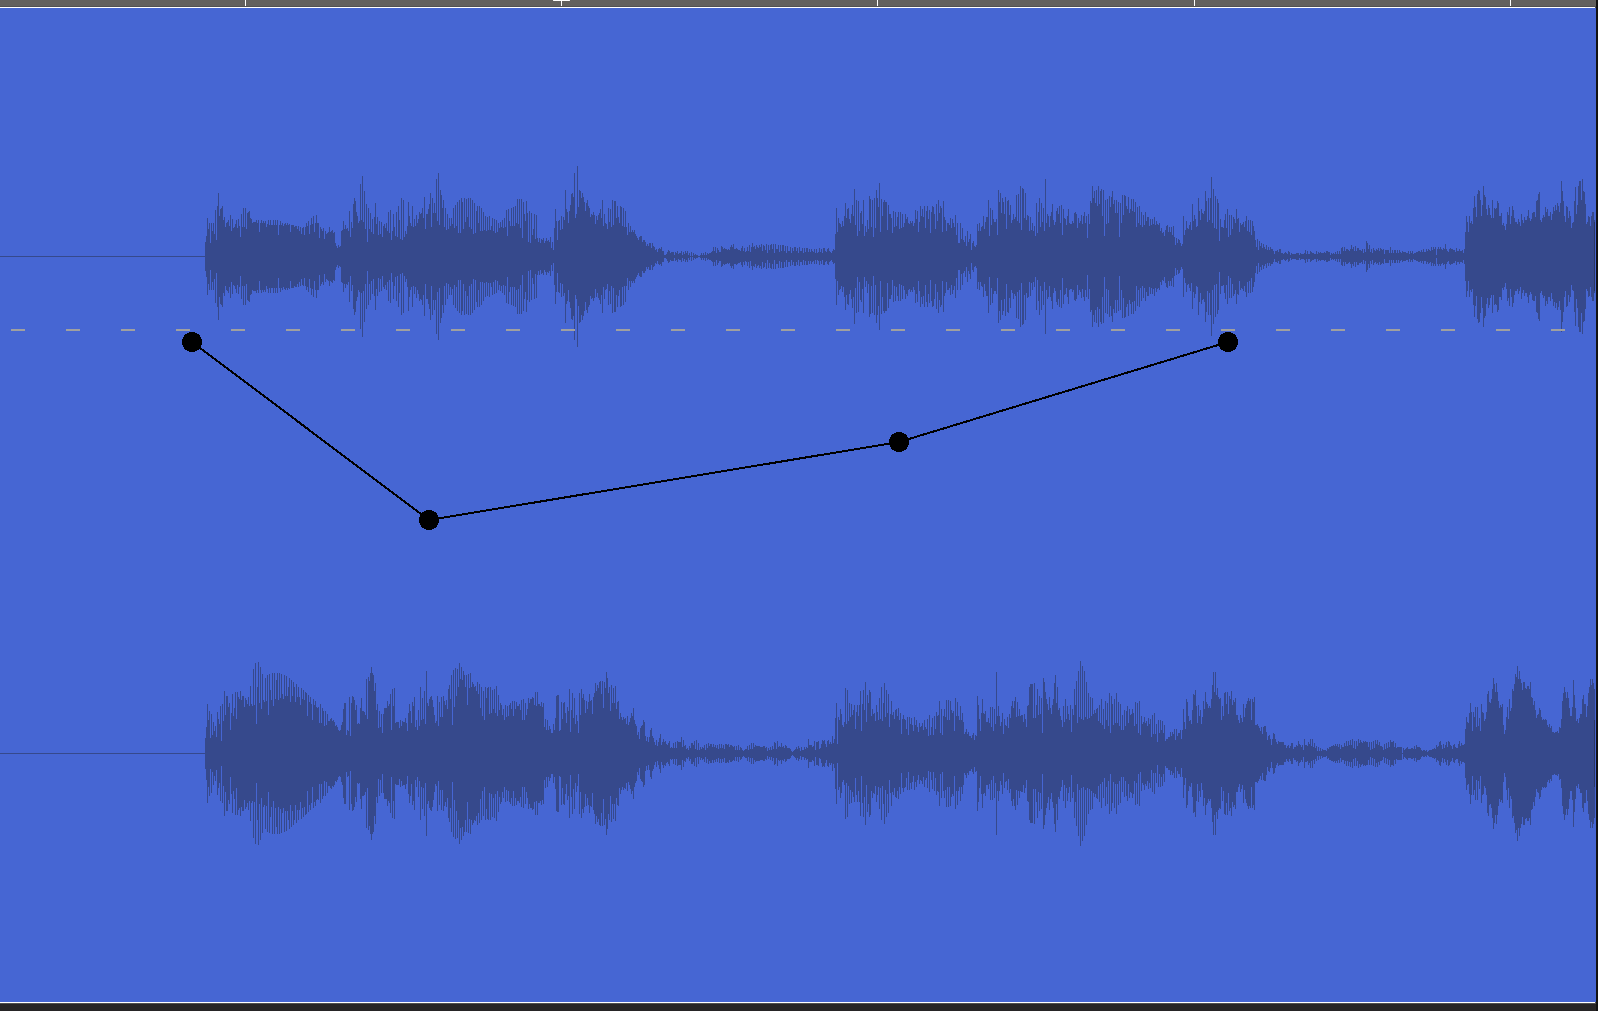
Tap to place a circular automation point, or tap and hold to then be able to move the point before releasing. Existing automation points can be moved by touching and sliding them. As you can see, a straight line is created between each automation point to ensure smooth transitions as the parameter's level changes during playback/export. Place automation points as required for the selected parameter throughout the track's timeline.
Be aware that, if snap-to is enabled in the Grid ![]() settings, automation points will be placed accordingly on the grid lines. Turn this off to be able to tap and place automation points completely freely. Don't forget you can easily resize the track on the display using pinch/pull in both the vertical and horizontal axis. (You may want to temporarily leave automation mode, by pressing the Auto
settings, automation points will be placed accordingly on the grid lines. Turn this off to be able to tap and place automation points completely freely. Don't forget you can easily resize the track on the display using pinch/pull in both the vertical and horizontal axis. (You may want to temporarily leave automation mode, by pressing the Auto ![]() button again, before doing this to avoid accidentally selecting other tracks and placing automation points by mistake).
button again, before doing this to avoid accidentally selecting other tracks and placing automation points by mistake).
Please note the dotted white line shown horizontally along the automation track. This will be placed at the the default level for the selected parameter, so, in this example for channel volume, it represents 0.00dB. An automation point has that value when it sits directly below the dotted line, with its top edge touching the line as seen below.. In other words, the top edge of the circular point indicates the parameter value at that point.

If you make a mistake you can either use the Undo ![]() button or can switch to Remove Mode using the button
button or can switch to Remove Mode using the button ![]() at the top of this interface. When in Remove mode, simply slide your finger over any automation points you want to remove.
at the top of this interface. When in Remove mode, simply slide your finger over any automation points you want to remove.
To automate a different parameter, make a different selection from those available via the Parameter ![]() button. To place automation points on a different track, tap on it once.
button. To place automation points on a different track, tap on it once.
All parameter automation you plot on a track will be represented in real time during playback by the relevant parameter control moving accordingly. So, in this example for the channel volume, the track's volume slider will be seen to move according to the automation at that point during playback. Please note, though, that this does not apply to the controls of the Evolution One synthesizer. Though the full range of Evolution One parameters are available for automation as described here, the automation will not be represented visually by the parameter controls moving during playback. Unlike other parameters, the controls of Evolution One cannot be automated using Touch mode either.
To leave automation mode, press the Auto ![]() button again to deactivate it.
button again to deactivate it.