Using Modifiers
Audio Evolution Mobile allows you to apply modifiers to almost every effect parameter available other than those found in the Version 4 (V4) Toneboosters effects which generally have their own modifying possibilities built in.
There are two types of modifier available in Audio Evolution Mobile: LFO (Low Frequency Oscillator) modulation and, when pertinent to the parameter selected, Lock to Tempo.
Lock to Tempo does exactly that: it locks the parameter to a particular increment of the currently selected project tempo. This option will only be available for parameters where it is possible to apply such a setting.
The LFO option allows you to constantly modulate the parameter value using a user defined Low Frequency Oscillator (LFO). An LFO is a slowly (low frequency) moving (oscillating) waveform. For more information on LFOs, see here. This opens up a huge amount of creative possibilities, from rapidly repeating rhythmical effects to slowly evolving changes in the audio soundscape.
NOTE. Don't forget that you also have the option to manually apply Automation to effect parameters BUT, please be aware that this will not be possible for parameters which already have a modifier applied to them: modifiers override automation. As such, if you want to apply automation to parameters with modifiers, you will first need to remove the modifier.
Using Lock to Tempo
To apply a modifier, simply double tap in the center of the parameter's dial. This will open the following Options.
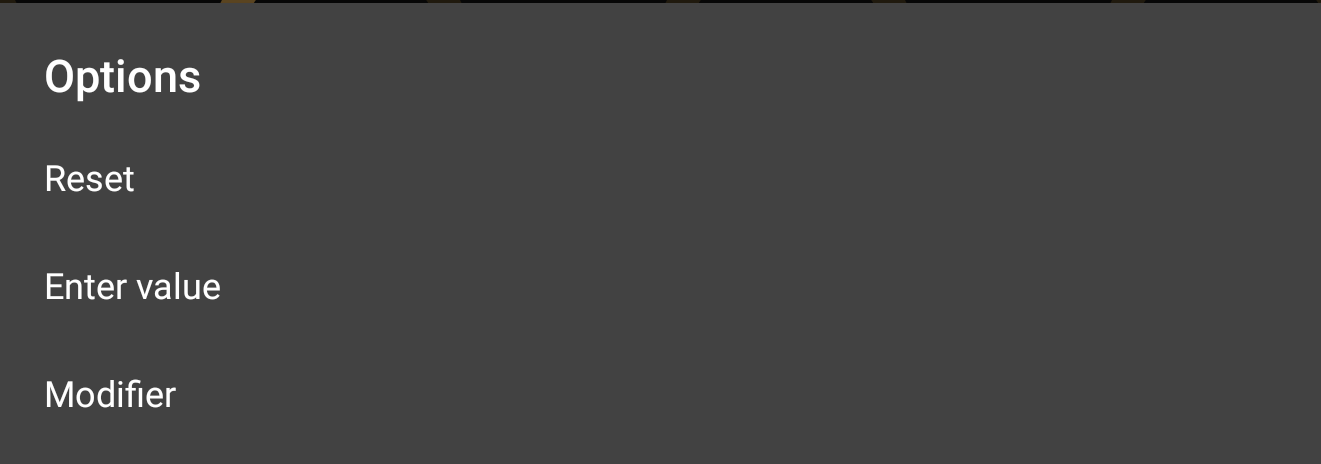
Selecting Reset will return the parameter back to its default level.
Enter value allows you to enter a numerical value for the parameter level should you require greater accuracy than simply using the dial. The numerical range of the particular parameter will be indicated on the dialog shown so you'll always know what you're working with.
Selecting Modifier opens the Modifier Options, seen here.
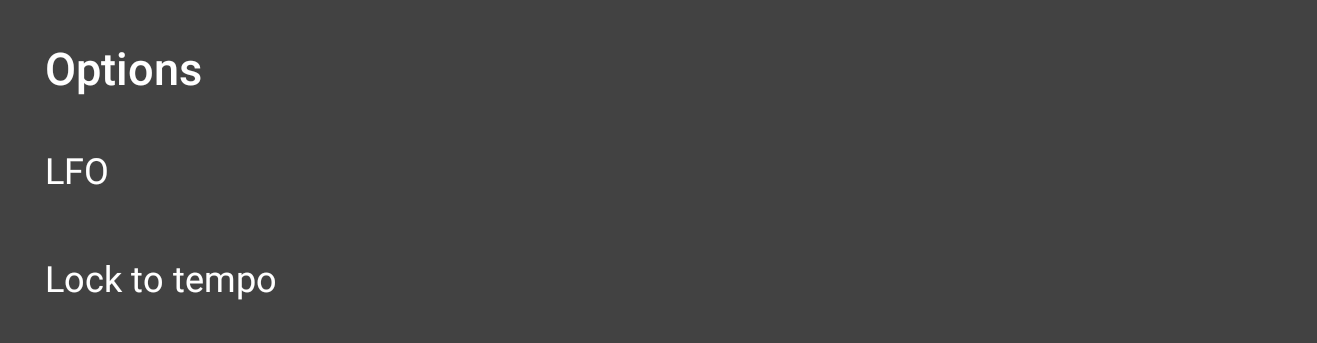
Select Lock to tempo to open the following dialog.
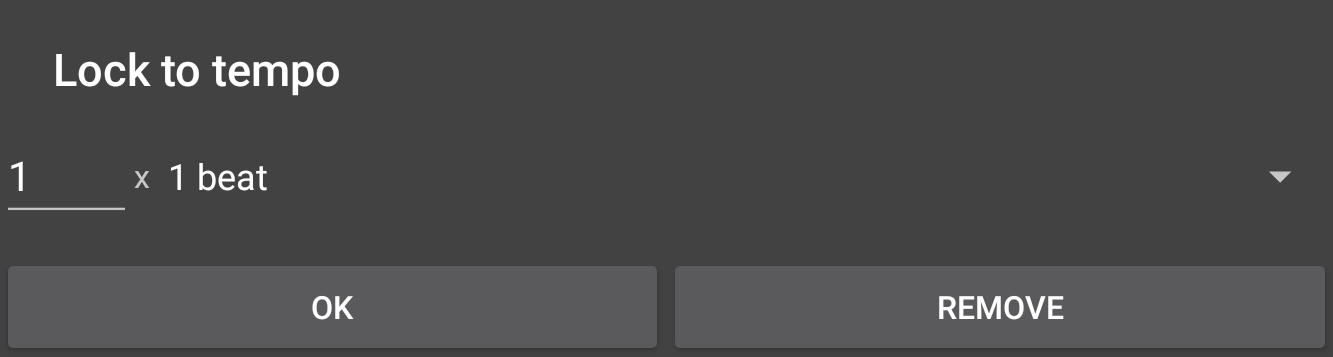
This dialog allows you to select the increment of the current tempo to be used for the parameter value. The tempo increments available are between 1 bar and 1/32 triplet beat, with 24 and 25 frames per second also available. Once the increment is selected, you can then define the multiples of that increment for even greater control. Click OK to apply the tempo lock to the parameter. Opening this dialog again for the same parameter will allow you to alter the settings if required and can also be used to Remove the modifier completely.
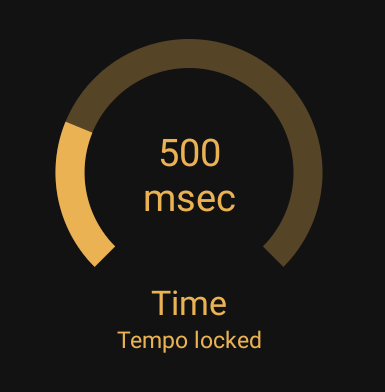
A parameter with 'Lock to tempo' applied will be indicated as seen below. This labeling isn't applied to the ToneBoosters effects, though modifiers can be applied to most of the Version 3 effect parameters.
Using LFO Modulation
To apply a modifier, simply double tap in the center of the parameter's dial. This will open the following Options.
Selecting Reset will return the parameter back to its default level.
Enter value allows you to enter a numerical value for the parameter level should you require greater accuracy than simply using the dial. The numerical range of the particular parameter will be indicated on the dialog shown so you'll always know what you're working with.
Selecting Modifier opens the Modifier Options, seen here.
Select LFO to open the following dialog.
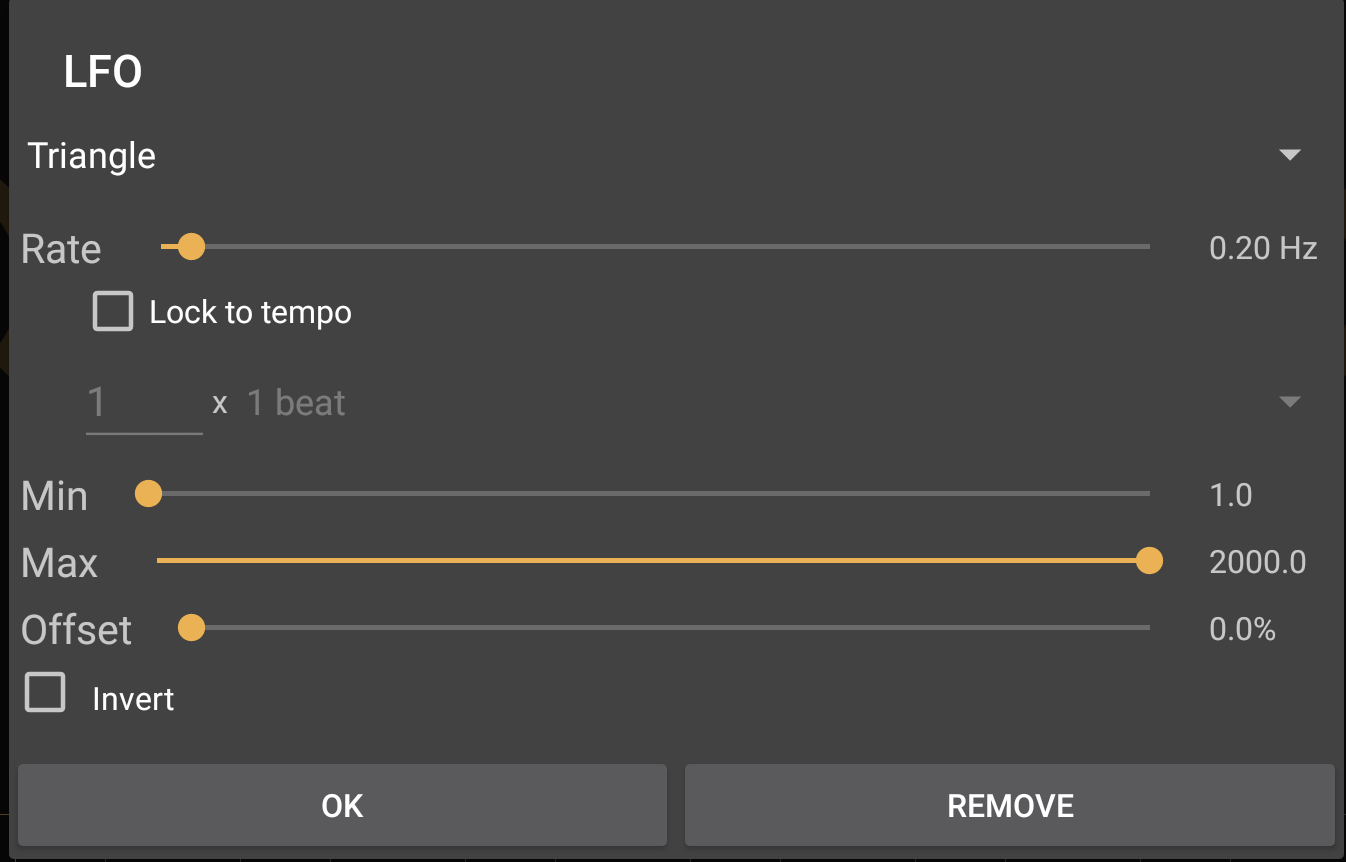
As can be seen, this is where you can define the characteristics for the LFO (Low Frequency Oscillator) which will be used to modify the level of the parameter over time. At the top is the drop-down list to select the LFO waveform shape (Saw, Sine, Square, or Triangle). Next is the Rate of the modulation. This can be set using the slider using a value of Hz (Hertz) or you can Lock to tempo using the checkbox shown. Once locked to tempo, the tempo increment options used for this 'locking to' will become available (they are grayed out in the screenshot above). The tempo increments available are between 1 bar and 1/32 triplet beat, with 24 and 25 frames per second also available. Once a tempo increment has been selected, you can then enter the number of that increment to use for the LFO duration before it starts again. So, for example, if you enter '2 x 1 bar', the LFO modifier will take the 2 bars to complete one full cycle before starting again. Next, the Min and Max sliders allow you to set the minimum and maximum levels for the parameter, between which the LFO modifier will move. Below them, the Offset slider allows you to adjust the starting point on the LFO waveform for the cycle to begin from. Finally, the Invert checkbox, when selected, inverts the LFO waveform (turns it upside down). Click OK to apply the LFO modifier to control the parameter. Opening this dialog again for the same parameter will allow you to alter the settings if required and can also be used to Remove the modifier completely.
When playback is started from the beginning of the project, the LFO will be reset to start afresh according to the LFO settings above. If playback is started from elsewhere in the project, from the current location of the Time Marker ![]() , the LFO will start from the position at which it would have been at that point on the timeline had it begun freshly at the beginning of the project. This means you can rely on the aural effects of the modulation always being heard at the same time within the project during playback and export.
, the LFO will start from the position at which it would have been at that point on the timeline had it begun freshly at the beginning of the project. This means you can rely on the aural effects of the modulation always being heard at the same time within the project during playback and export.
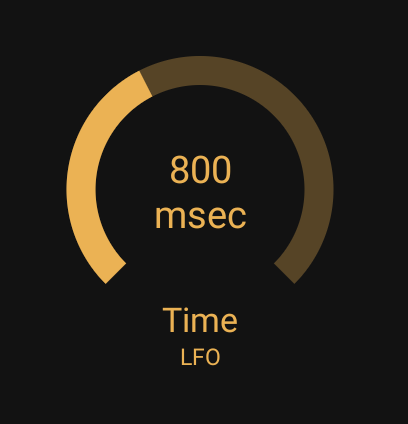
A parameter with 'LFO' modulation applied will be indicated as seen below and you will also see the dial moving in real time according to the LFO modulation. This labeling isn't applied to the ToneBoosters effects, though modifiers can be applied to most of the Version 3 effect parameters and you will see the dials moving in real time.
NOTE. Any modifiers applied, and their settings, will be saved with effect presets you design and save.