Sidechain Compression
Both Audio Evolution Mobile's own Compressor effect and the ToneBoosters Compressor (in-app purchase required) have the ability to sidechain. This is a very useful feature, but one which can often confuse users who are unfamiliar with the process.

What is Compression?
Compression is a way of controlling the dynamic range, the loudness range, of your audio. The Compressor effect can automatically attenuate - turn down, squash, compress - the loudest parts of the audio to bring them more in line with the quieter parts. This compressed signal, with those loudest peaks attenuated, can then be turned back up to match its original overall peak volume again (without distorting/clipping), meaning the lower volume parts of the audio - which weren't compressed - will be louder than they were originally and the audio overall is more dynamically uniform. It is usually advisable to use compression subtly to bring things together. Over-compression should be treated with great caution.
The Audio Evolution Mobile Compressor, seen above, has the five controls which will be found on most compressors.
- Threshold. This sets the loudness level the audio needs to go above to make the compression kick in.
- Ratio. This sets the amount of attenuation applied by the compression, how much the loud audio is turned down by the effect according to a ratio. The ratios refer to decibels (dB). So, if you have a ratio of 2:1, a signal exceeding the threshold level by 2dB would be attenuated (turned down) to 1dB above the threshold level, and a signal exceeding the threshold level by 6dB would be attenuated to 3dB above the threshold. Higher ratios mean stronger compression.
- Attack Time. This defines how long it takes for the signal to become fully compressed after it has exceeded the threshold level.
- Rel. Time (Release Time). This defined how long it takes for the compressed signal to go back to the original non-compressed signal after the signal goes below the threshold again.
- Output Gain. As mentioned above, the attenuation of the loudest parts of the audio will result in the overall volume being lower. The Output Gain, also referred to as Make-up Gain, allows you to 'make-up' for that lost volume. Audio Evolution Mobile's Compressor has an Input (I) level monitor on the left and an Output (O) level monitor on the right, allowing you to match the original input signal level.
The Audio Evolution Mobile Compressor also has a horizontal monitor along the bottom which shows you the amount of compression being applied in real time.
What is Sidechain Compression?
Regular compression monitors and uses the audio level/volume of the track being compressed to determine when the compression is applied. Sidechain compression monitors and uses the audio level/volume of a different track to determine when the compression is applied to the track the compressor effect is on.
One of the first uses of sidechain compression was when DJs wanted to have the volume of the music they were playing automatically lower and duck out of the way whenever they used their microphone. In that case, the sidechain compressor would be applied to the channel the music was on, but it would be triggered by the sound level of the microphone channel. As soon as the DJ used the microphone, the volume would go above the Threshold set for the sidechain compressor and the compression would be applied to the music channel, lowering its volume out of the way of the microphone.
Another commonly used example of sidechain compression is to have compression applied to a track, triggered, using sidechaining, by the Kick Drum track. This would mean that the compression applied to that track would result in it ducking out of the way (either subtly or in an exaggerated manner depending on the compressor settings used) of the kick drum to keep the drum punching clearly through the mix. You could easily do the same using a vocal track to trigger the compression applied to other tracks to subtly keep the vocals prominent within the mix.
As can be seen, sidechain compression can be very useful.
How to use Sidechain Compression
Select the track you want the compression applied to and open its FX Grid using the FX Grid ![]() button.
button.
Tap on the empty block you want the Compressor to be placed on and select Compressor (or the ToneBoosters Compressor if you've purchased it) from the Amp category in the Effects Selector.
Now, press the Sidechain ![]() button which will be present at the top of the screen for those two effects. This will open the Source Track dialog seen here (obviously, you need more than one track present in your project to be able to use sidechaining).
button which will be present at the top of the screen for those two effects. This will open the Source Track dialog seen here (obviously, you need more than one track present in your project to be able to use sidechaining).

The Source track is the track which will be monitored by the compressor and will be used to trigger the compression being applied when its signal goes above the Threshold set. Pressing OK will then open the Source block dialog, below.
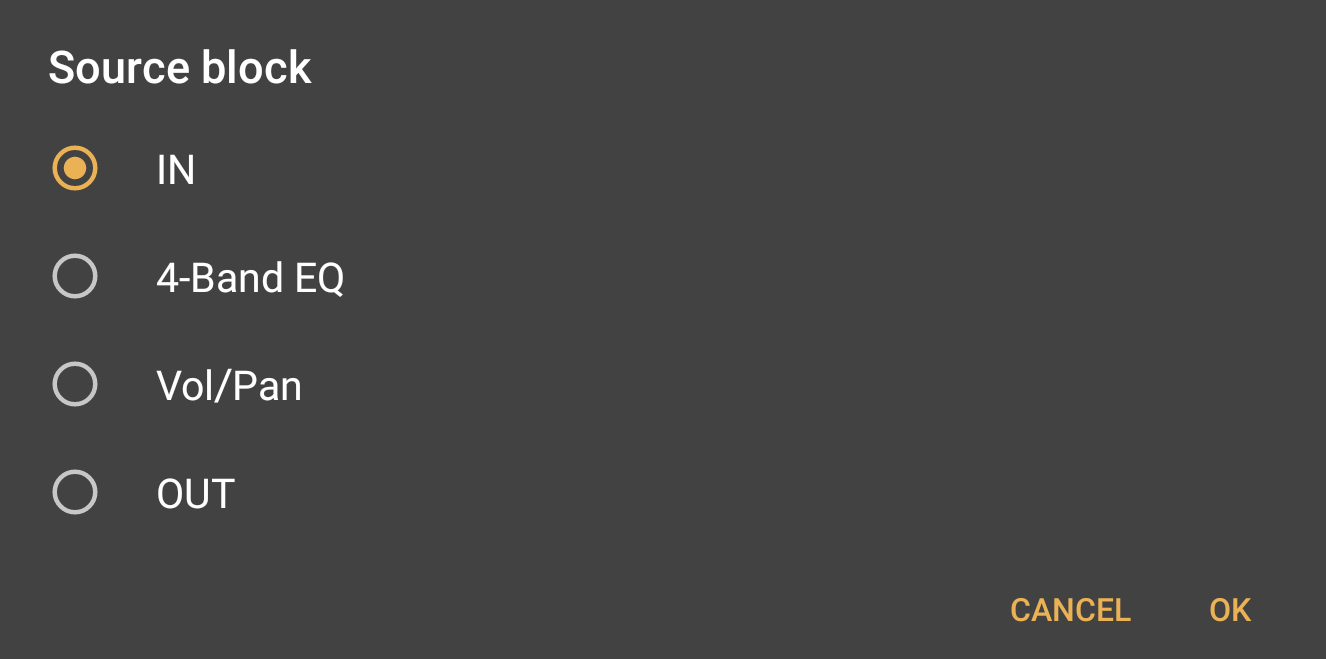
The Source block defines at which point in the source track's signal chain (on its FX Grid) its level is monitored and used by the compressor. You may, for example, want the compressor to to react to the source track's raw audio levels before it's had any effects or processing applied to it: in that situation you would choose IN, the point at which it enters its FX Grid. If, on the other hand, you wanted the compressor to react to the source track's audio levels after all of its track processing had been applied, you would select OUT.
Now it's simply a case of playing back both tracks and adjusting the settings of the compressor until the selected track, with the compressor on it, is being compressed and ducking out of the way of the source track in the way you want.