Adding Tempo and Time Signature Changes
Audio Evolution Mobile allows you to add tempo changes and time signature changes, both immediate and gradual, to your musical compositions at any point you choose.
This may be obvious to some of you, but it is worth mentioning just in case it doesn't occur to everyone: tempo and time signature changes only affect MIDI tracks; audio tracks will be unaffected. Whilst you can Time Stretch audio clips, which might go some way to getting existing audio to match a changed tempo, it is unlikely to be completely satisfactory. As such, if you are making a song which you know is going to have tempo changes in it, it makes sense to lay down your MIDI tracks first - or even just one of them - apply the tempo changes, and then you have the chance to record your audio whilst listening to the MIDI and incorporate the tempo changes into the performance you record.
It is also worth noting that Tempo and time signature changes are applied across all (MIDI) tracks present in the project and cannot be applied only to individual tracks.
Set your initial track time signature and tempo using the Tempo Settings as described here.
Then, the process for adding and editing tempo and time signature changes is as follows.
First, double tap on the Timeline/Marker Display ![]() , on the Arranger Screen, Piano Roll Editor or Drum Pattern Sequencer screens, at the start of the bar at which you want the tempo change to happen (tempo changes can only be placed at the starting point of bars) to open the Marker Options, seen here.
, on the Arranger Screen, Piano Roll Editor or Drum Pattern Sequencer screens, at the start of the bar at which you want the tempo change to happen (tempo changes can only be placed at the starting point of bars) to open the Marker Options, seen here.

Select Add tempo/time sig change which will add a blue tempo change marker ![]() to the Timeline/Marker display at the nearest bar start point to the current position of the green Time Marker
to the Timeline/Marker display at the nearest bar start point to the current position of the green Time Marker ![]() , which will be at the point at which you double tapped. Once a tempo change marker has been created, another will automatically be placed at the beginning of the Timeline/Marker Display showing the initial tempo at the beginning of the project. It will also open the Tempo Settings for tempo changes, seen here.
, which will be at the point at which you double tapped. Once a tempo change marker has been created, another will automatically be placed at the beginning of the Timeline/Marker Display showing the initial tempo at the beginning of the project. It will also open the Tempo Settings for tempo changes, seen here.
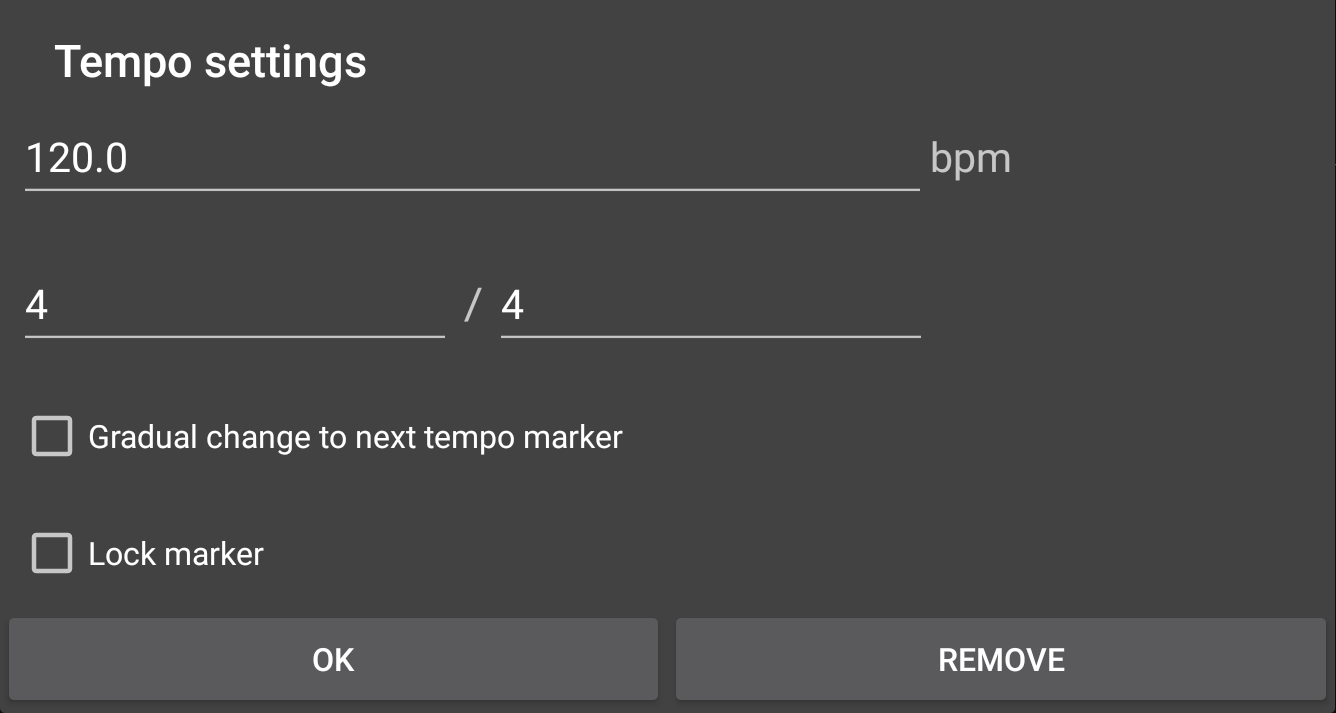
As can be seen, these settings allow you to enter a new beats per minute (bpm) value and change the time signature. There is also a checkbox allowing you to apply a tempo change immediately or, if checked, have it applied gradually between the marker just placed and the next tempo change marker. Obviously, you will need to place another tempo change marker further along the timeline for this to happen but it can be very useful when you want a piece to gradually speed up or slow down.
The checkbox for Lock marker will, when active, lock the marker in place to avoid it being moved accidentally.
If you want to change the tempo change settings, double tap on the front of the tempo change marker (where the vertical black marker point is). This will open the Marker Options again. Instead of 'Add tempo/time sig change' there will now be a Edit tempo/time sig marker option. Selecting this will open the Tempo Settings, seen above, again, allowing you to change them as necessary. As can be seen, there is also the option to Remove the marker completely if that's what you want to do.
If you need to move a tempo change marker, first - if Lock marker has been applied - double tap on the front of the marker to open the Marker Options, open Edit tempo/time sig marker and deselect Lock marker. Then, long press, hold and slide on the front of the marker (where the vertical black marker point is). Be aware that the movement of the marker will snap-to the beginning point of each bar as these are the only places at which tempo change markers can be placed.
NOTE. Please be aware that applying tempo changes physically alters the lengths of the note events in MIDI clips and, as such, will change the lengths of MIDI clips on the timeline.